Use Case Description
With LiveID+, identifications can be dealt with live. In addition to extensive identification checks, LiveID+ can also be used to sign documents live. Thus, LiveID+ is a perfect tool with which you can ensure that the right documents (passport etc.) are from the right person. With LiveID+ you can instantly check the identification types as photos are taken of the e.g. passport. Furthermore, you can also use the microphone to communicate with the recipient or use the integrated chat window for communication.
Before proceeding with the integration it is mandatory to start with the platform setting, that provides a set of useful information about the organization requesting the integration with LiveID +.
For detailed information about this settings please have a look at: Platform setup
For more information please also see this LiveID-Video-Identifikationsverfahren
In order to answer a call an organization must be inserted between those managed by at least one operator. A single operator can manage calls for more than one organizations, that means that any operator will need to select, once logged in, for which organization want to receive calls. There are two operator types: administrator and standard. The standard one has limited access to the administration panel which only includes calls answering and
editing of some of its personal information. The administrator one, in addition to standard operator features, can register other operators of the administered organizations and entering report panel. For each operator connected to a single organization must be defined a role : the purpose of role is to limit the type of video-recognition flows that can be managed by an individual operator connected to an organization. For example, if an organization has several different processes with roles can indicate operators able to manage only a list of processes and other ones able to manage all the available processes.
Only for resident operators the LiveID+ administration panel is available at the following link:
– TEST: https://liveid.test.namirialtsp.com/app/service-login/
– PRODUCTION: https://liveid.namirialtsp.com/app/service-login/
Settings
| Figure | Description |
|---|---|
|
|
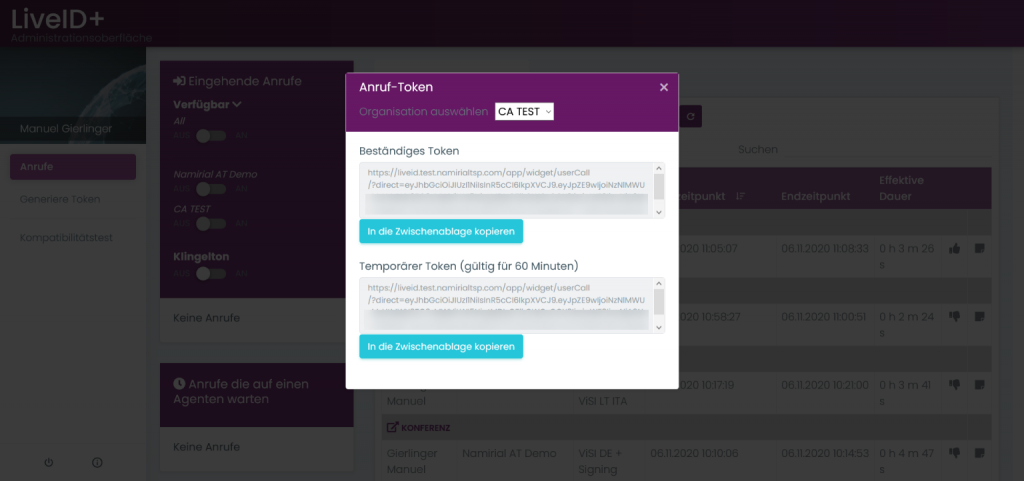
Generate Token
You can either generate a persistent token or a temporary token (valid for 60 minutes). You can forward the generated token to the recipient of the call to start the call.
Please also see the next figure:
Network and media test
In this section you can test your network and media (network and system compatibility, microphone, camera and WebRTC. This test is necessary to start an call.
Start a call
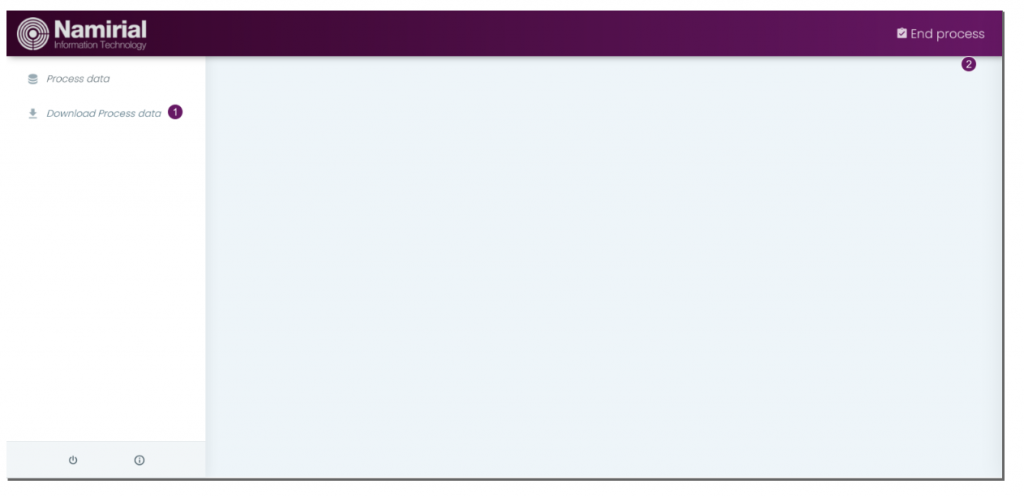
Download Process Data
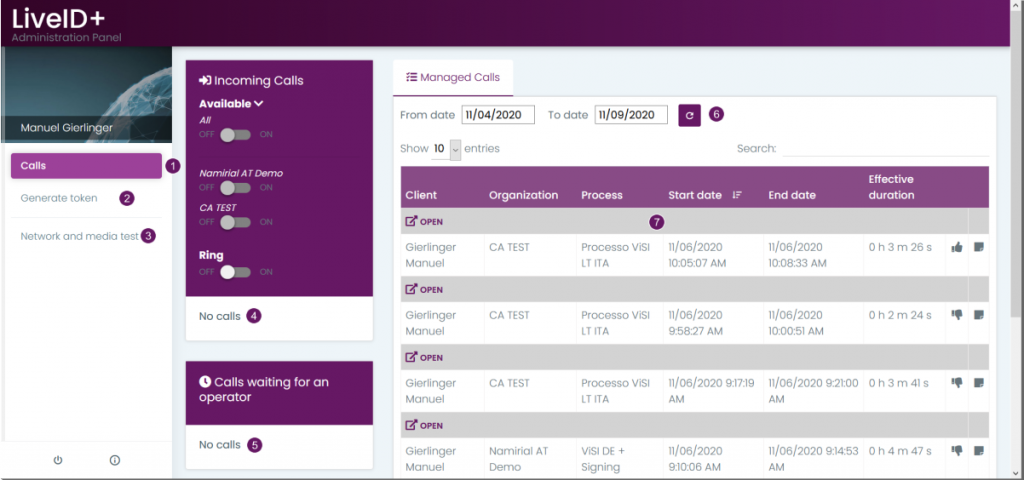
After finishing the call you can download the process data. Click on the “open” button like it is shown in the next figure:
| Figure | Description |
|---|---|
 |
|
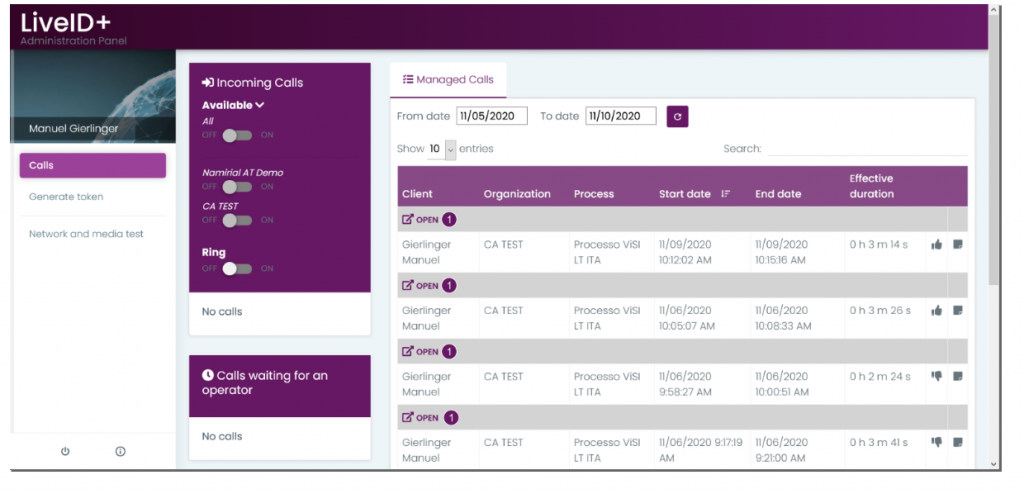
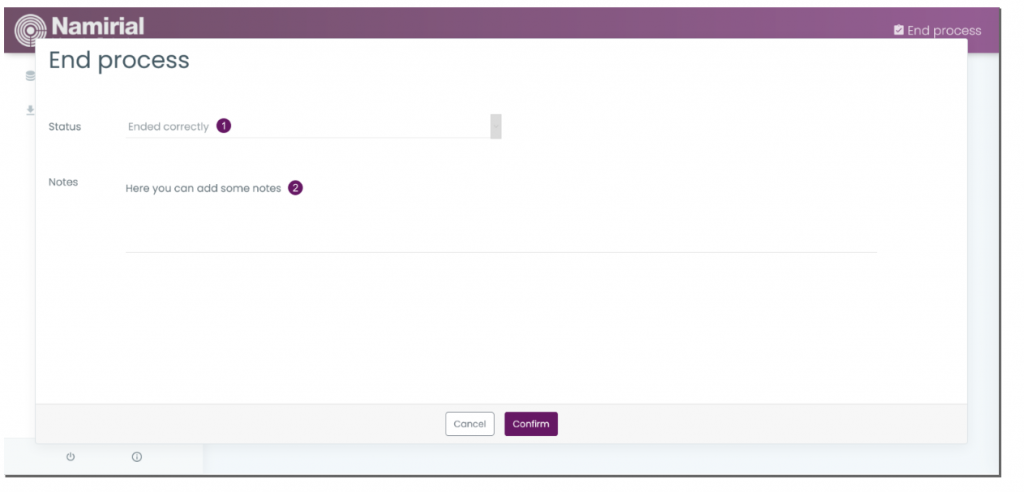
Afterwards, you get to the page like it is shown in the figure, where you can download the process data:
| Figure | Description |
|---|---|
 |
|
If you end the process you can add a note, which you can later see on the main page far right of a call.
| Figure | Description |
|---|---|
|
|
Integration
Download Data via REST
Please also see the documentation of all REST API calls here: https://liveid.namirialtsp.com/doc/
First, check if the service is active. For this call you need no authorization. Simply run the following api call (GET) with the URI: https://liveid.test.namirialtsp.com/api/v1/checkStatus
If the service is active you will get the following response:
{
    "success": true,
    "service": "/checkStatus",
    "active": true
}
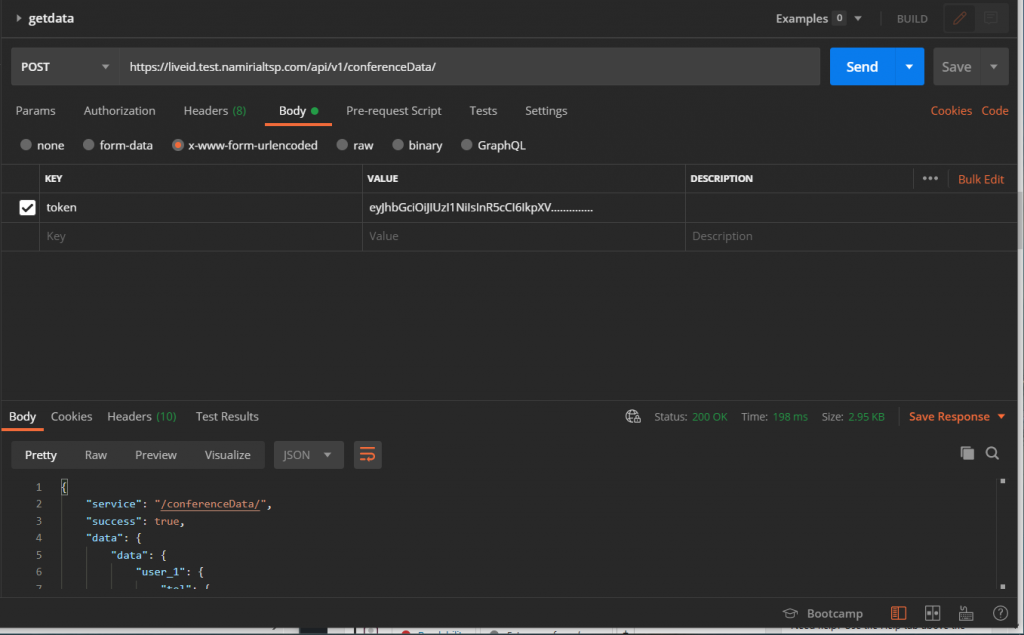
Get the conference data
You need the following URI to get the conference data: https://liveid.test.namirialtsp.com/api/v1/conferenceData/
Moreover, you also need the token provided on call closing. Please see the following sample callback which contains the close status, the token and the conference id:
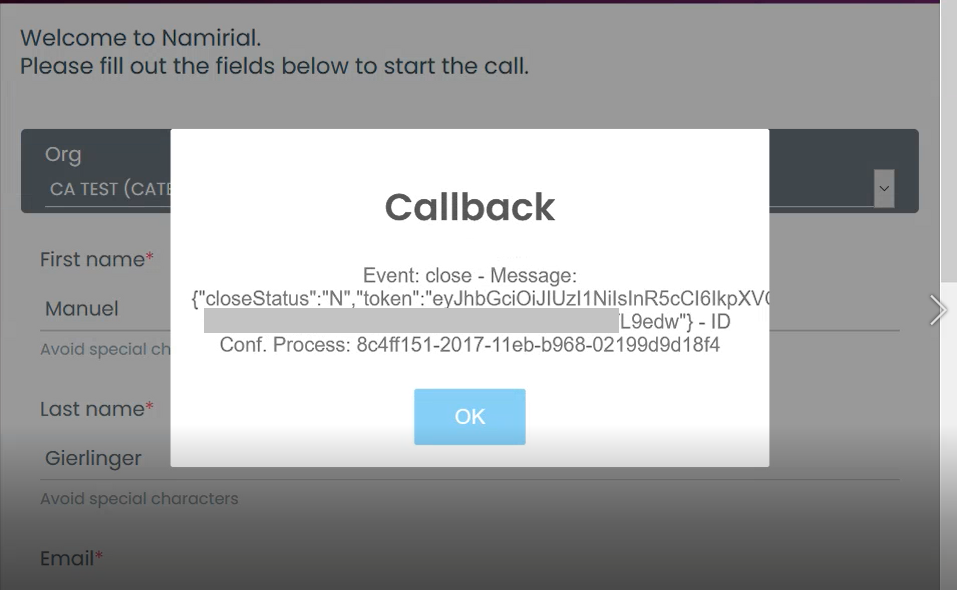
Please also see the next figure which shows a sample call with Postman:
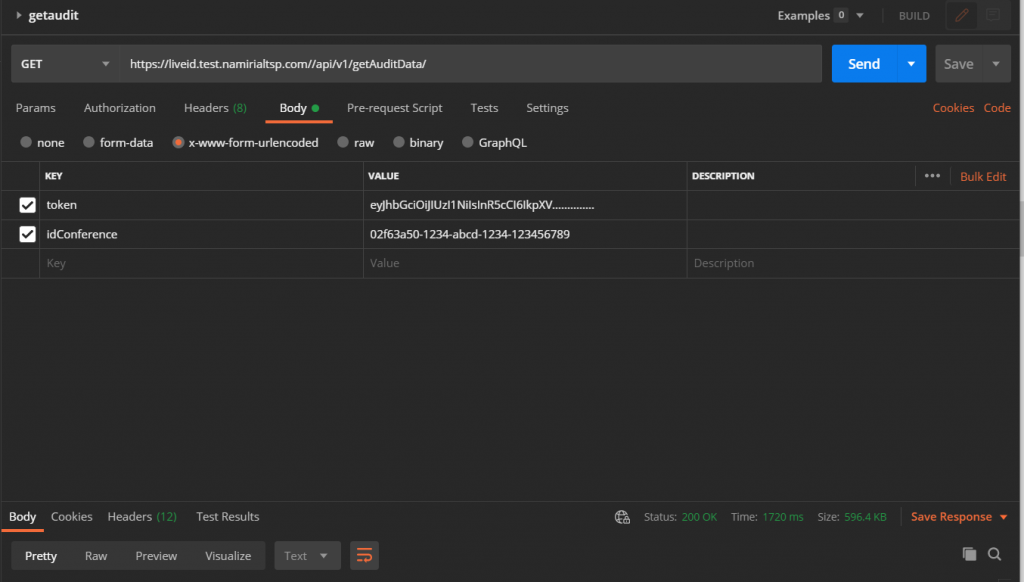
Get the audit trail
To get the audit trail you need again the token and additionally the conference id as authentication. Please see the next figure which shows a sample call to get the audit trail: