...
| Section |
|---|
You want to save your files and find them again straight away? With DMS tagging you can add metadata so that you can save your documents and envelopes with additional data and thus you can more easily assign and find them. The DMS Tagging integration scenario explains how to integrate a custom tagging page (e.g. aligned with the data structures from your DMS / ECM) into eSignAnyWhere, and how to use this data for later upload (with tagging) to the DMS/ECM solution.
In the eSignAnyWhere Web UI, an additional (custom) page is added before sending the envelope. This page collects tagging information. The data are stored in the envelope’s metadata section. A callback handler service implementation is notified after envelope completion, and will extract the tagging information from the metadata and perform the upload to the DMS. This story includes the following: - Use of a custom page implemented in an external service on integration layer, used to do tagging of the envelope for further use of the DMSNote that enabling the "Default redirect url before sending a draft" automatically hides the Meta Data section in the Envelope Creator's Recipients Page, as a custom page before sending can e.g. implement a dialog asking for metadata in a specific format showing a convenient UI. The plain-text input of expected XML data therefore is hidden, to avoid system malfunction and potential security risks resulting from freetext input which cannot be parsed.
- OAuth2 Code Grant flow, to avoid entering an API authentication in the configuration directly. The user should authenticate via username and password, and should allow API access for the app.
- Callback handler process completed envelopes and store the results in the DMS
We recommend to read the story "Retrieving the User API Token via OAuth" before continuing with this story. You can define the envelope as usual, with the eSignAnyWhere WebUI envelope creater. After the recipients page and the designer page, the sender will see the summary page of eSignAnyWhere. In the summary page, instead of the “SEND” button, the sender will see a “NEXT” button because a “before-send redirect url” was configured. Following placeholders are available for the “before-send redirect url” : - ##EnvelopeId##
- ##SenderUserId##
- ##OrganizationId##
When the sender clicks the “NEXT” button on the summary page, he/she is redirected to the configured before-send redirect page. This page, for example can allow to modify the envelope before sending. Therefore, the page is collecting the DMS Tagging metadata in a custom HTML form, and will set the data as metaDataXML into the envelope. On the authorization page, the OAuth 2.0 code grant flow is implemented, and therefore the user is asked, if not permissions have been granted for the application so far, to authenticate with username and password (but the username/password check is bypassed when an active eSignAnyWhere session is already open) and then the user is asked to grant permission for the custom web application to access the API. After successful authorization, the user is redirected back to the custom web application . More details about the underlying OAuth2 Code Grand Flow and its implementation are documented in the chapter. for the document tagging. Now the authentication check is passed, and the user gets the DMS Tagging form presented. After he/she enters the data, the form action is calling the custom web application’s back-end with the form data provided. The back-end will update the envelope (draft) data by adding the metadata, and will the send the envelope based on the draft. Afterwards, the user is redirected to the eSignAnyWhere documents inbox.
Please see the The next figure which shows a the process flow in more detail: |
| Section |
|---|
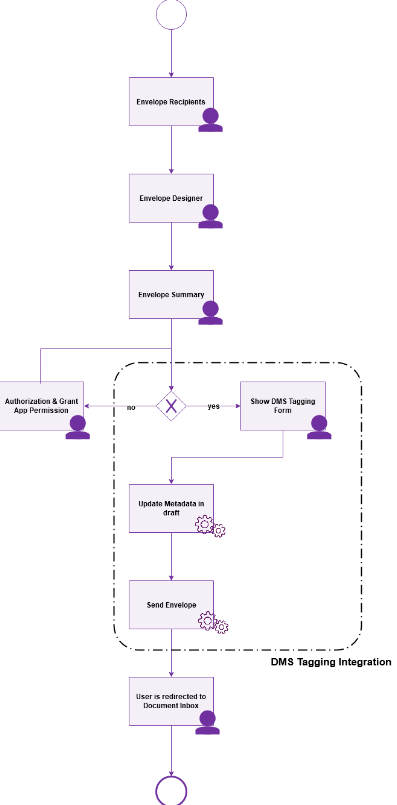 Image Removed Image Removed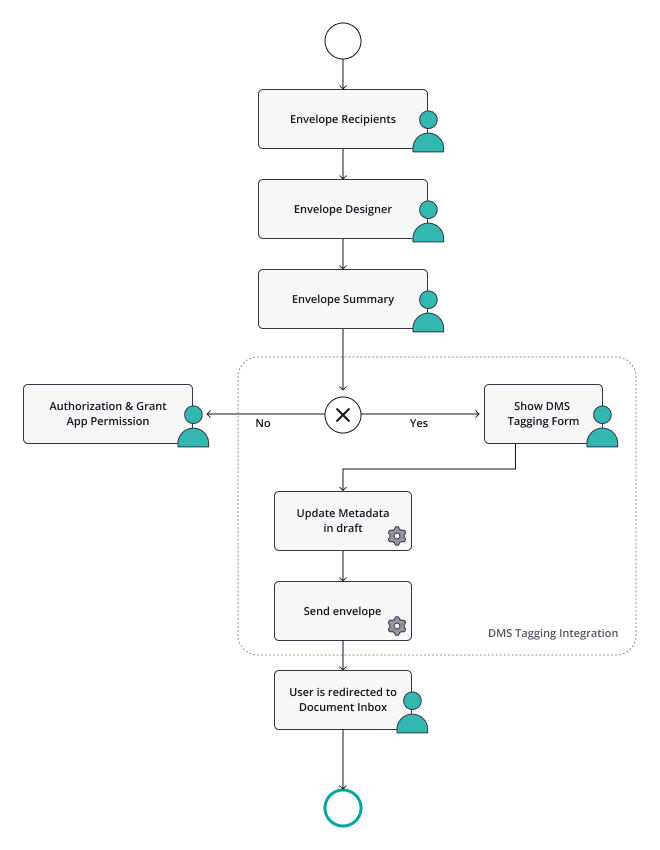 Image Added Image Added
|
| Section |
|---|
This flow will be represented to the user in the following screens: Recipients PageIn the recipients page, the sender selects documents to be signed, and defines the recipients and workflow. This is standard eSignAnyWhere functionality.
 Image Removed Image Removed
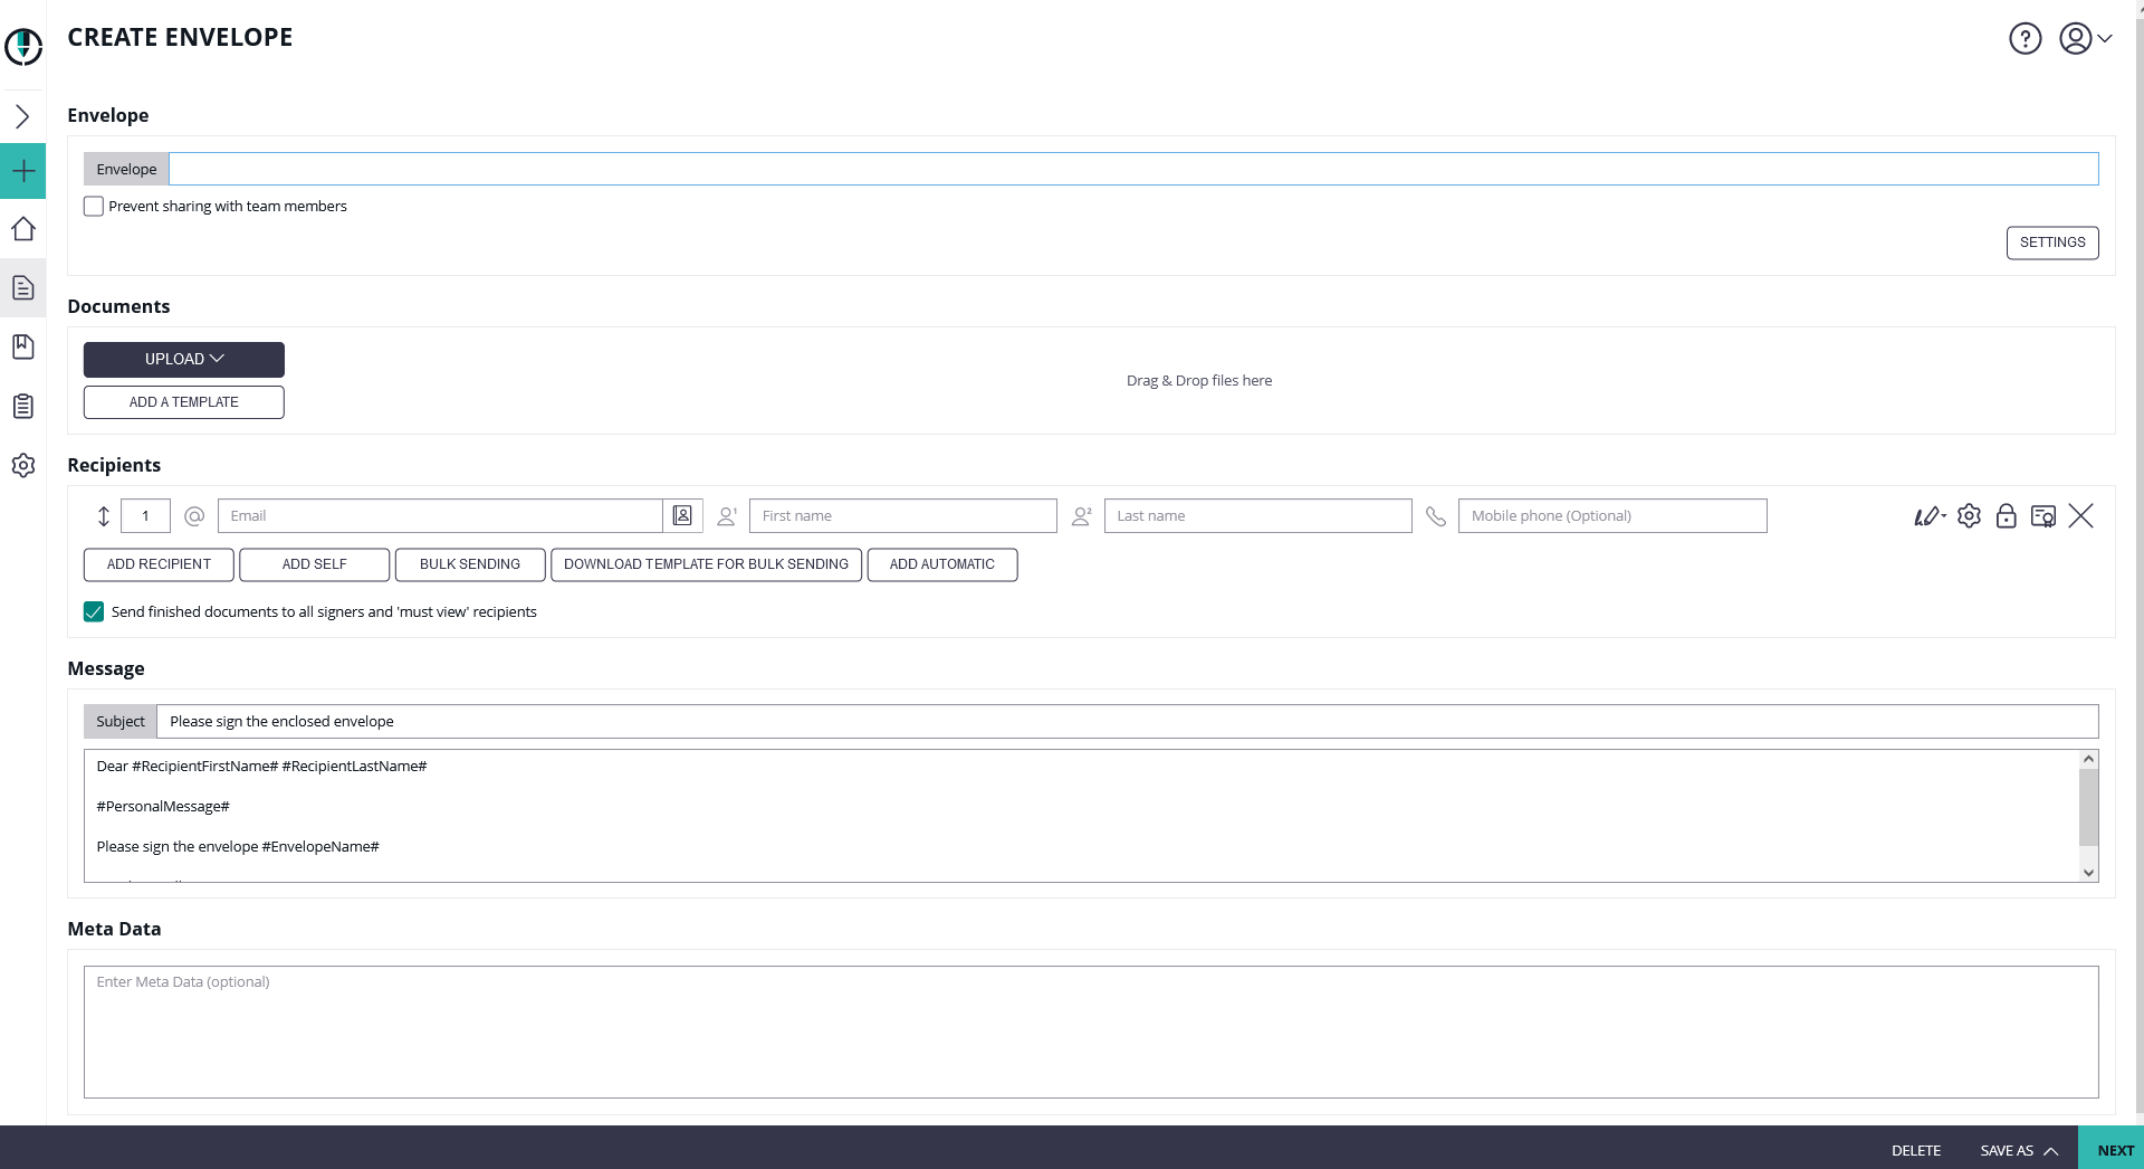 Image Added Image Added |
| Section |
|---|
Designer PageIn the designer page, the sender may define or add form fields, signature fields and predefined annotation fields. This is standard eSignAnyWhere functionality.
Image Removed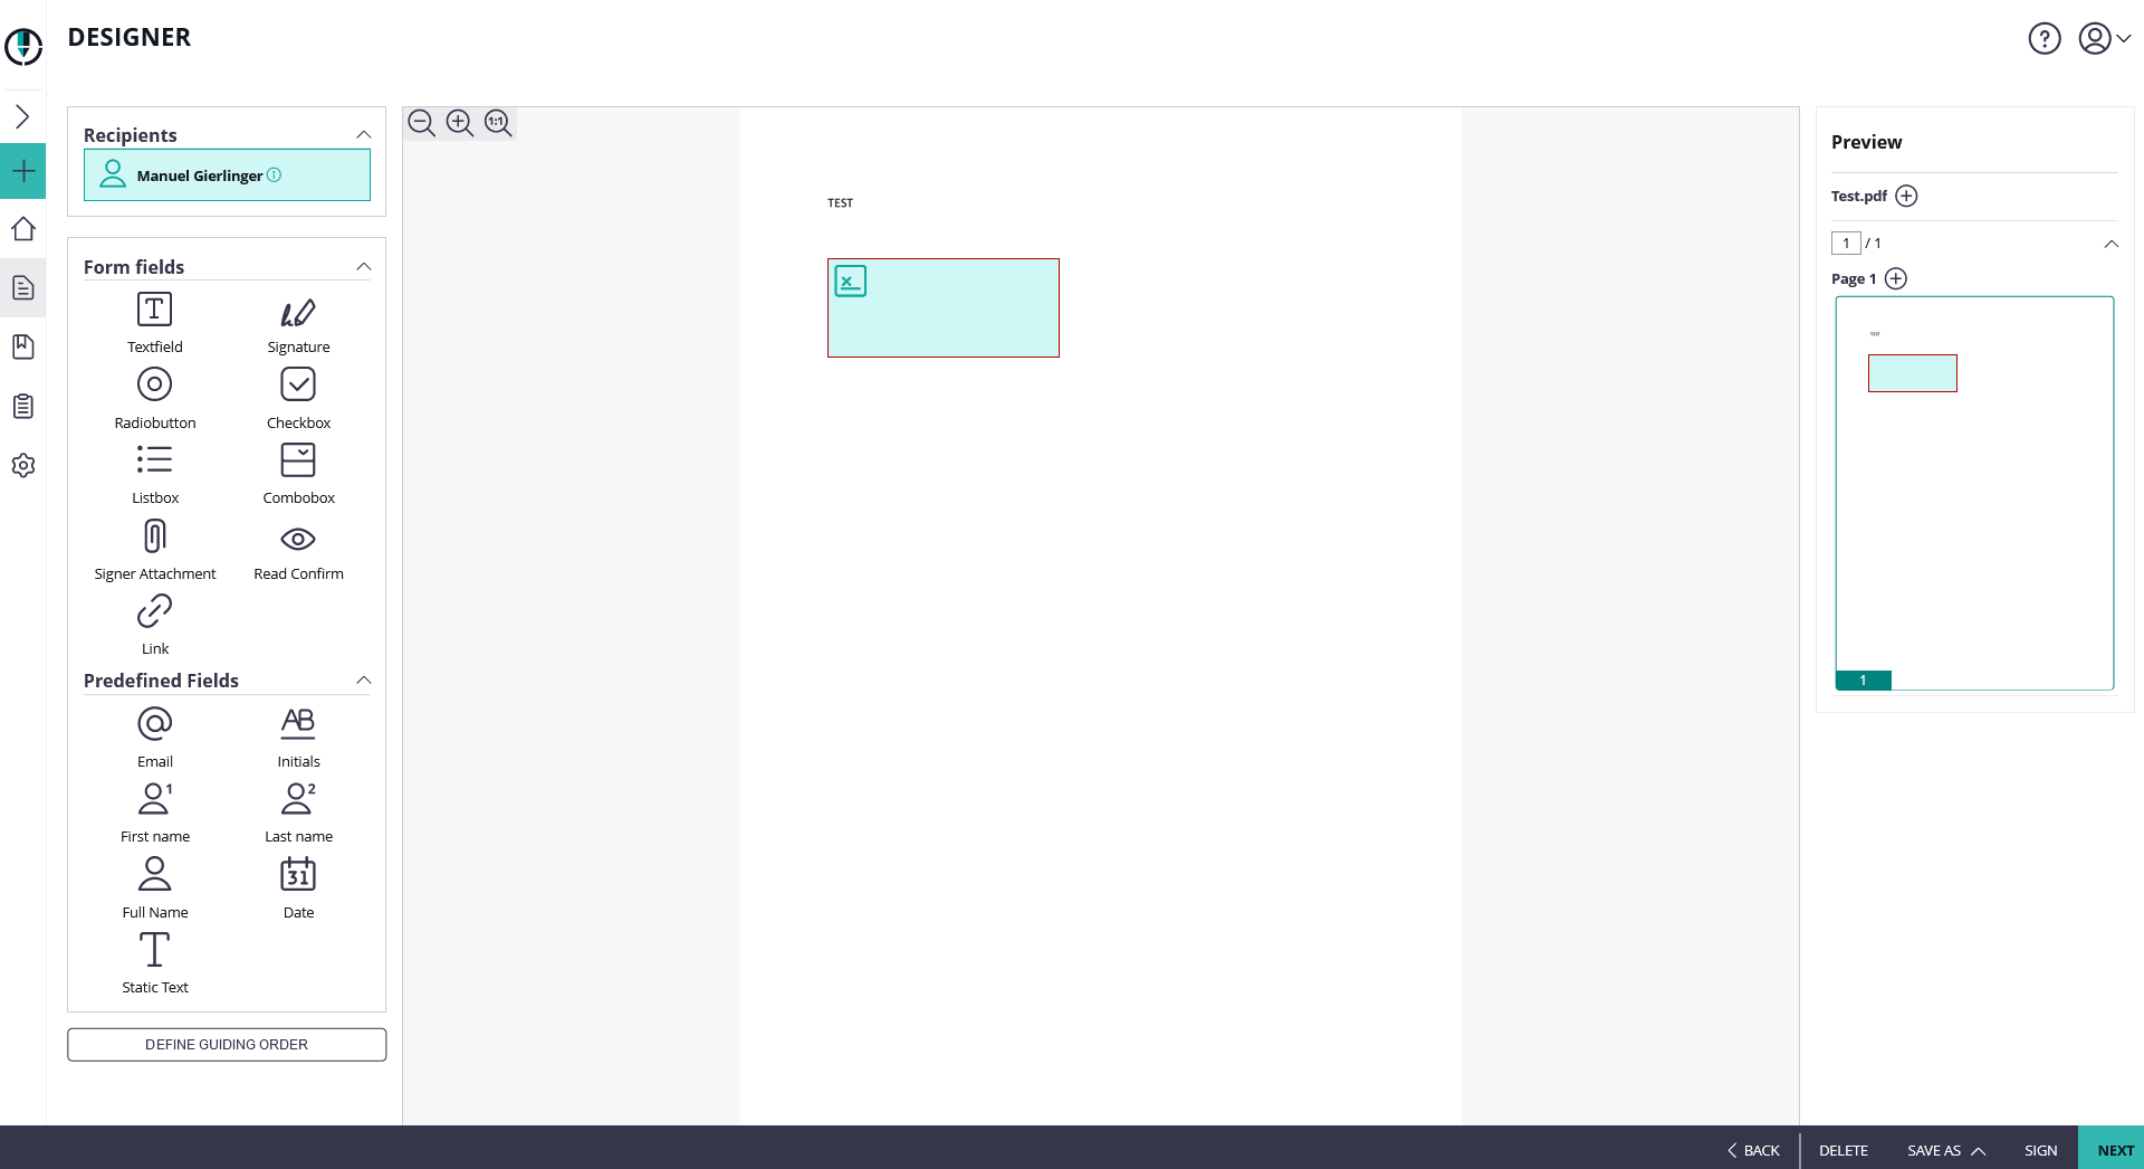 Image Added Image Added |
| Section |
|---|
Summary PageIn the summary page, the sender may adjust some envelope settings such as notifications/reminders.
Image Removed
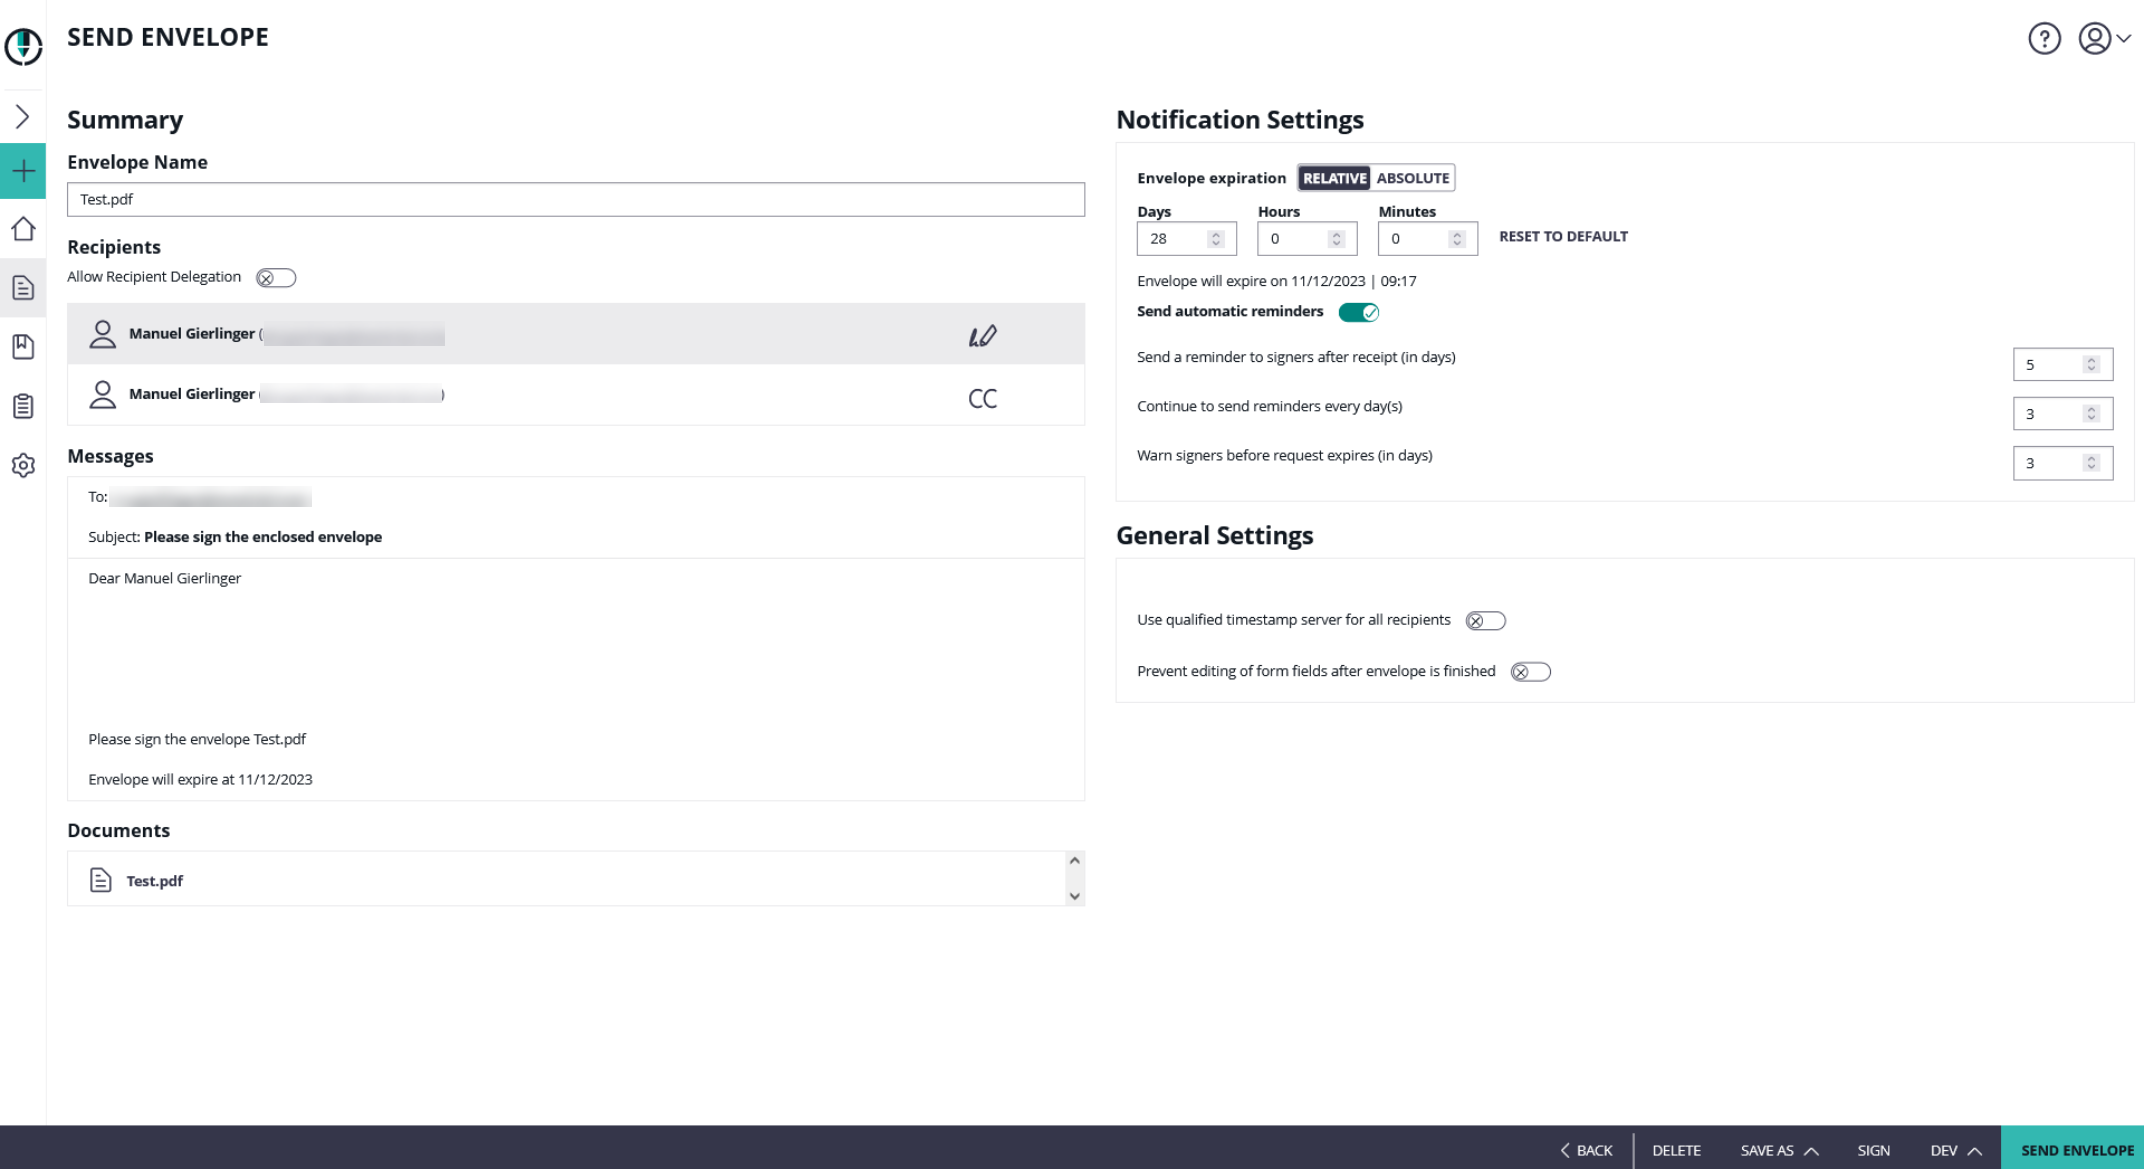 Image Added Image Added |
| Section |
|---|
Then the user is redirected to the configured redirect page. Before the tagging page is shown, the user may be asked to login (which is usually skipped because the user’s session is already active), and on first usage the app asks for permissions to grant API access. The authentication page is implemented as part of the eSignAnyWhere product, but the custom page must return with an HTTP Redirect to that authorization page when authorization is unknown or invalid.
Image RemovedThe names shown in the custom tagging page are part of the configuration of the eSignAnyWhere OAuth Application, so configured centrally per instance in the AdminWeb. Details of this authentication are well described in the story "Retrieving the User API Token via OAuth".
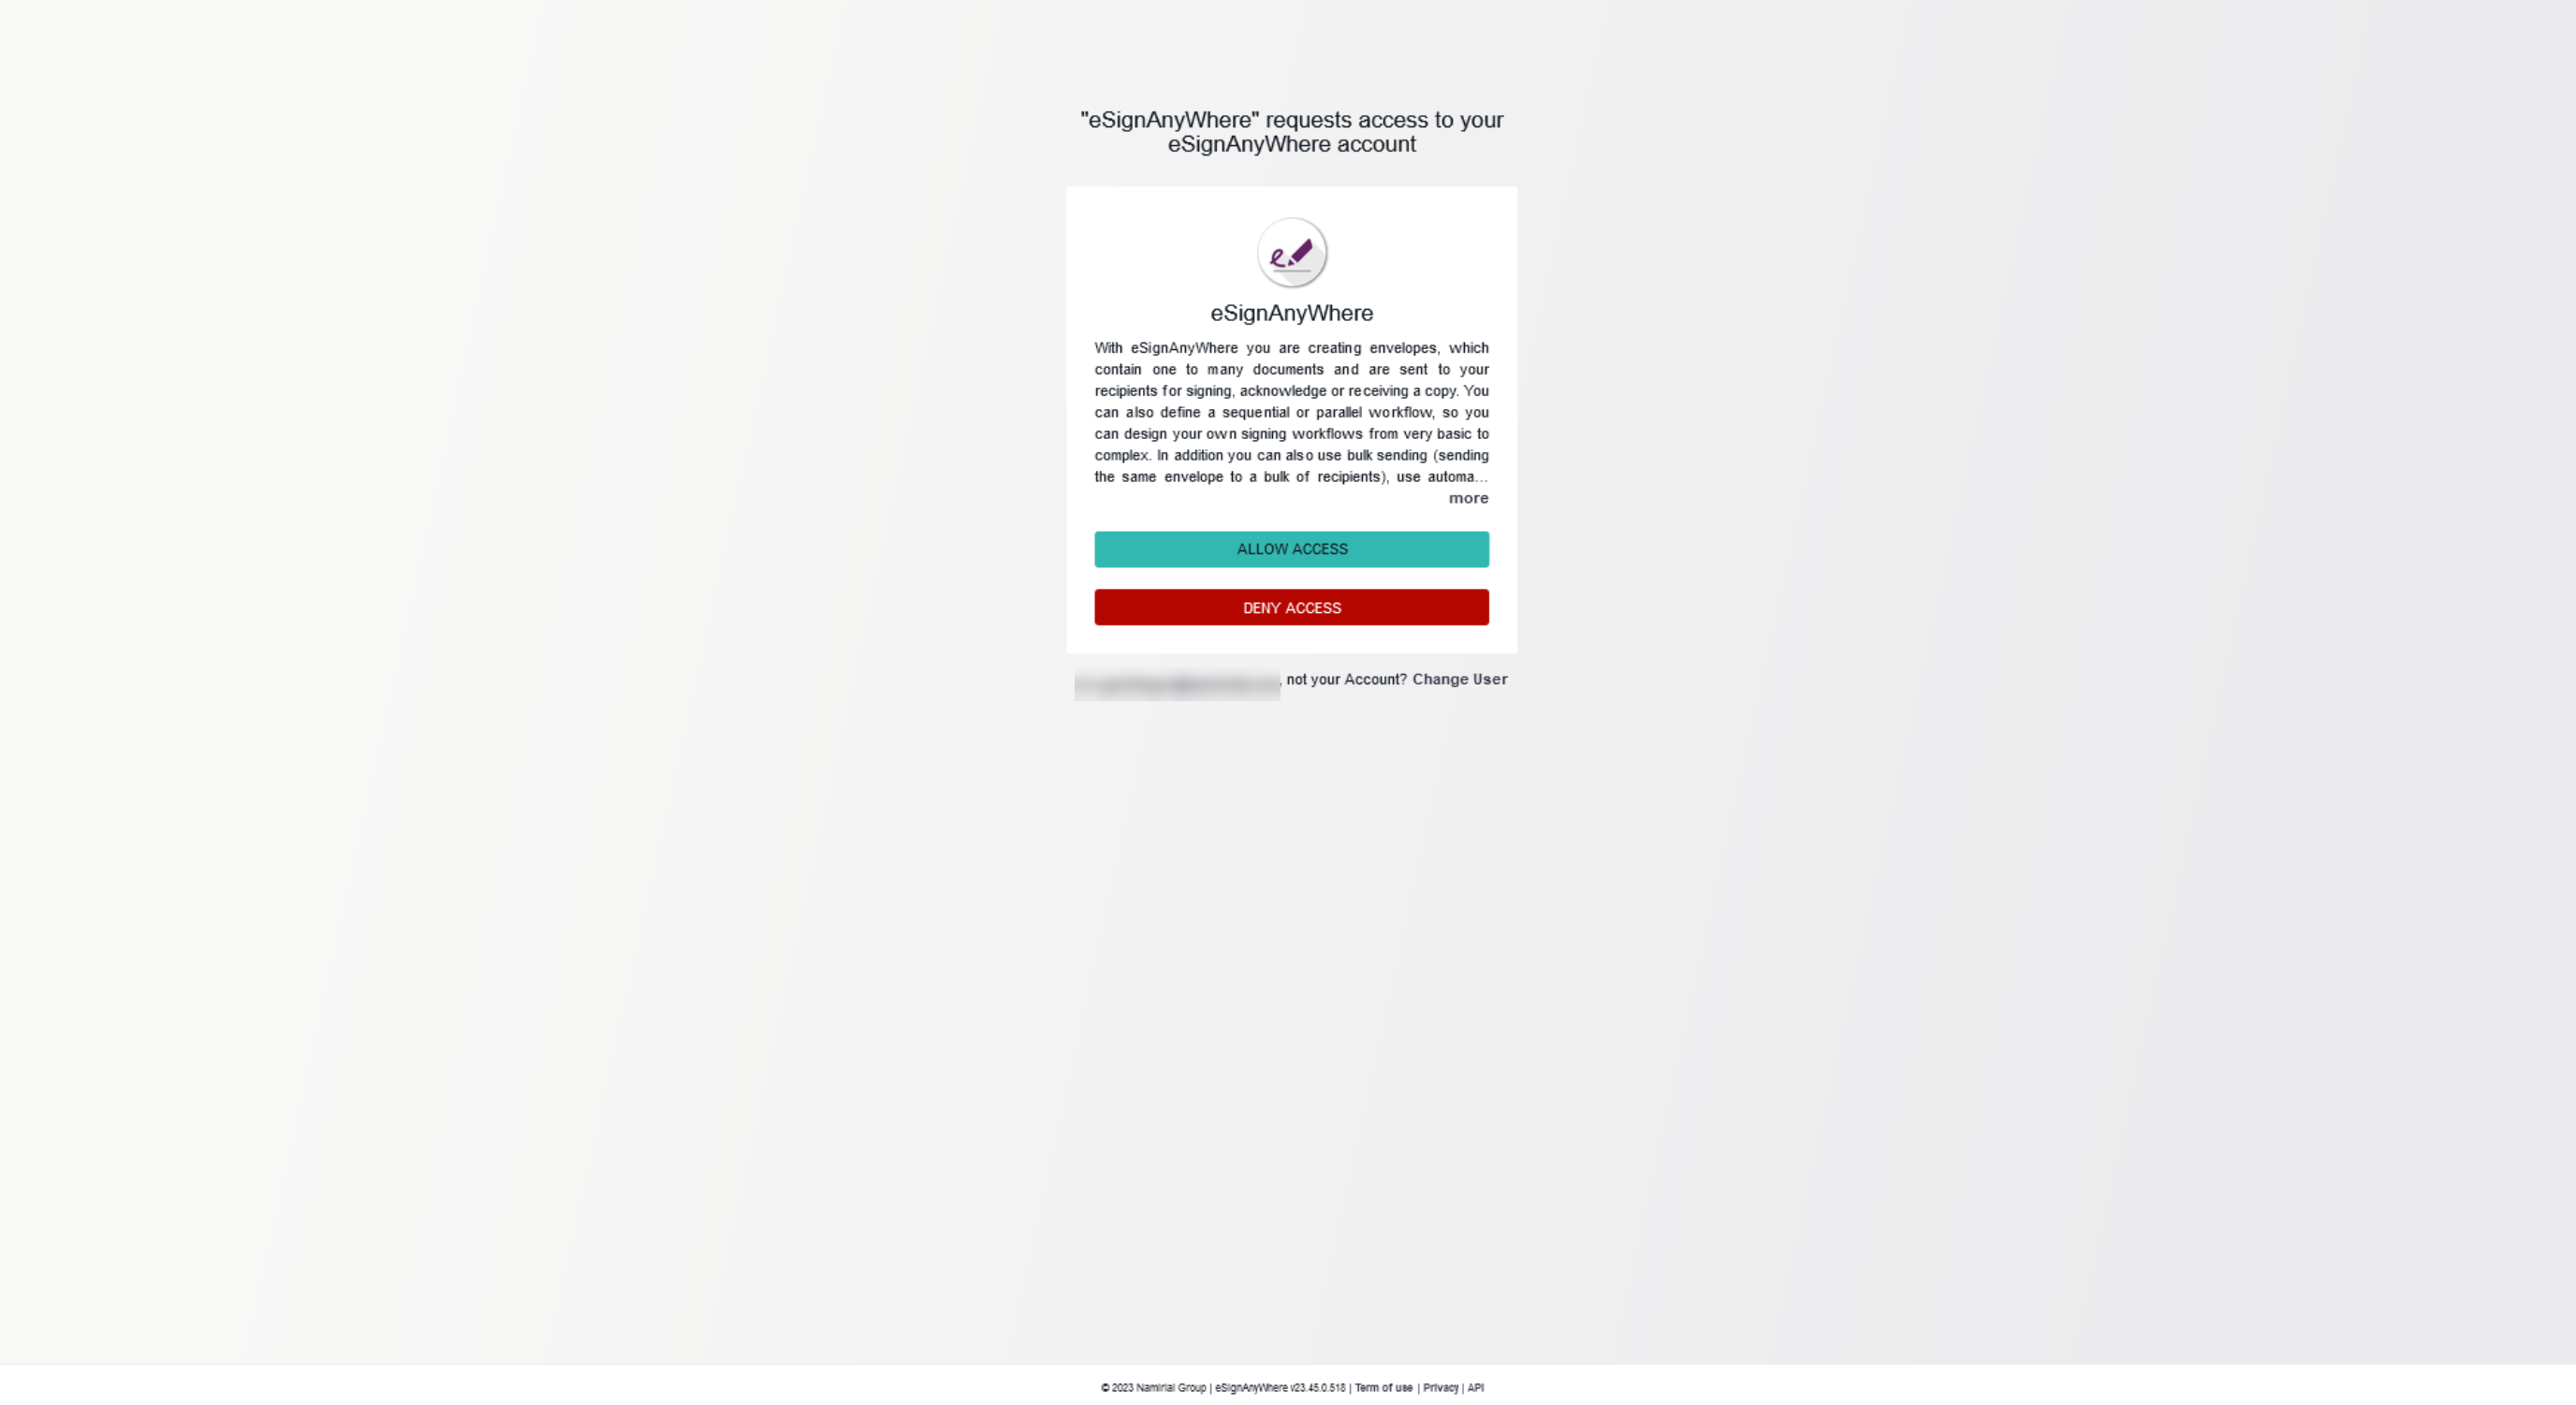 Image Added Image Added
|
| Section |
|---|
Custom Tagging PageThis page is fully implemented in the custom web application for DMS tagging. The fact that it looks like the eSignAnyWhere Web UI is just because it was implemented that in a sample code. This is purely part of the custom DMS tagging sample. Image Removed
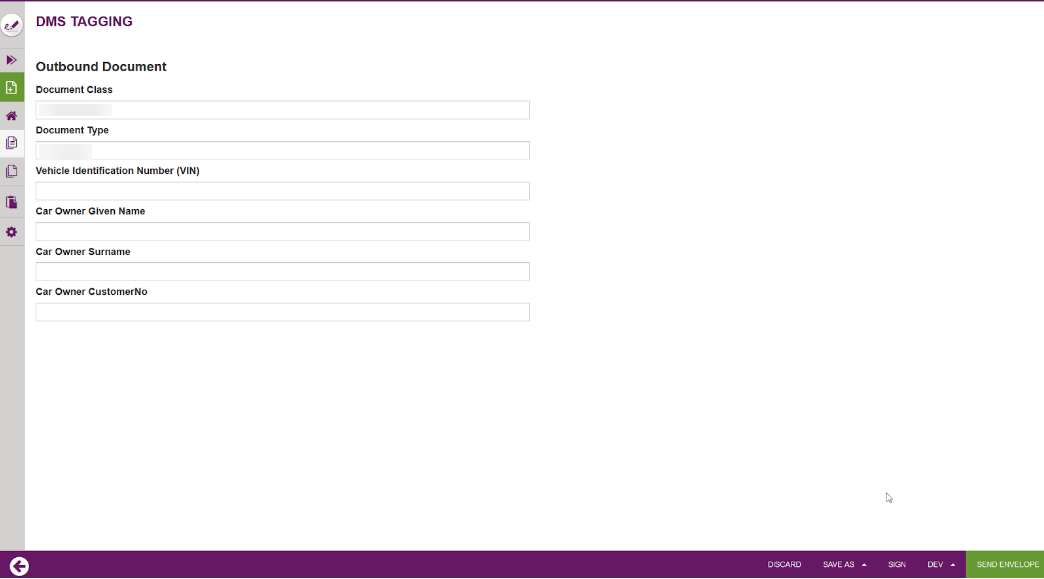 Image Added Image AddedIn a simple webform, this can look like: |
| Section |
|---|
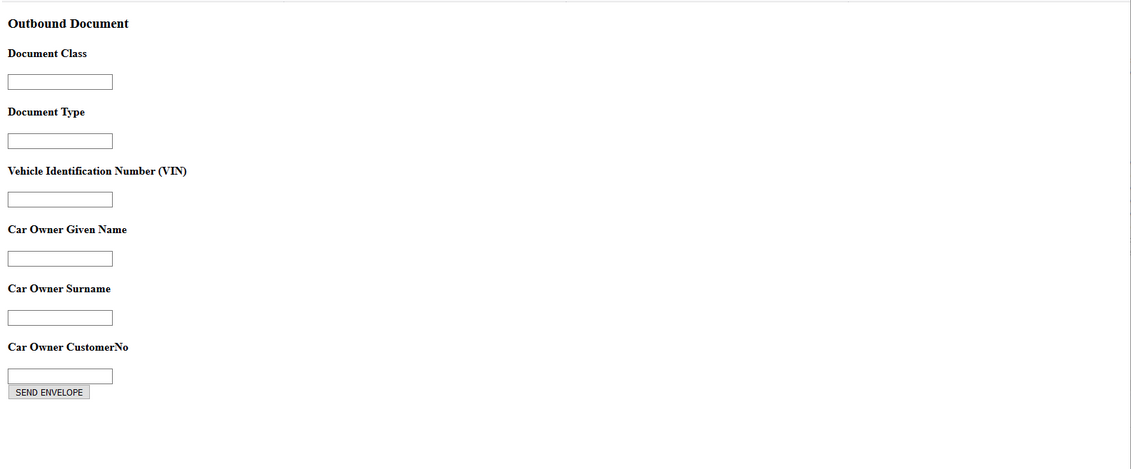 Image Added Image Added
|
Serverside handling of Form Data
After clicking the "Send Envelope" button in the custom tagging page, notify the backend of the tagging page implementation (also called "BeforeSendRedirectPage") and let the backend do the following with the retrieved form data:
Update Metadata in Draft
Set the data collected via the form e.g. in draft metadata section, to make these data available for the later callback processing
This will make the data available for pushing the signed documents to the document management system (DMS)
POST /v6/draft/update
| Code Block |
|---|
| language | java |
|---|
| title | POST body |
|---|
|
{
  "DraftId": "...",
  "MetaData": "..."
} |
Send Envelope
While being on the BeforeSendRedirectPage, we are still working on a draft. There was no envelope sent yet. To send the envelope, we use an API method for the transition from draft to envelope:
POST /v6/draft/send
| Code Block |
|---|
| language | java |
|---|
| title | POST body |
|---|
|
{
  "DraftId": "..."
}
Image Removed Image Removed |
| Section |
|---|
After the envelope is sent, the custom web app is redirecting should redirect to the eSignAnyWhere document inbox. This is standard eSignAnyWhere functionality; the custom web application just needs to redirect to that page once done. | Info |
|---|
Note if you want to cancel the settings: Disable the beforeSendRedirectUrl in Settings-Organization. After all pending envelopes (drafts) have been sent, disable the OAuth Application (prevent log-in via this OAuth App). When disabling the OAuth App, existing drafts still contain the beforeSendRedirectUrl, so the OAuth Application should not be blocked before those drafts have been sent. |
After the callback for finished envelope was received, the callback handler should check if it was a completed action. The handler has to retrieve the envelope ID from the HTTP GET parameters. Then, the callback handler should note down the envelope ID in a persisted storage for further processing and return with an HTTP 200 (success) to indicate the archiving request was noted down. |
| Section |
|---|
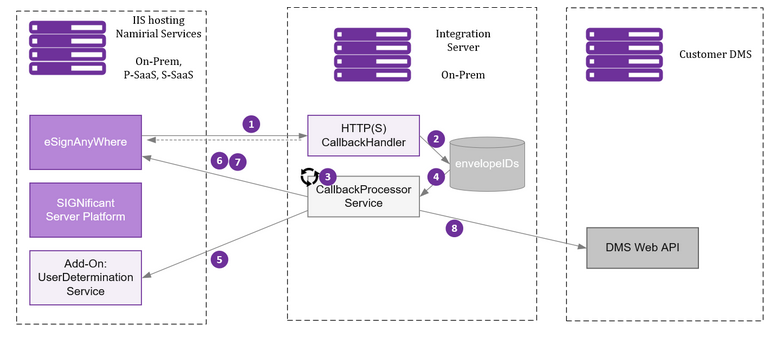 Image Removed Image Removed
|
For more information about server-side post-processing using callback handlers please see this story. |
| Section |
|---|
|
| Section |
|---|
Please see the following descriptions for the implementation in detail. |
| Number in the figure | Description |
|---|
| 1 | eSignAnyWhere calls your CallbackHandler implementation when the envelope is finished (completed or cancelled). |
| 2 | Your CallbackHandler stores the envelope ID in a persistent storage (disk, database) and replies with HTTP 200 on the HTTP request (1). |
| 3 | A service implementation should permanently process the envelopes noted-down for processing. |
| 4 | A service implementation will detect the noted-down envelope ID and process it as step by step queue processing. |
| 5 | Some implementations may require a user determination service to identify which user sent an envelope, because only this user can access the envelope in step (6). In combination with the DMS tagging page (which is using OAuth Code Grant flow), the DMS tagging already noted down for each envelope which user (apiToken / Bearer Token) was involved in sending the envelope, so in this combination it is not required to have such a user determination service installed. It is also not part of the product, so we recommend to avoid it. |
| 6 | It should call the REST API call GET envelope/{envelopeId} to receive details about the envelope, including metaDataXml which was set by the DMS tagging application, and receive document IDs for the relevant documents. |
| 7 | The documents, which are typically the signed PDFs, the Audit Trail PDFs, and in addition the legal documents (such as the CA22D certificate request form for disposable certificates) should be downloaded form eSignAnyWhere via API. |
| 8 | After that, the application should upload the documents to the external DMS via the DMS API according to the requirements of the DMS; and use the tagging retrieved from the metadata. |
Once done, the implementation should note down in the list of envelopeIds noted down above, that the processing was completed. Once completed, the callback handler implementation should delete the envelope from eSignAnyWhere.
Alternatively, a data retention job can be configured on the organization to perform an automatic cleanup (but then w/o checking if the documents are already stored in the DMS).
OAuth2 Code Grant Flow for API AuthenticationA common situation is that the eSignAnyWhere user is redirected to a custom web application which should deal with the envelope sent before via eSignAnyWhere Web UI. To access the envelope via API, the custom web application must authenticate to the API with a user that has the permission to access the envelope.
While this was difficult in the past and often required to keep records of a mapping of envelopes to the creator, this got much simpler since eSignAnyWhere supports the OAUth2 OAuth2 Code Grant authentication flow. The user of the custom web application is asked to authenticate, via OAuth2, with the eSignAnyWhere user credentials. As a result, a code sharing between eSignAnyWhere and the custom web application is triggered and as a result the custom web application gets API credentials to access the envelope. During authentication, the user may choose the wrong user account on eSignAnyWhere – therefore it is required to check the permissions for the envelope, and redirect to the authentication again if the authentication provided does not have the required permissions.
Image Removed
Sample sequence diagram of a sample application we implemented for DMS tagging:
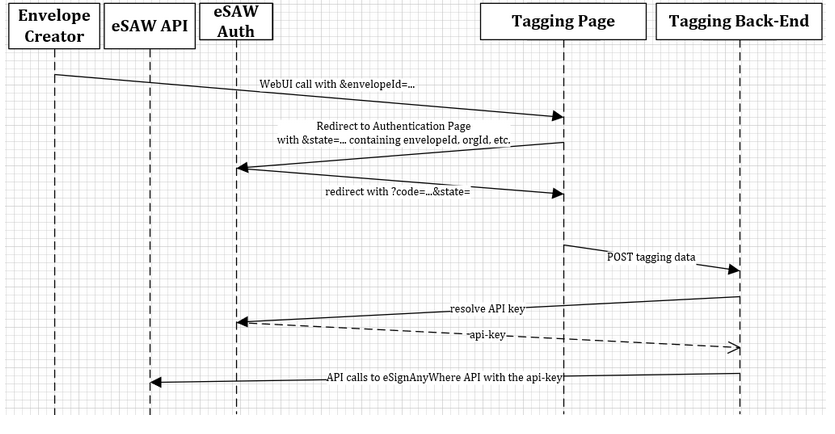 Image Added
The OAuth2 Code Grant Flow is implemented as specified in RFC 6749, Chapter 4.1 – see https://tools.ietf.org/html/rfc6749#section-4.1Note that the invocation of the tagging page , when responding with a HTTP 302 redirect to the Authorization page, provides itself as redirect_uri which is again called after authentication. But in the 2nd invocation, no dynamic HTTP GET arguments such as the envelopeId can be provided cannot contain the "envelopeId" as HTTP GET parameter, as GET parameters are not allowed in the OAuth 2.0 redirect_uri. This is because the OAuth application configuration in eSignAnyWhere AdminWeb must already be whitelist the full URL including all parameters. Therefore, the sample application we implemented is encoding all GET arguments from first call into the “scope” “state” parameter of the authentication call. The redirect_uri is invoked with the scope state parameter, as specified in RFC 6749. So the scope state is used in that case to transport all the GET parameters.
The callback handler implementation also requires to know the API Token (Bearer Token) of the sender to retrieve signed documents, audit trail etc. – therefore the DMS Tagging Page implementation is already storing a mapping between envelopeId and senderUser and also a bearertoken of the senderUser in its persistent storage.
“The provided url ‘redirect_uri’ does not match any of the configured urls of the OAuth application.”:
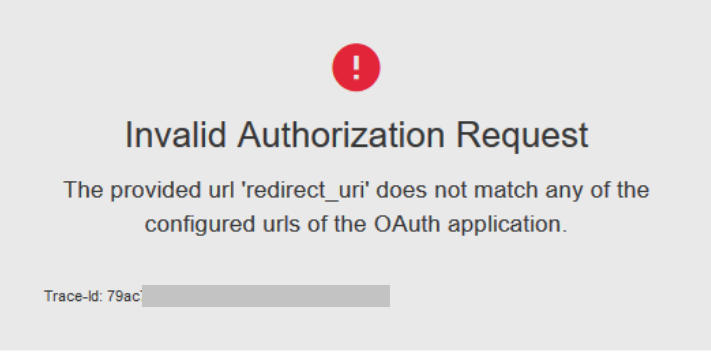 Image Removed
The exact URL of the web application has to be configured in the OAuth Application configuration, available in the AdminWeb.