Preliminary Remarks
On this page, the subsequent chapters and their sub pages we are providing the documentation of Namirial's eSignAnyWhere Workflow product. Within the documentation, we are following the story-telling approach, starting to explain the product from a beginners level and getting more into details in later chapters. In addition, in the WebUI Application Reference, we are following an explainatory approach where we are structuring the information as you find them within the user interface of the product.
Target Audience
The documentation should satisfy all audience, from business level to technical integrators. It covers both sides, the envelope sender view and the signer view. Also the system integrator's view is contained, including API documentation and sample integration scenarios. Some documentation (mainly administrative content required only in case of On-Premise installation, or for complex integration scenarios) will be invisible for readers that are not logged in or do not have an account. When accessing the documentation via the servicedesk platform, the content presentation will be filtered for the most relevant functionality in the SMB scenarios.
What is eSignAnyWhere?
The eSignAnyWhere Platform is offering signature workflow capabilities based on the signing features of SIGNificant Server Platform combined with the eSignAnyWhere Workflow components.
Users of Namirial eSignAnyWhere can
- create envelopes containing one or more PDF documents to be signed in a transaction
- upload PDF documents from local drive
- add form fields to enter free text, radio buttons, checkboxes, etc.
- add signature fields according to ISO standard
- enable signers to upload attachments (files which might be required to support a transaction)
- orchestrate their signing processes: sending signing request to one or more signers (sequentially or in parallel),
- setting reminders for signers and receive notifications on signing progress and having signed document(s) and audit trail sent to signers into their email inboxes
- create templates for frequently used documents types – e.g. non-disclosure agreements (NDAs) or standard contracts.
- monitor signature acquisution progress in a real-time dashboard
Signatories are enabled to review, fill and sign documents from anywhere anytime on any device. They do not require to open an account with Namirial. They will be authenticated using their email address (and optionally additional authentication methods) and, if available, their local digital certificates are enabled to sign in typing their name or pasting their signature as an image into the document. Signatories may also delegate signing requests in case they are not entitled to sign a particular document.
Namirial eSignAnyWhere is delivering complete evidence of a legally binding digital transaction. Any interaction is looplessly documented in an audit trail file: Who was signing which version of a document at which point in time. eSignAnyWhere can be integrated in enterprise business applications via its REST API and callback (webhook) mechanism.
The platform is available as On-Premise deployment option, as Private SaaS or as Shared SaaS offering.
Basic Concepts
Organization and other Core Data
When creating an account or trial account on eSignAnyWhere, you are already creating an organization entity (i.e. a tenant). The first user account is created within that organization. This is a design principle of eSignAnyWhere Workflow solution, as it is designed as a multi-tenant platform.
Within that eSignAnyWhere organisation, following administrative objects exist:
- Organisation: The organization itself typically reflects the legal entity for which the sender is collecting signatures. The first user's name is used as organization name by default, but the organization name can be configured later on. The organization is also the unit for which the license applies, at least in the SaaS deployment scenarios.
- User: As mentioned above, during account registration, the user is created within a generated organization structure. Remember that a user is always part of an organization. But within one organization, additional users (depending on your license and select plan) can be added by the organization administrators.
- Roles & Permissions: We already mentioned above the role "organization administrator". In general, the roles assigned to a user define the permission set of the user, and it is possible to assign more than one role to a user. The role “Administrator” belongs to an administrator of the organization and is automatically granted to the first user of an organization. The “Power User” is a user, who can send envelopes to request signatures. The “Registered Signer” can use eSignAnyWhere as a signing platform to sign his/her documents and can use it as an document inbox. Beside registered signers, unregistered signers (which do not have an account on eSignAnyWhere) can be invited to sign a document; but they cannot log in and don't get e.g. an envelope overview. Beside this three primary roles, the predefined roles "Api User", "Automatic Sealing Sender" and "Developer" can be assigned to a user to use specific product features. In the roles and permissions guide we go more into details and also explain how to define and use custom roles.
- Teams: Teams, if included in the purchased package, can be used to group users within an organization. Teams are used to share templates and envelopes in between team members and the teamlead, or within team members.
Envelopes
Basic Idea: Send a document via eSignAnyWhere to a signer (recipient) and collect the signed document later.
With eSignAnyWhere you are creating envelopes, which define the signing workflow. An envelope can contain one or many documents (all related to the same business case). Those documents are sent to the recipients to collect signatures, to get a receiving confirmation or just to deliver a copy. The workflow can contain sequential or parallel activities. This allows to design your own signing workflows from very basic to complex. In addition, the product supports sending bulk envelopes - a concept where copies of the same envelope are sent to a list of recipients, and all need to sign their independent copy. Also the use of automatic remote signing certificates (stored in an HSM in the premises of the trust service provider) or hiding certain documents from some recipients within a workflow is supported.
The simplest possible signing workflow would be sending one document to one recipient, who has to sign the document.
You can use eSignAnyWhere for simple signing tasks and for complex tasks e.g. signing a project order, which has to be signed by some managers. A lot of features allow you to design many different signing ceremonies and use cases. In addition you can use our SIGNificant product suite to extend your use case possibilities (e.g. use native iOS/Android apps and SDKs, Signature Pads or even biometric signature verification options).
Workflow Capabilities:
- Sequential recipients: one after another
- Parallel recipients: all recipients without specific order must sign
- Bulk recipients*: each recipient will get a unique copy of the envelope (e.g. if you want to send out a new company policy, first signed by the responsible manager and then each employee gets a separate copy of the envelope for signing)
- Document Hidding*: hide certain documents from specific recipients
- Meta Information: allow to store meta information per envelope (e.g. for hybrid integration; sending envelopes via UI and automated post processing [auto-archive] via finish callback)
Recipient Types:
- Signer “needs-to-sign”: the recipient must sign the document (or can reject it)
- CC “receives a copy”: the recipient receives a copy of the document
- Needs to acknowledge: the recipient must open the document
- Automatic Remote Signers: via Namirial TSP an automatic signature/seal is applied to the document*
- P7M (PKCS#7) Signer: a specific feature to sign with a PKCS#7 signature*
* optional feature
Examples of Signing Workflows
Simple Example: You want to send a new insurance contract to your client. (1) First you prepare the new insurance contract for your client and upload the document to eSignAnyWhere to create a new workflow. (2) You design the workflow, where your line-manager first has to approve the contract details and then the approved document is sent to your client for signing the document. The document itself contains some form fields, where the client can change e.g. his address information, if it has been changed. (3) After the line manager has approved the document and the client has signed the new insurance contract, you receive a notification about the finished document. (4) You can download the signed document and audit trail (process evidence) and copy it to your archive for storage.
Simple Workflow (1 Signer):
Workflow (1st Signer, Reviewer, 2nd Signer)
Bulk Workflow (1st Signer, Bulk Signers)
Simple Automatic Workflow (1st Automatic Signer)
Automatic Workflow (1st Signer, 2nd Automatic Signer)
Registration and Login
The login page requires your email address and your password to login. If you have too many false login attempts an additional captcha (“i am human”) will appear due security reasons. If you have forgotten your password, you can reset it via the “Forgot your password?” link.
Moreover, you have the link for the registration page to create a new account/organization. On-Premise and private SaaS customers will see the LDAP/SAML option for login if it is configured.
User Interface
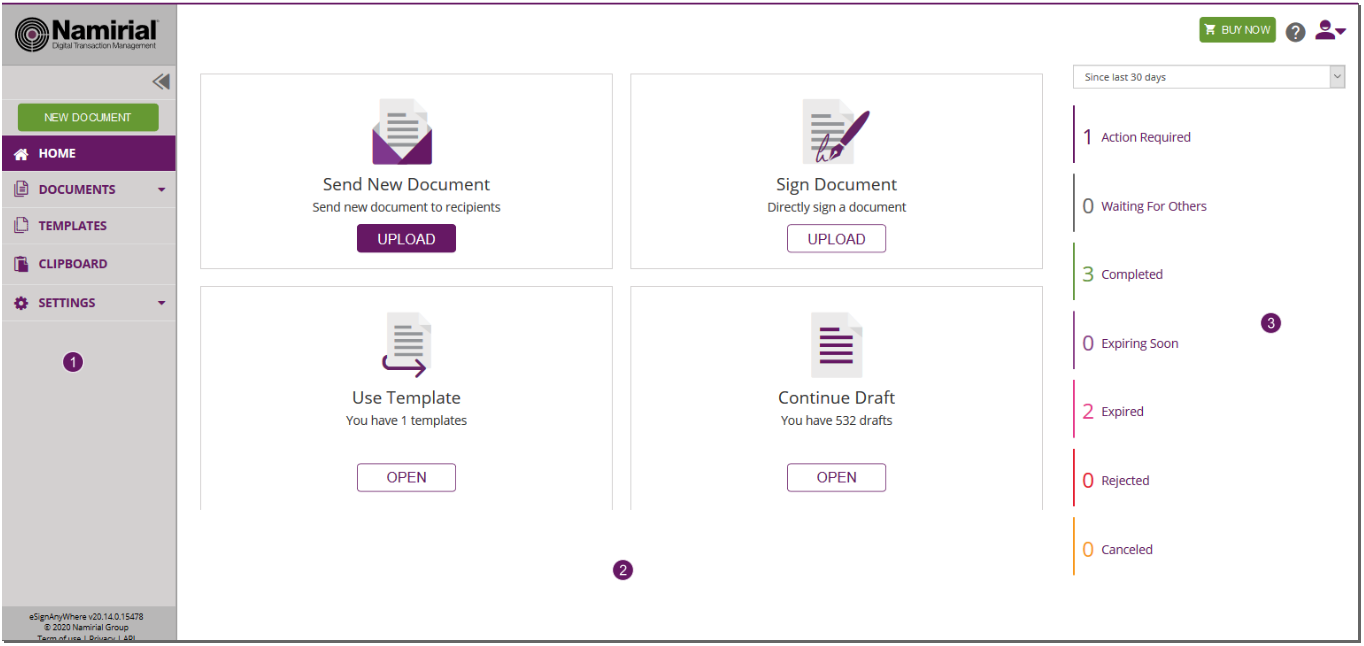
The eSignAnywhere default user interface:
- Menu: on the left you find the menu
- new Document: create a new document
- Documents: your (or our teams) sent documents and documents you have to sign
- Templates: your available templates
- Clipboard: if you install the MS Office Plugin (available in the menu top right), you are able to directly upload documents to MS Word to your clipboard in eSignAnyWhere.
- Settings: change your account or organisation settings
- Quickstart: in the middle you find the quickstart buttons
- Send New Document: create new document
- Sign Document: upload and directly sign a document
- Use Template: use a template
- Continue Draft: finish a draft
- Dashboard: provides you information about your envelopes
- Help: at the top right you find a question mark to enable the help
- Account-Action: also at the top right you find the account menu for account settings, issue reporting, Microsoft Office Plugin and log out
Figure | Description |
|---|---|
 |
|
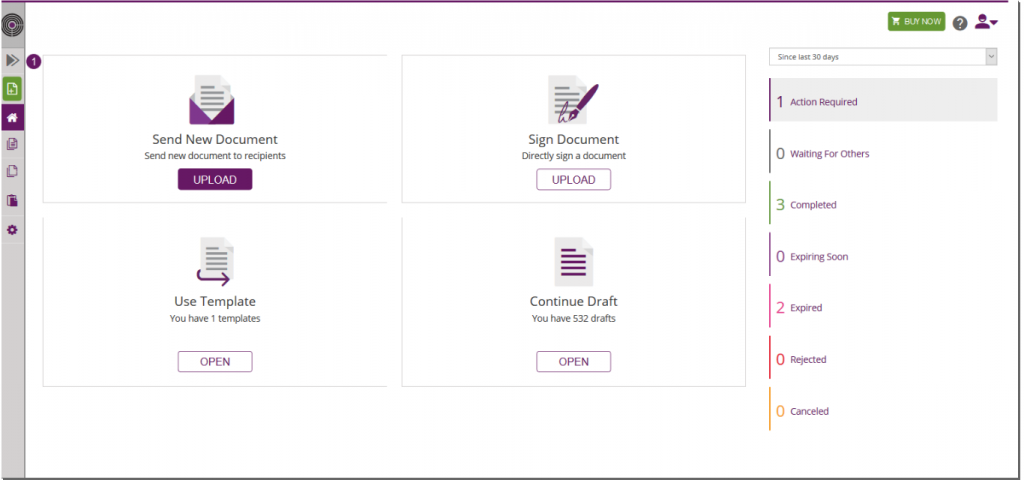
Compact View
If you want to have more space for designing documents, you can enable a compact view by collapsing the menu. Just click on the arrow symbol in the menu bar at the top.
Figure | Description |
|---|---|
 |
|
With this basic introduction and the following Guide you should be able to create and send your first envelope. Please see the Web UI Guide for more information about how to create and send an envelope here.