...
| Section |
|---|
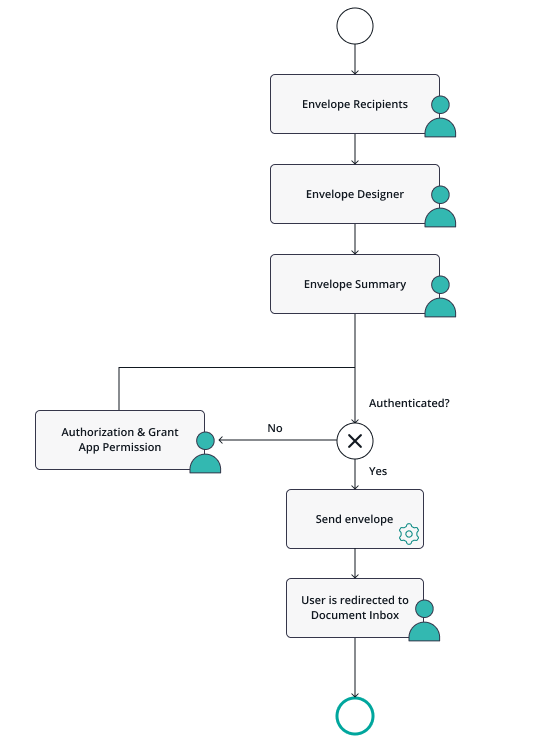
Application Flow - The Ideal Hook PointWe want to ask to grant access in a scenario where the sender user is already involved. Therefore, we identified that the time of sending an envelope usually fits best. With the option to add a "before-send redirect page" in the envelope creator, we are offering a hook point for such activities directly in the envelope creator. When such an URL is configured, the envelope creator changes to a 4-pages mode instead of its typical 3-pages mode: After the recipients page and the designer page, the sender will see the summary page of eSignAnyWhere. In the summary page, instead of the “SEND” button, the sender will see a “NEXT” button because a “before-send redirect url” was configured. Following placeholders are available for the “before-send redirect url” :
When the sender clicks the “NEXT” button on the summary page, he/she is redirected to the configured before-send redirect page. We don't really want to show a specific page typically, but only in case the user did not yet grant access to the OAuth Application he will be asked to confirm this access. In standard cases, the envelope create wizard will just send the envelope and close. It's a matter of user experience if you want to show some "final page" with a "send" button or if you accept that the "next" button did implicitly trigger sending the document. |
| Section |
|---|
User ExperienceThis flow will be represented to the user in the following screens: Recipients PageIn the recipients page, the sender selects documents to be signed, and defines the recipients and workflow. This is standard eSignAnyWhere functionality. 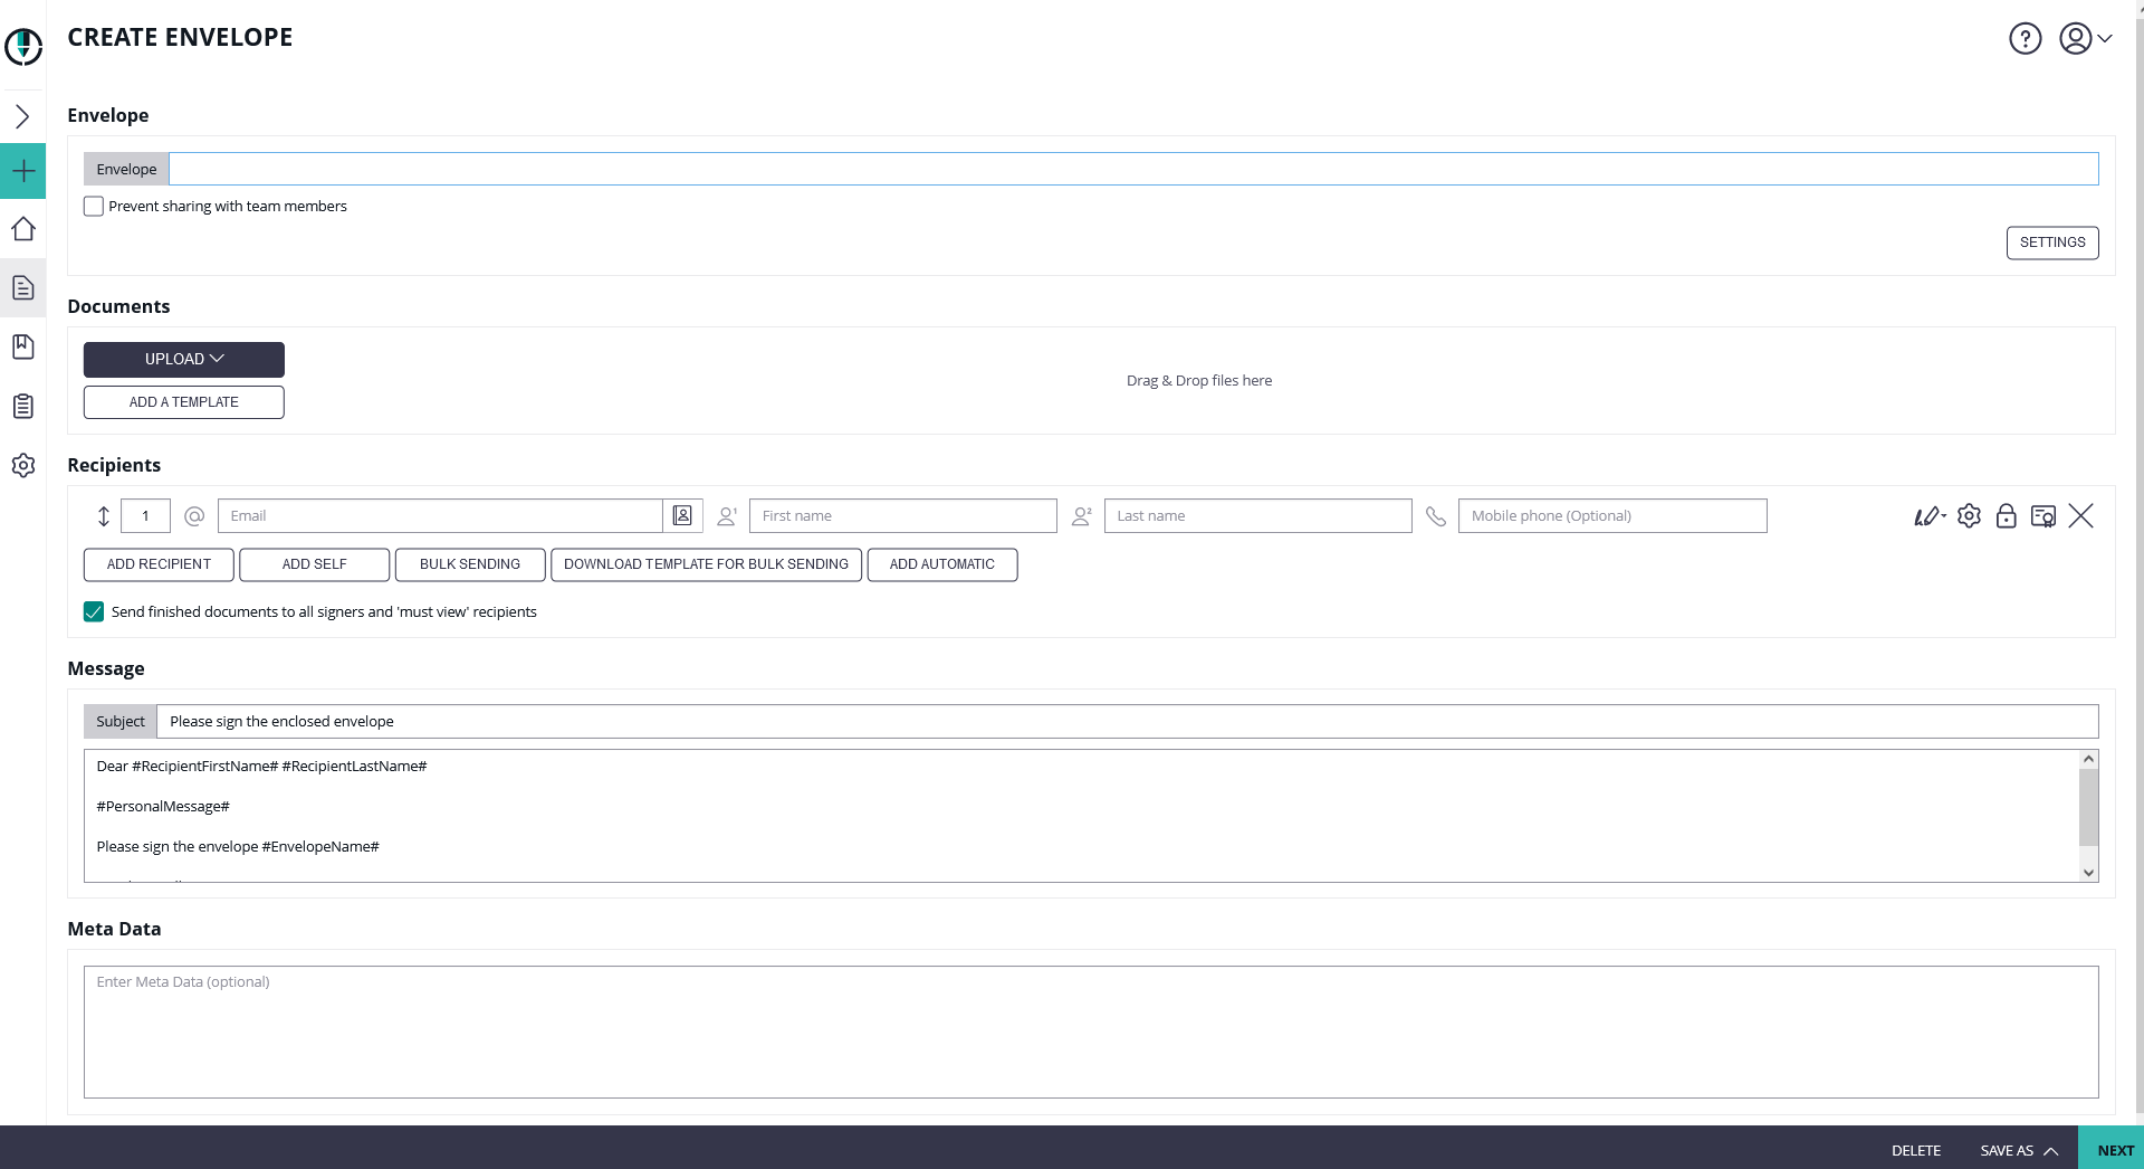 |
...
| Section |
|---|
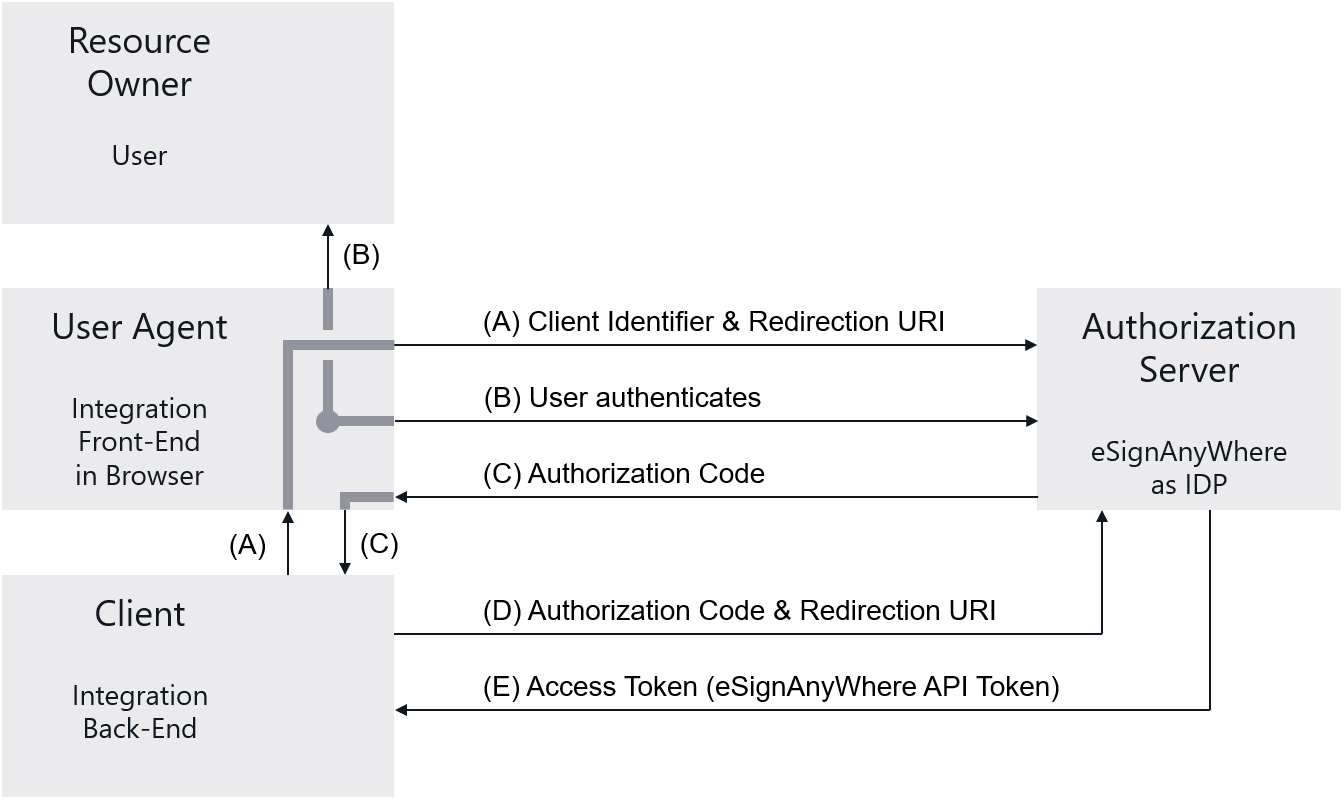
PrerequisitesAdminWeb: Create OAuth Application Implementation BasicsBefore implementing the OAuth 2.0 Code Grant, we recommend to read RFC 6749, Chapter 4.1. The diagram in the RFC explains the communication flow. Derived from the diagram in the RFC 6749, the following diagram puts the components in the context of eSignAnyWhere and your integration code: |
| Section | |||||||||||
|---|---|---|---|---|---|---|---|---|---|---|---|
In Step (A), your front-end therefore redirects to the authorization page provided by the IDP, and provides the client_id and the redirection URI as parameters to the authorization call. The redirection can be implemented via a HTTP 302 redirect or by opening the authorization page in a separate window. Note that OAuth's security concept requires that the front end therefore is not aware of the client_secret. The client_secret should be treated like a password and must never be available in front-end code. The URI of the authorization page is provided to you along with the client_id and client_secret when obtaining the prerequisites. It will typically be something like:
where state is just a random input parameter (see RFC 6749 for details) and the redirect_uri has to be URL-encoded as it is passed on within an URI parameter. Step (B) does not require any programming. It just visualizes the human interaction where the user is involved and enters his access credentials to the login page and/or grants access permission when using the OAuth application for the first time. As the user is typically already logged in when sending an envelope, he will not be asked to authenticate to eSignAnyWhere again as a valid user session is found. Step (C) is triggered by the OAuth 2.0 Identity Provider. eSignAnyWhere will therefore just redirect, with a HTTP 302 typically, to the redirection uri provided in Step (A). Steps (D) and (E) then have to be imlpemented in the back-end. Using the authorization code retrieved in step (C), the back-end has to call the token endpoint of the OAuth 2.0 Identity Provider. The token endpoint of eSignAnyWhere is provided to you along with the client_id and client_secret when obtaining the prerequisites. In the response, the Access Token will be returned. The access token is the user API token which you can use for further calls to the API as long as the user doesn't revoke access permissions for the OAuth Application. The token URI endpoint will typically be something like:
where the parameters are provided as JSON structure in the POST body:
eSignAnyWhere does not require to use a nonce parameter, and does not use refresh tokens. Therefore, the token received via above's call sequence will be valid until revoked. Note that the envelope was not yet sent when a before-send redirect uri is invoked. As there is no "send" button in eSignAnyWhere, use the eSignAnyWhere API methods for the draft with the provided DraftID to send the draft. After sending, we call it an envelope. After sending, which may be done immediately or after a human interaction in the before-send redirect page, return a HTTP 302 or implement some timeout on the clientside website to return to the document inbox by calling its URI directly. |
...