The application reference describes the application features in the structure as they are accessible for the user through the user interface. Some items described in the application reference may be invisible due to different instance configuration, configuration of feature flags, organization configuration or user permissions.
...
General Structure
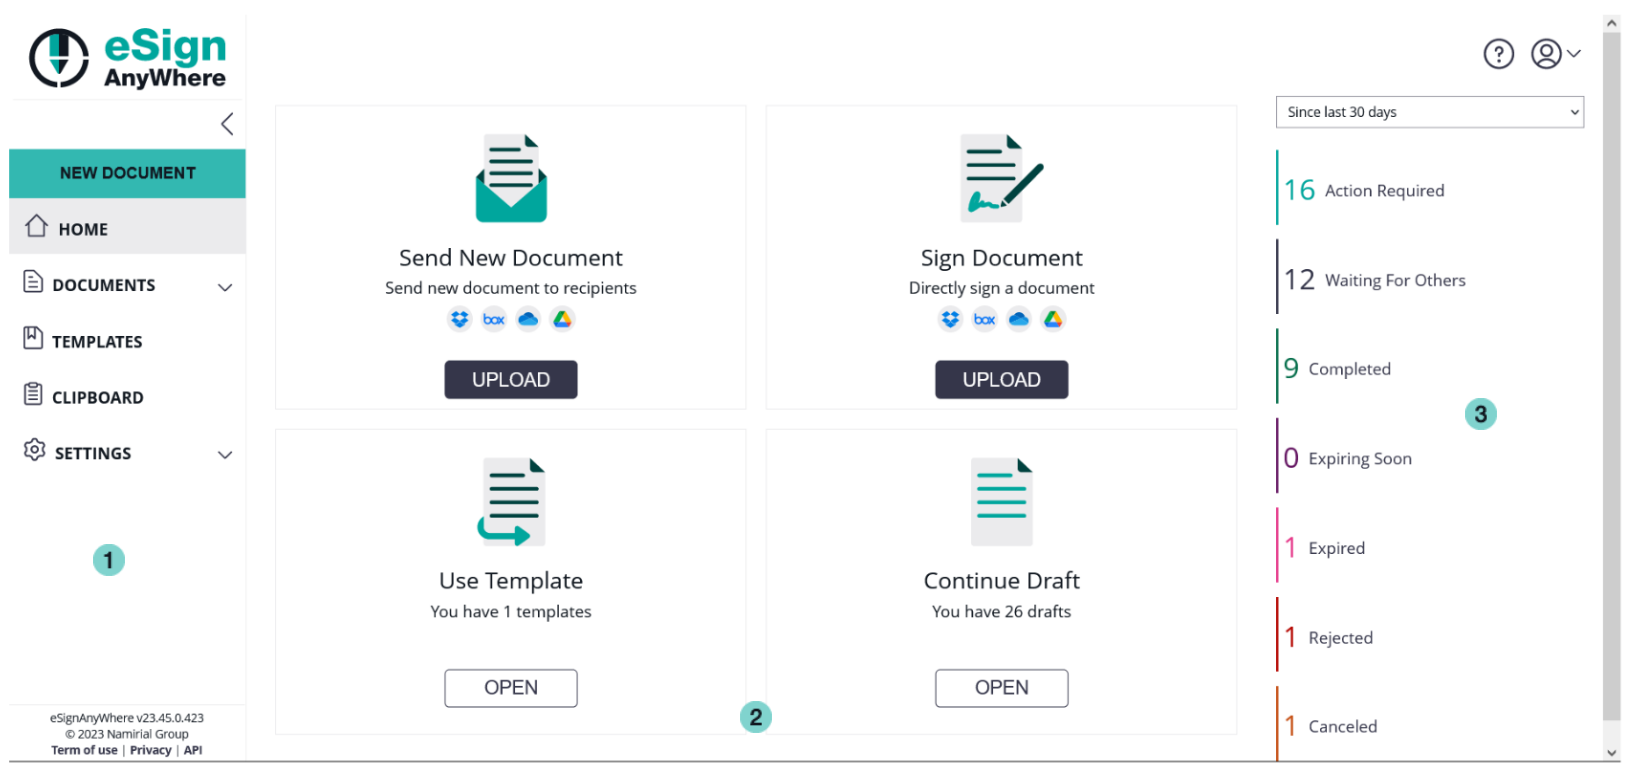
The "Home" area (also called "Dashboard") is offering following main functionality:
- Speed up sending a new envelope
- Directly start creating an envelope with a Drag&Drop interaction on one of the two areas “Send new Document” or “Sign Document”
- Statistics Summary
Tiles in Main Area
There are four big tiles in the center area. Those are providing following functionality:
Send new Document
Starts creating a new envelope draft; expecting to be sent to remote recipients via e-mail.
The tile also supports following Drag&Drop interaction:
Drag any local document from the operating system (e.g. MS Windows) to the tile
Sign Document
Starts creating a new envelope draft; but with the current user as first recipient so that there is no need to send the envelope to the first recipient via e-mail. When the sender himself is the first recipient, the sender can directly go to the signing step after defining the envelope.
The tile also supports following Drag&Drop interaction:
Drag any local document from the operating system (e.g. MS Windows) to the tile
Use Template
The templates selection shows all templates by default, where the user has the permission to read and use them. Permissions can be configured as described in {…}. By default, a power user is able to access his own templates, and all templates created by a team member and shared with the team.
...
eSignAnywhere user interface, with standard appearance of a user having "Power User" and "Administrator" role:
- Menu: on the left you find the menu
- new Document: create a new document
- Documents: your (or our teams) sent documents and documents you have to sign
- Templates: your available templates
- Clipboard: if you install the MS Office Plugin (available in the menu top right), you are able to directly upload documents to MS Word to your clipboard in eSignAnyWhere.
- Settings: change your account or organisation settings
- Main Area: different views, depending on which item has been selected in the menu, are shown in the main area. The different views are described in detail in the next chapters.
- Help: The questionmark icon on top-right, directly next to the account-menu, allows to open the context specific product documentation.
- Account-Action: also at the top right you find the account menu for account settings, issue reporting, Microsoft Office Plugin and log out
Figure | Description |
|---|---|
 |
|
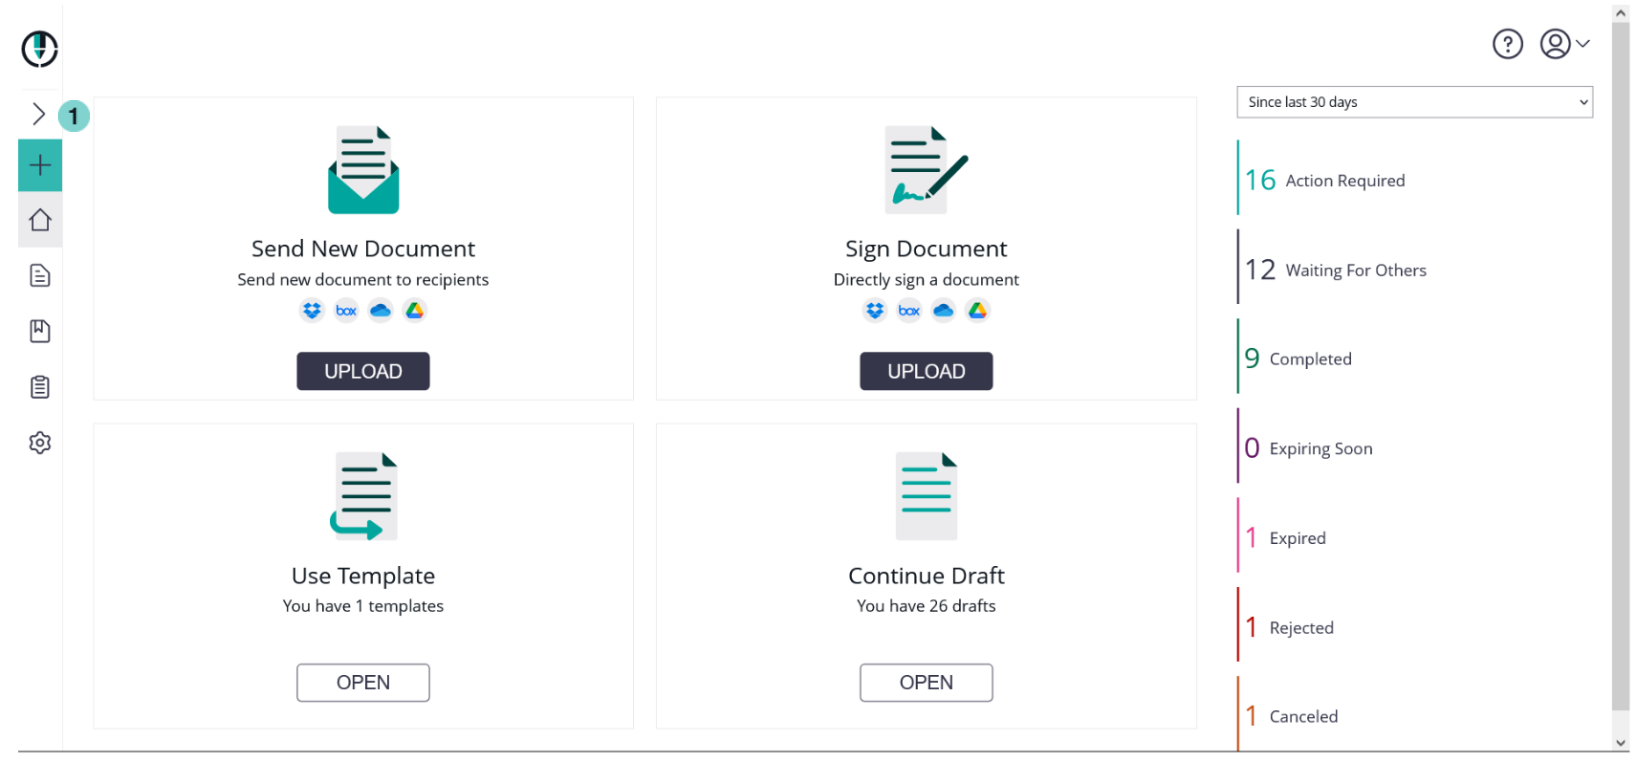
Compact View
...
If you want to have more space for designing documents, you can enable a compact view by collapsing the menu. Just click on the arrow symbol in the menu bar at the top.
Figure | Description |
|---|---|
 |
|
The different views of the main area, which are accessible using the menu bar on the left side, are explained in detail in the following sub chapters:
- Home (Dashboard)
- Documents (Envelope Filter Views)
and, related to envelopes: - Templates
- Clipboard
- Settings and Customizing
The result does not refresh automatically e.g. when another user created a draft which is shared with team members. To refresh the list in such scenarios, it is required to use the refresh button.
Continue Draft
...
The result does not refresh automatically e.g. when another user created a draft which is shared with team members. To refresh the list in such scenarios, it is required to use the refresh button.
Documents
Templates
Clipboard
The clipboard is listing documents that have been created by Microsoft Office Plugin. Read User Guide: Clipboard & Microsoft Office Plugin for more information about how to work with the Microsoft Office Plugin.
Settings
...