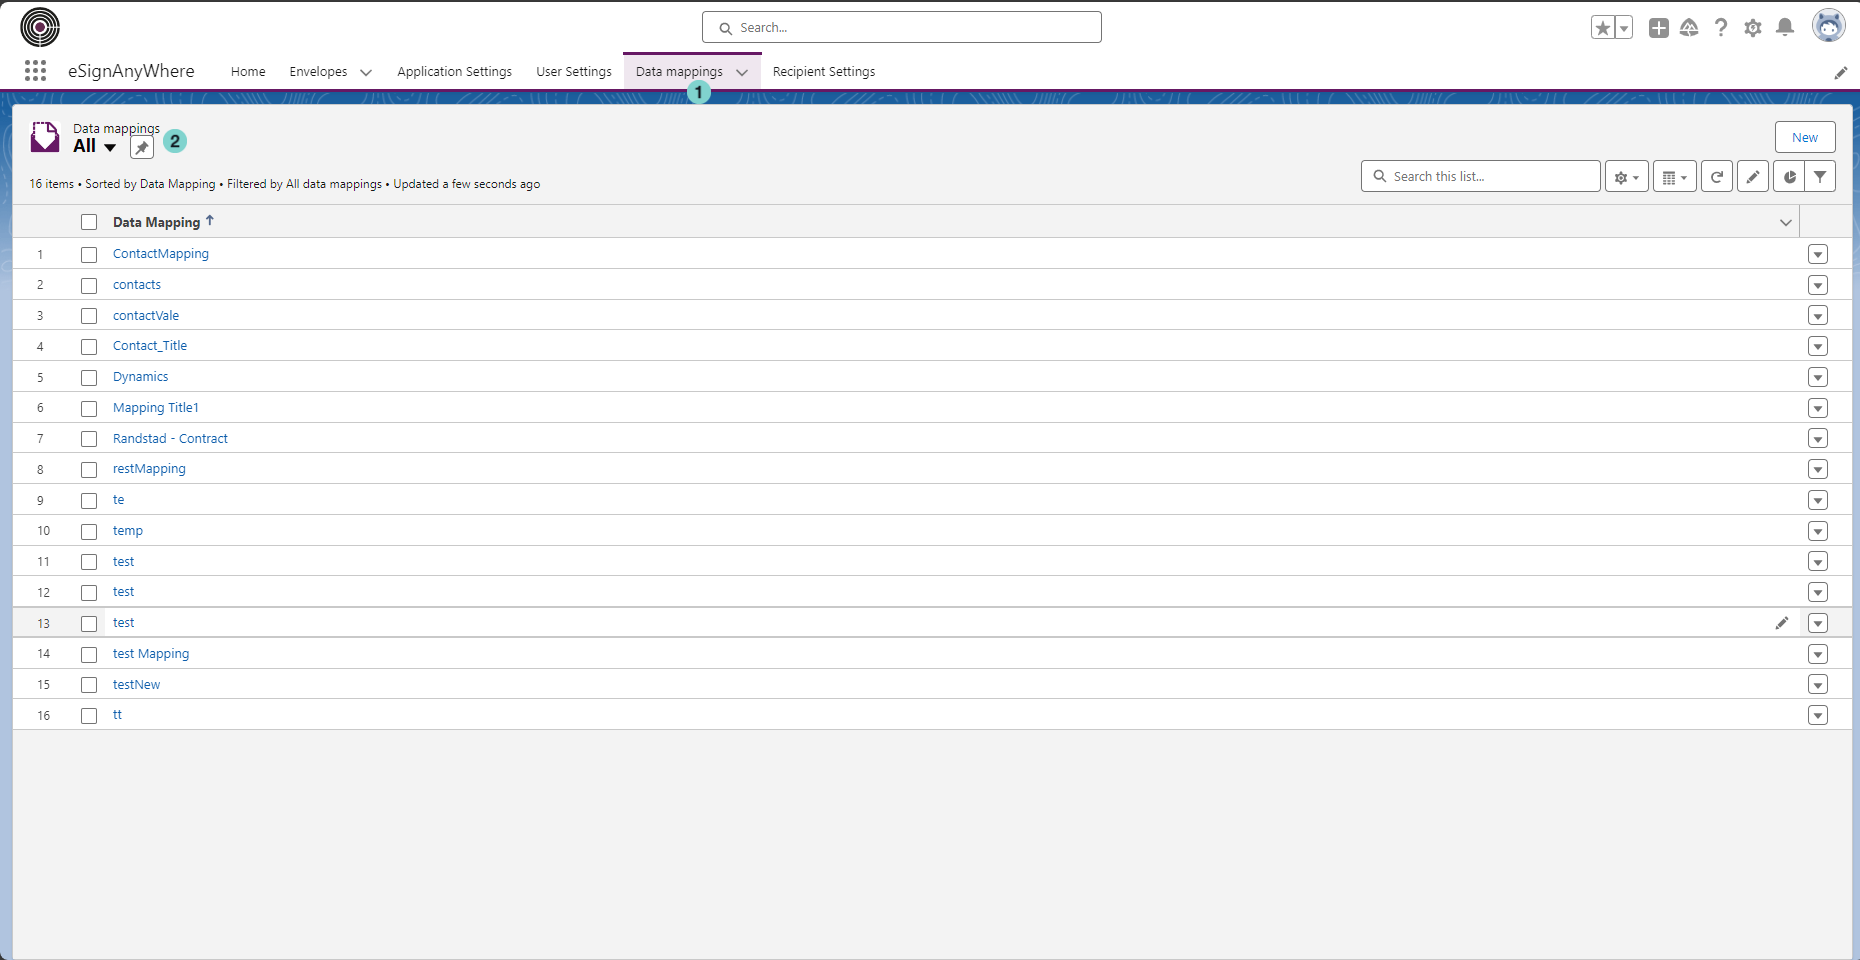
Data mapping tab contains the list of data mapping configured in your SalesForce instance

...
functionality allows you to automatically update a field value from Salesforce and eSAW and vice-versa.
Figure | Description |
|---|---|
|
|
Configure a new Data Mapping:
...
Steps to follow to configure a new data mapping:
- Click the 'New' button.

- Define data mapping properties and click the 'Save' button:

Starting new data mapping creation:
Figure
Description

- New Data Mapping Button
Configure the new Data Mapping:
Figure
Description
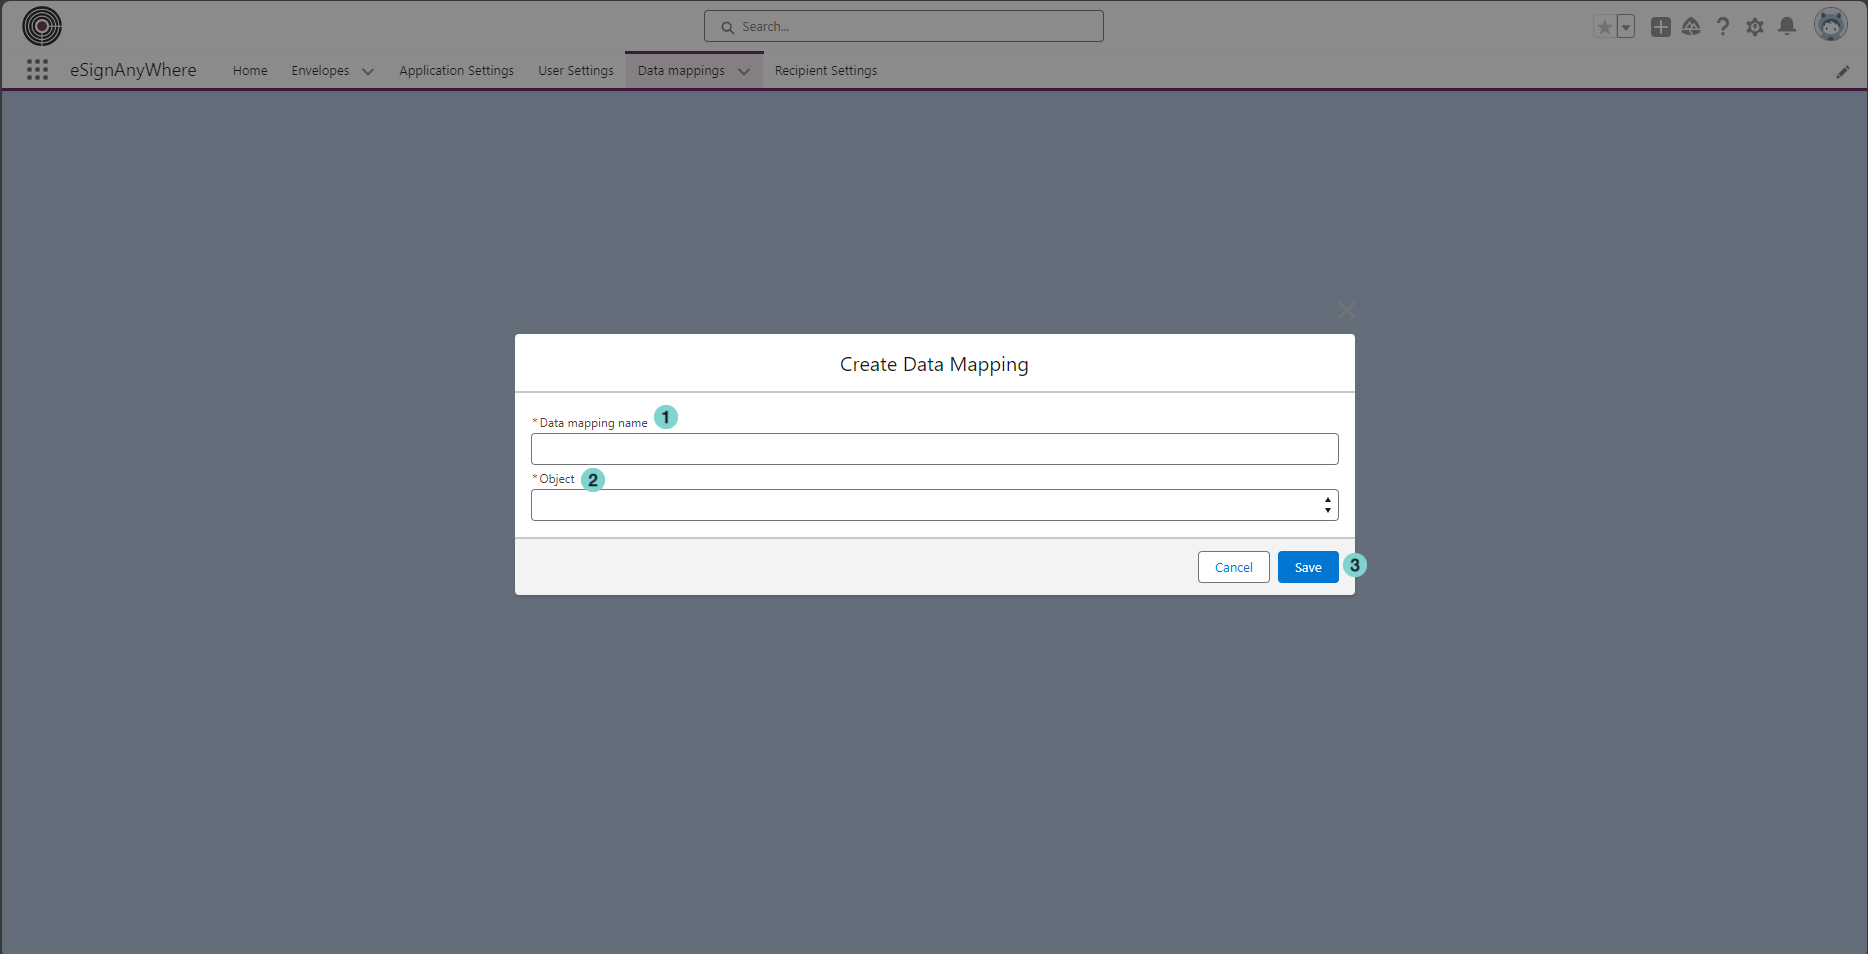
- The
Data mapping name: the - name that identify your data mapping.
Object: the - The Salesforce object that you what to map eSAW.
- Click 'Add' button to configure a new data mapping from a Salesforce object to eSAW document.

- Save Button
Configure the field that you want to map

- SALESFORCE FIELD: this is the name of the field of chosen SalesForce object that you want to map.
- ENVELOPE FIELD NAME: this is the id of the field in eSAW document.

- ENVELOPE FIELD ELEMENT: this is the type of the field in eSAW document.
- DOCUMENT NUMBER: this is the number of the document uploaded in the envelope that contains the field that you want to map.
- Click 'DOCUMENT→ SALESFORCE' and 'Add' button to configure a new data mapping from eSAW document to a Salesforce object.

- Configure the field that you want to map from eSAW document to Salesforce object and press 'Save' button:

Figure
Description
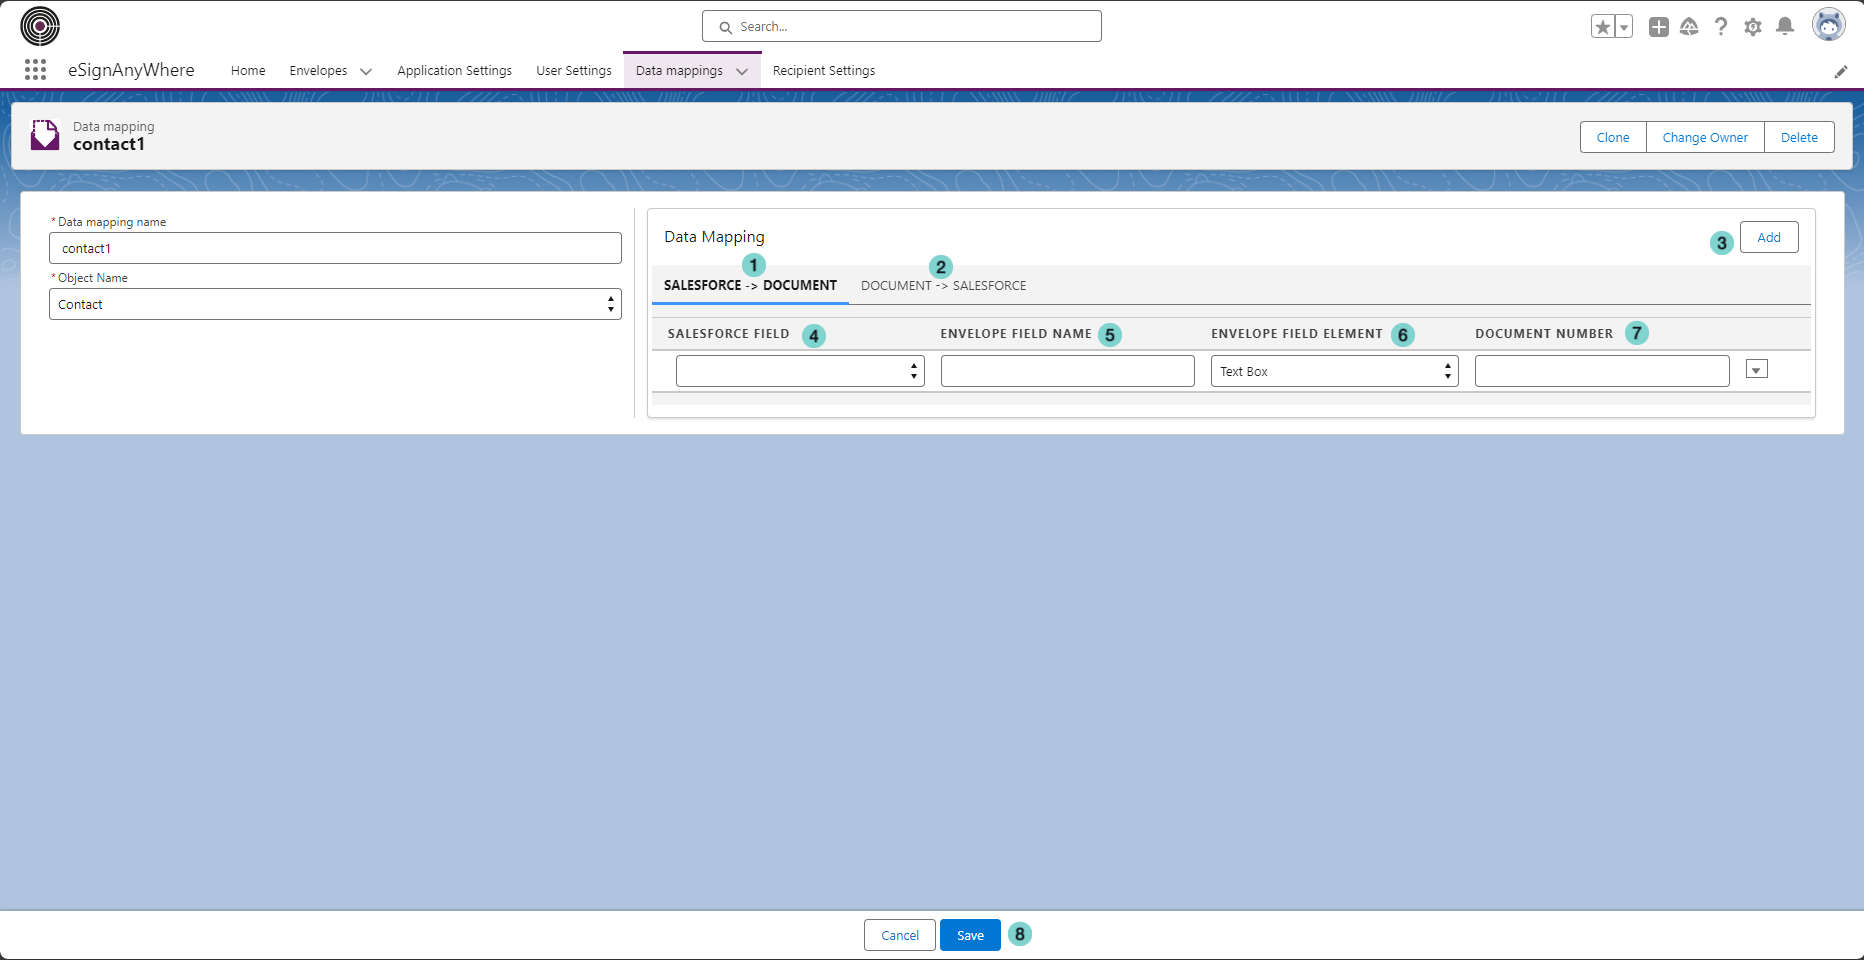
- Tab to map Salesforce object to eSAW document.
- Tab to map eSAW document to Salesforce object
- Add new field data mapping.
- The name of the field of chosen SalesForce object that you want to map.
- The
ENVELOPE FIELD NAME: this is the - id of the field in eSAW document.
SALESFORCE FIELD: this is the name - The type of the field
of chosen SalesForce object that you want to map.- in eSAW document.
- The
DOCUMENT NUMBER: this is the - number of the document uploaded in the envelope that contains the field that you want to map.
OVERWRITE: if this option is selected, the value in Salesforce object field will be overwritten- Save button.