...
In this section, we are describing OAuth 2.0 based solutions for strong identification of signers, with technical possibilities to retrieve data (e.g. for issuance of a QEC). Please note that legal aspects and the allowance of its use in specific scenarios need to be checked in the Trust Service Provider's Operative Manual or contractual agreements.
Video Identification - Namirial LiveID+
The Namirial LiveID+ video identification can be inserted into identification processes using an OAuth 2.0 Authentication / Identification configuration. As LiveID+ is not offering an OAuth 2.0 endpoint itself, this is implemented in "LIP OAuth Wrapper".
Step 1: Request to create an organization in LiveID+ configuration, and configure the required identification process
The underlying LiveID+ configuration needs to be done by Namirial staff.
As a result, you will get
- an organization identifier in LiveId+
- a process identifier
Step 2: Request registration of a new Application in LIP OAuth Wrapper
This needs to be done by Namirial staff. Please provide following information:
- Request to create an OAuth application for the LIP OAuth Wrapper for a code grant flow with eSignAnyWhere. You need to receive, as result of the request, a client_id and client_secret.
Note that the LIP OAuth Wrapper is an optional add-on to eSignAnyWhere and must therefore be installed on the eSAW instance as a precondition. - eSignAnyWhere redirect URI which needs to be whitelisted in the MyNamirial configuration
- Provide your eSignAnyWhere organization's customization ID, and which LiveID+ organization and LiveID+ process should be linked with it
Step 3: Configure eSignAnyWhere
- Login to eSignAnyWhere with a user that has administrative permissions on your Organization.
- Open the Settings > Identity Providers page and add new OAuth Settings for Signer Authentication.
| Provider Name | This name will be displayed in the Authentication dialog in SignAnyWhere Viewer, so make sure it identifies your organization. e.g.: Video Ident with LiveId+ |
| Redirect Url | This is already set and has to be white listed on LIP OAuthWrapper. We already provided this URL in the request in Step 2. |
Client Id | your "Application (client) ID" from Step 2 |
| Client Secret: | your secret's value from Step 2 |
| Scope: | |
| Authorization URI: | https://<your-esaw-instance>/OAuthWrapperLiveIdPlus/api/authorize |
| Token URI: | https://<your-esaw-instance>/OAuthWrapperLiveIdPlus/api/getToken |
| Logout URI: | can be blank |
| JWKS URI: | https://<your-esaw-instance>/OAuthWrapperLiveIdPlus/Jwk/getJwks |
| Issuer: | https://<your-esaw-instance>/OAuthWrapperLiveIdPlus |
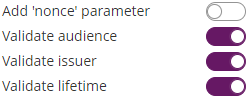
| On-Off Sliders: |
|
And then configure the following field mappings:
| Field property path | Validate/Update | Data Field |
|---|---|---|
| firstname | Update | Recipient First Name |
| lastname | Update | Recipient Last Name |
| identificationType | Update | Disposable Certificate identification type |
| recognitionType | Update | Disposable Certificate document type |
| identificationNumber | Update | Disposable Certificate identification number |
| phone | Update | Disposable Certificate phone number |
| Validate | Recipient Email | |
| documentIssuingCountry | Update | Disposable Certificate document issuing country |
| documentIssuingOrganisation | Update | Disposable Certificate document issued by |
| documentNumber | Update | Disposable Certificate document number |
| documentIdentificationCountry | Update | Disposable Certificate identification country |
| documentIssueDate | Update | Disposable Certificate document issued on |
| documentExpireDate | Update | Disposable Certificate document expiry date |
(if you want to disallow proceeding with data corrected by the video identification agent, change additional mappings from "Update" to "Validate". But note that e.g. small deviations in the name might then disallow to proceed)
and then,
- Click on Update to save the configuration
- Click on the slider to enable the OAuth provider
Step 4: Send envelopes using the LiveID+ identification
When sending an envelope using eSignAnyWhere Web UI, select the identification provider in the Envelope Create wizard's Recipients Page. The identification provider is listed in the expandable area of the recipient's activity, accessible through the "lock" symbol (Identification methods are listed in a separate section directly below the Authentication methods)
Identification using national eID implementations
...