Team Editor
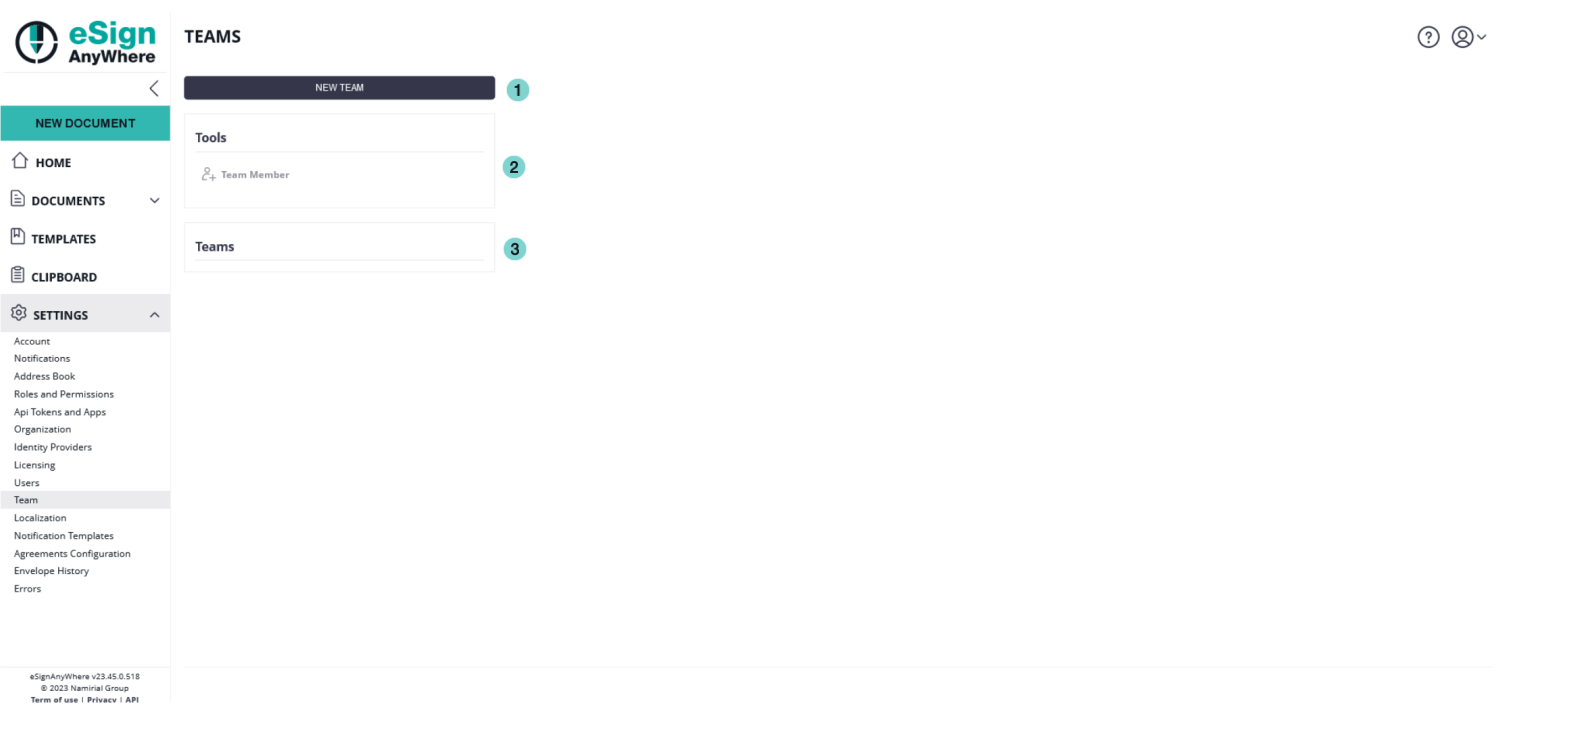
In this section you are defining your teams. A team is a virtual organization, in which the team-manager (root) has access to all envelopes of the team. With the enabled sharing feature all team members can access the envelopes and/or templates of the team. People with the “isUserManager” setting can edit teams.
If a person is in two teams (Team A & Team B) and sharing is enabled, the envelopes of Team A are not visible to Team B (and vice versa). [Note: changed behavior with eSAW 3.5, before it was able to be shared across both teams].
Overview
| Figure | Description |
|---|---|
|
Creating a Team
This chapter explains how to create teams for your organization.
Following steps are necessary to create a team:
- Create a team record (Choose a team leader)
- Add team member to the team
You can create more than just one team and you can also configure more level team structure. For more information please see the section Scenarios.
Create team record
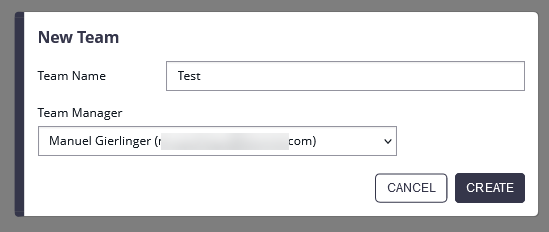
First, create a new team in your organization in Settings -> Team. Just click on the “New Team” button to add a new team to your organization. For a new team you need a team name and a team leader. See also the following figure:
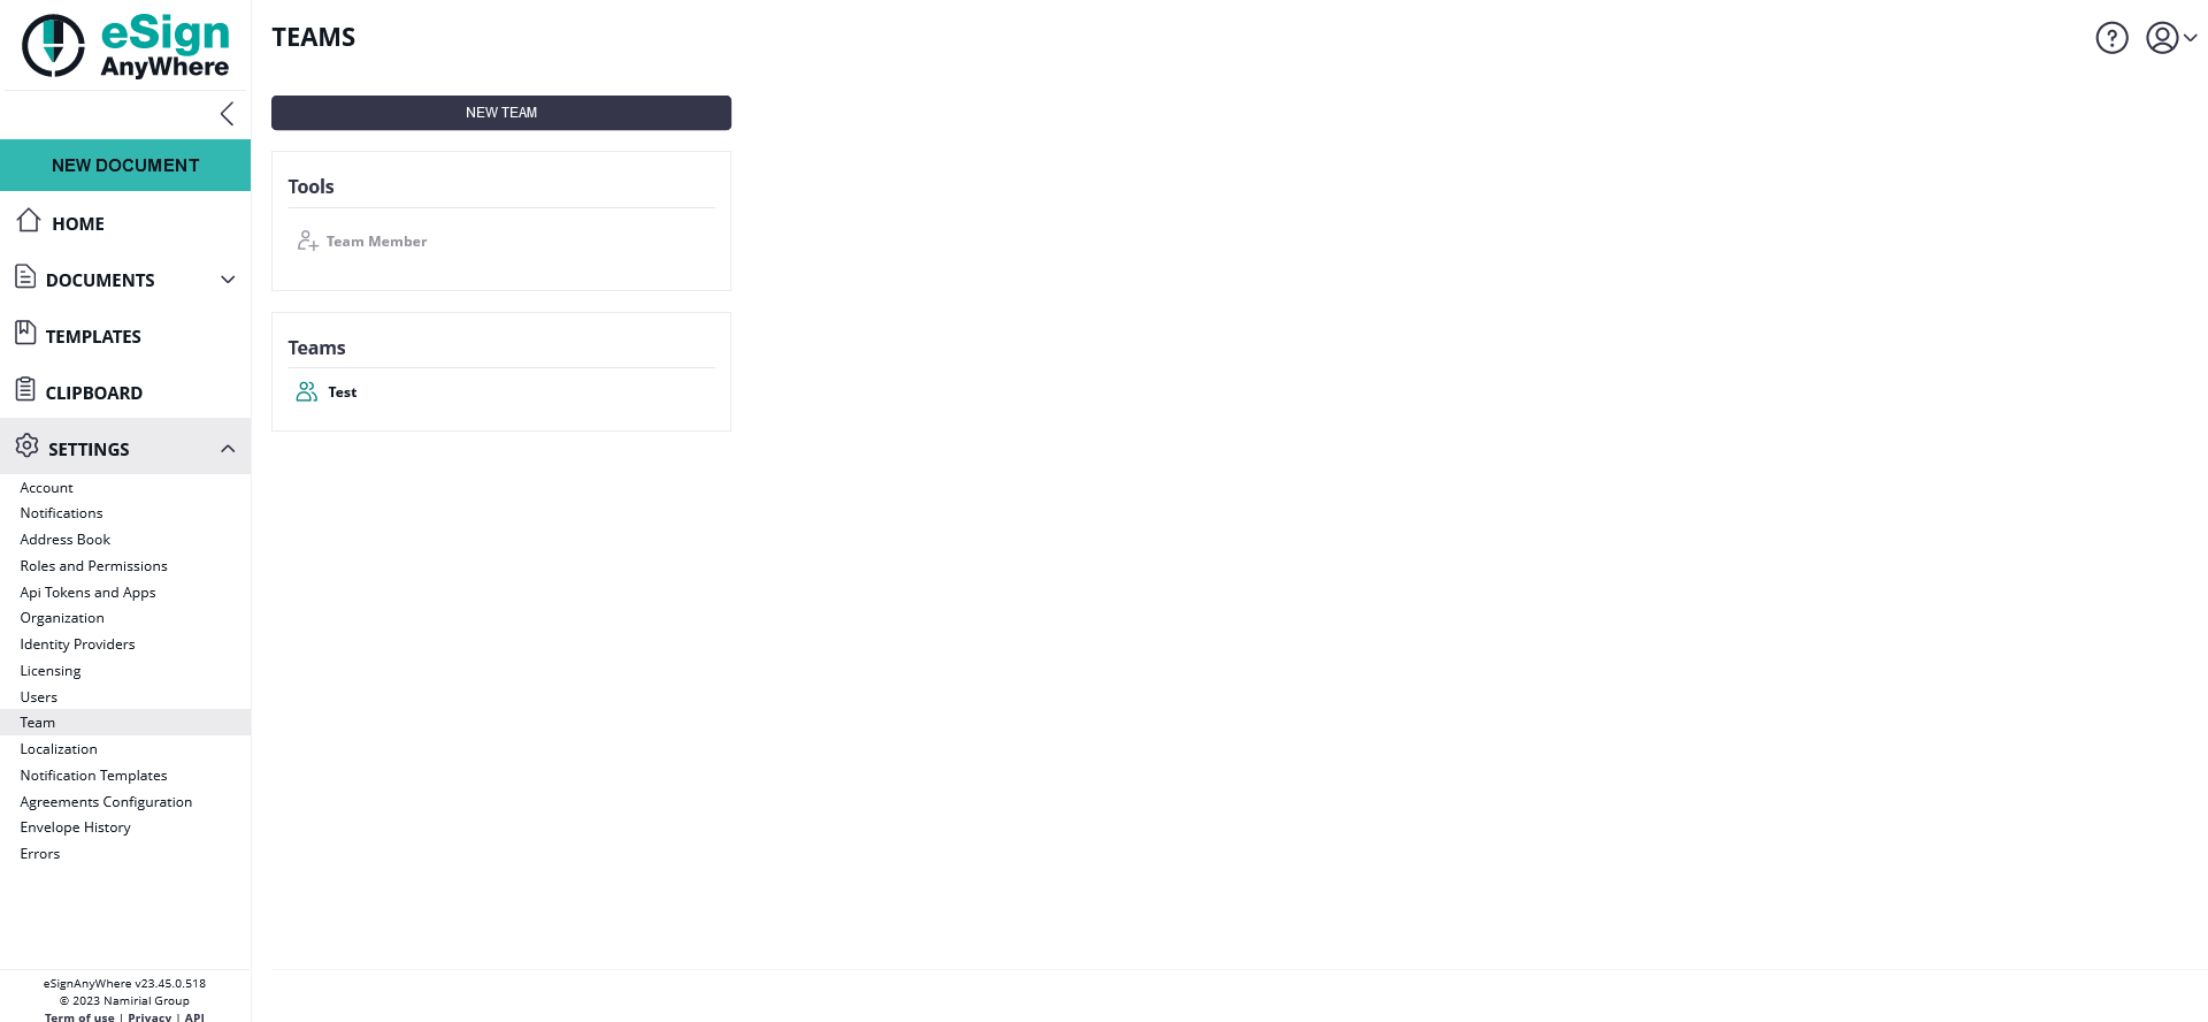
After creating your team you can find it in the section teams like it is shown in the next figure:
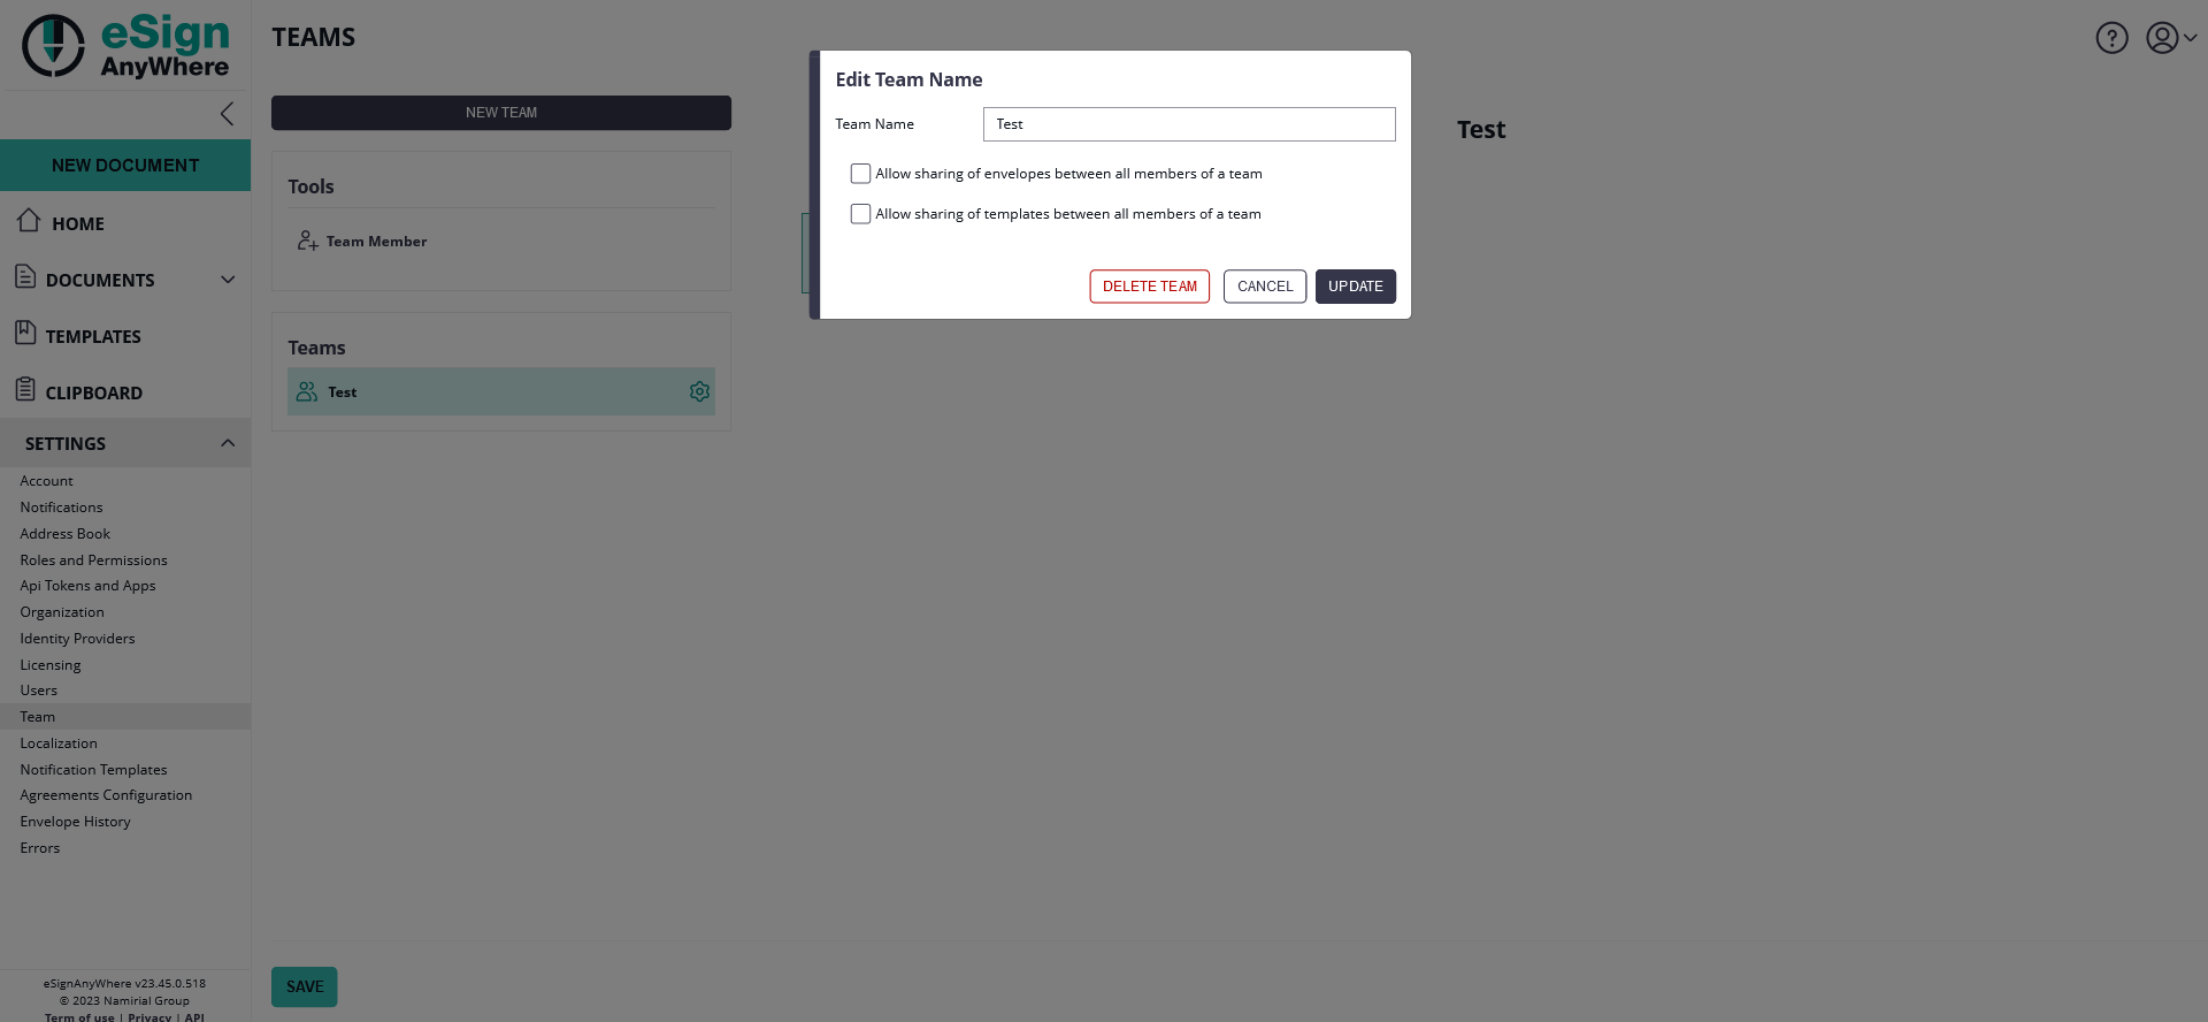
Note: For each team you can define the following settings:
- Allow sharing of envelopes between all members of a team
- Allow sharing of templates between all members of a team
Please see the following figure, which shows you where you can find those settings:
| Figure | Description |
|---|---|
|
|
Add team member
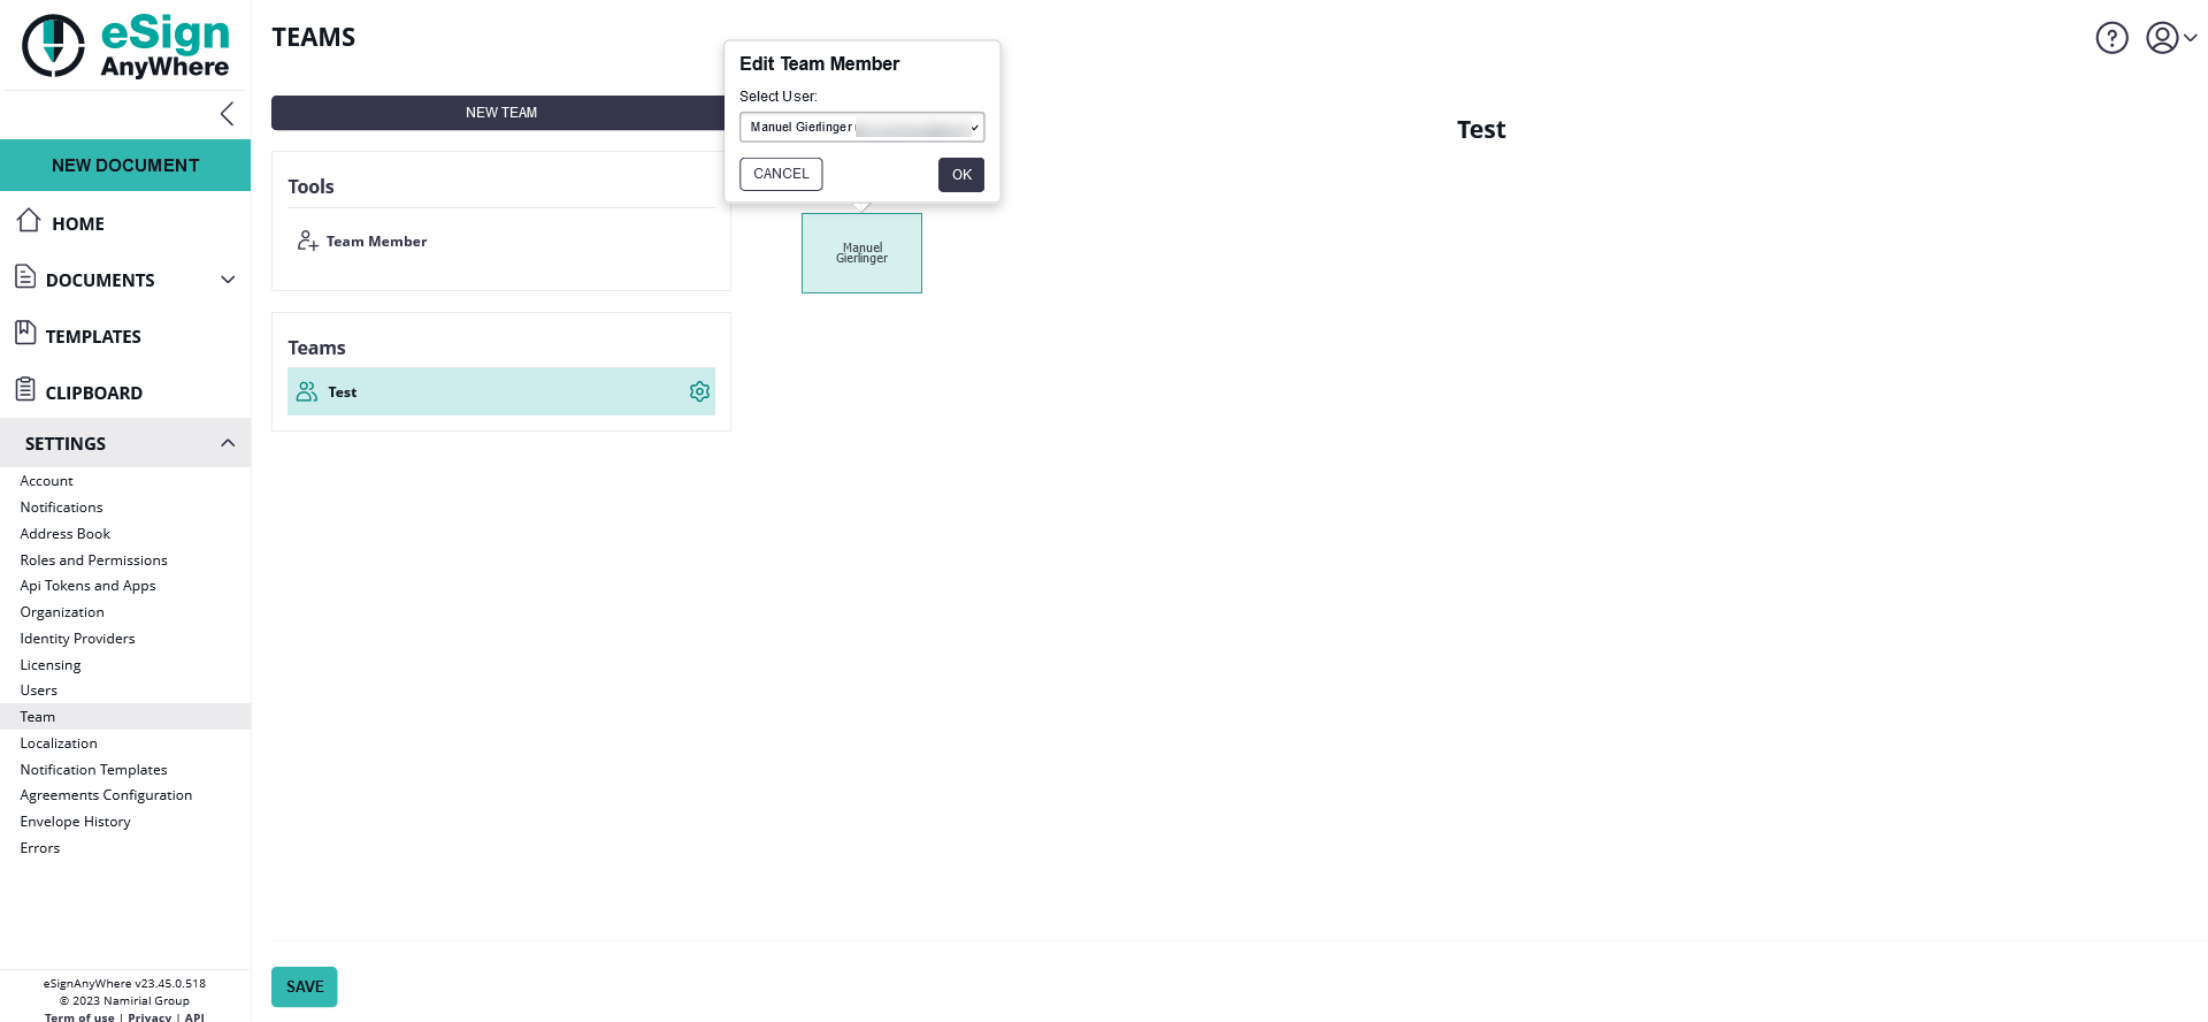
By drag and drop add a new member onto to your selected team. You have to select which user should be added to the team.
Please note: The member must be dragged onto an existing member!
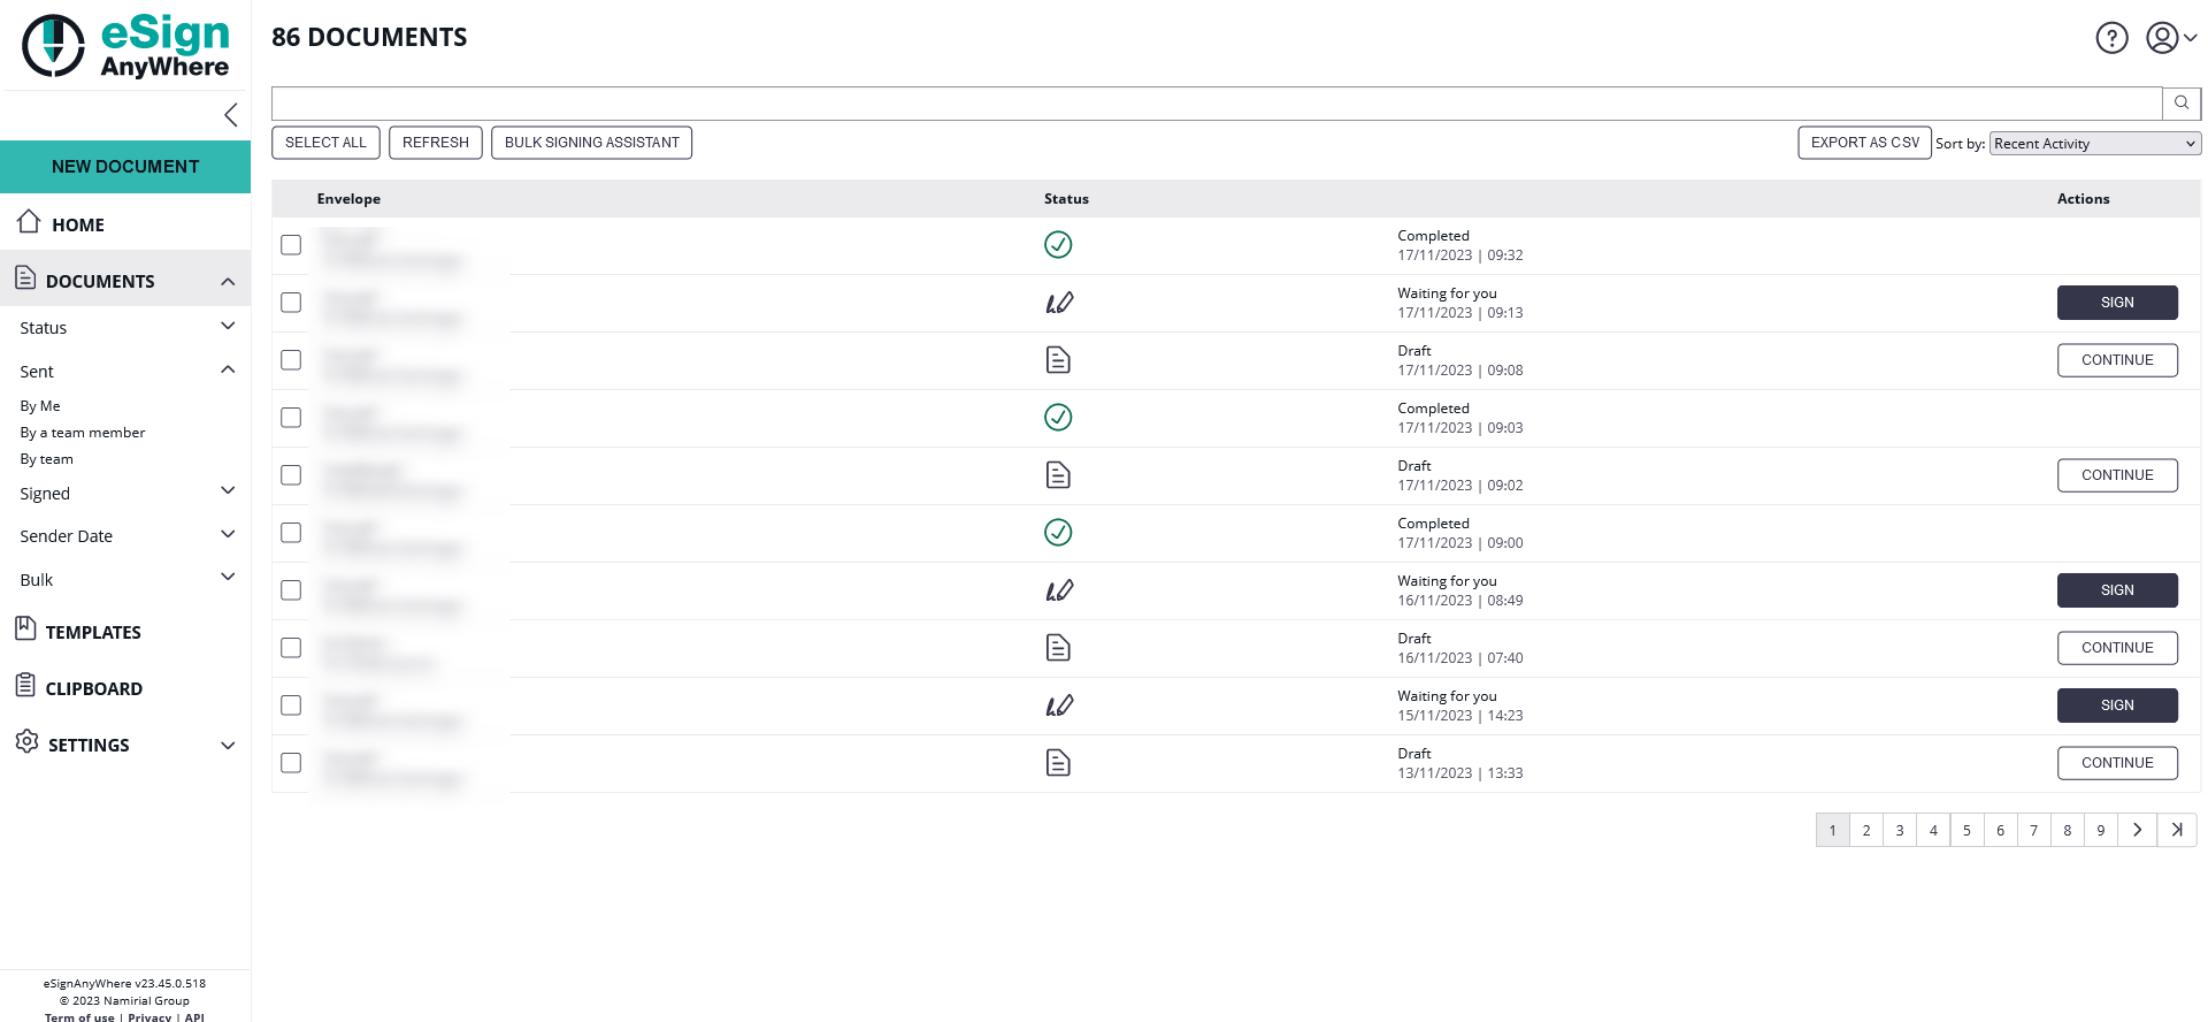
After adding team members to your team you can find a filter "By a team member" in the section Documents in Signed and Sent. Please see the next figure:
Please also see a complete process in the following video:
Remove team member
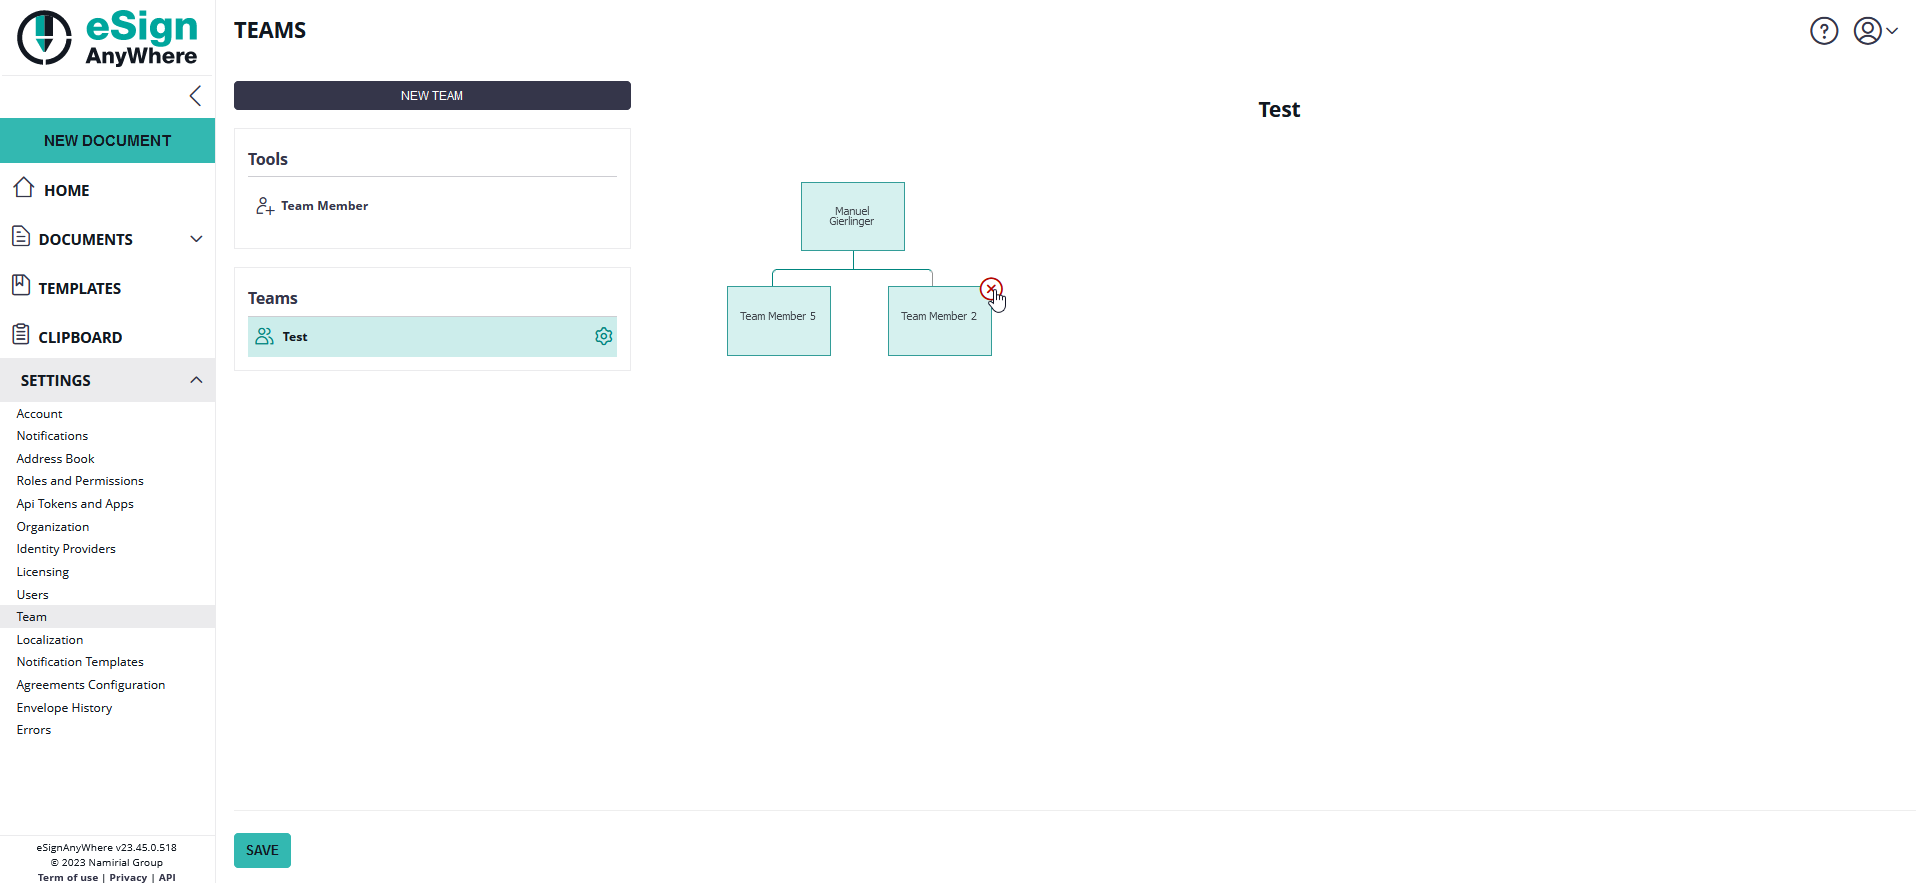
Removing a team member is simple. Just move over it and a delete icon appears.
Sharing Envelopes / Drafts / Templates within a Team
As you can see in the table below, the team leader always has access to sent and signed envelopes. If the team configuration also allows sharing templates then the team leader has also access to the templates created by the team members. If team sharing is allowed also the team members have access to other signed and sent envelopes from other team members and also the team members have access to the signed and sent envelopes created by the team leader.
| No sharing | Sharing | |||
|---|---|---|---|---|
| Team leader | Team member | Team leader | Team member | |
| Envelopes | ||||
| Templates | ||||
| Bulk | ||||
| Draft | ||||
For more information of sharing envelopes in a team please also have a look at the next chapter “Scenarios“.
If a user is allowed to create/read/update/delete envelopes, the user can prevent sharing documents with team members. In this case, even if sharing is allowed according to the team settings, the individual user can choose whether his/her own document is visible to others or not when creating and also after creating an envelope.
If prevent sharing documents with team members is enabled also the team leader has no more access to the document of the team member who has enabled preventing.
Scenarios
In the section you can find different implementations of various team structures. The first descriptions show you how to create a one level team structure. Below that description you can find implementations for more level team structures and how the communication (sharing documents) work in teams with more level.
Sharing in team
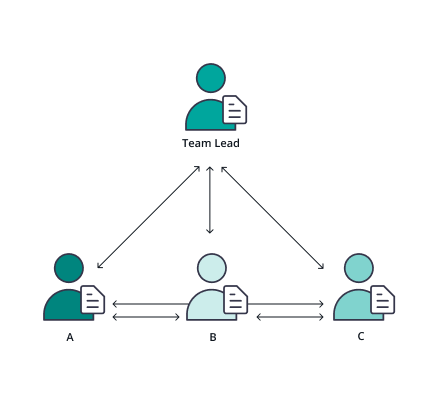
In this scenario everyone has access to documents sent by others:
No sharing in team
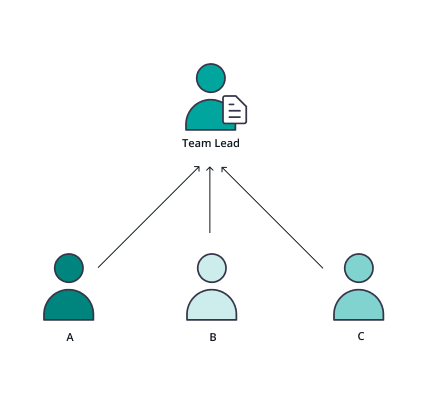
In this scenario everyone has access to his/her own sent documents, except the team lead has access to sent documents of the complete team.
In two teams
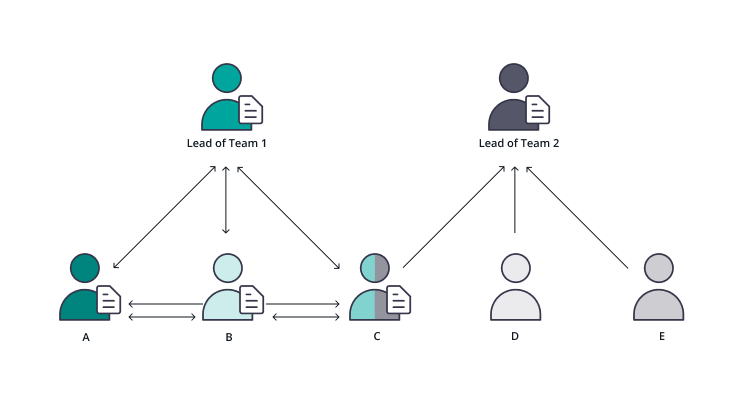
Person C is in two teams and has two team leads. Documents of Person D cannot be seen by Person B. In that case Team 1 has sharing enabled and shares all sent documents. In Team 2 sharing is not enabled and does not share documents. Both team leaders have access to sent documents of Person C.
In two teams and sharing
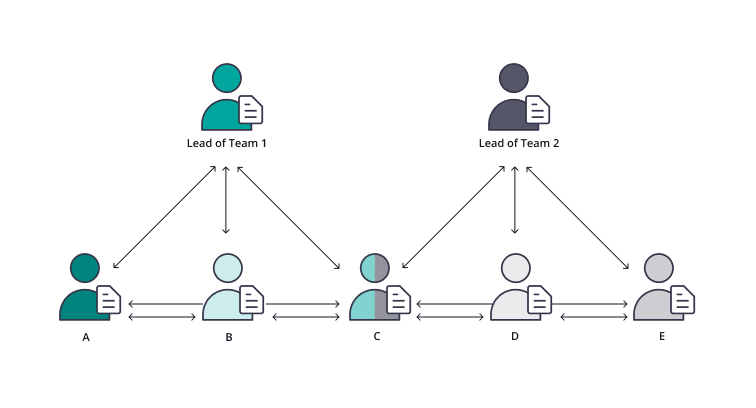
Person C is in two teams and has two team leads. Team leaders have again full access to all documents of their team and all documents of Person C.
More level with split teams
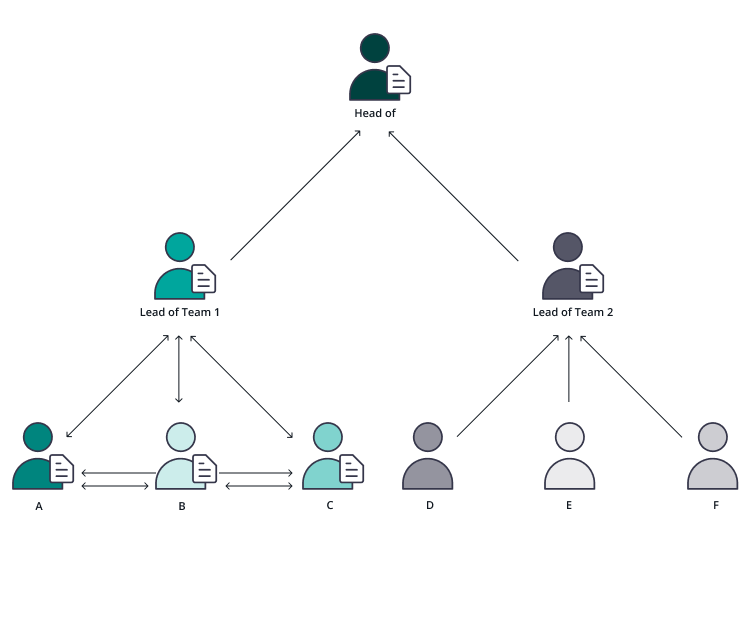
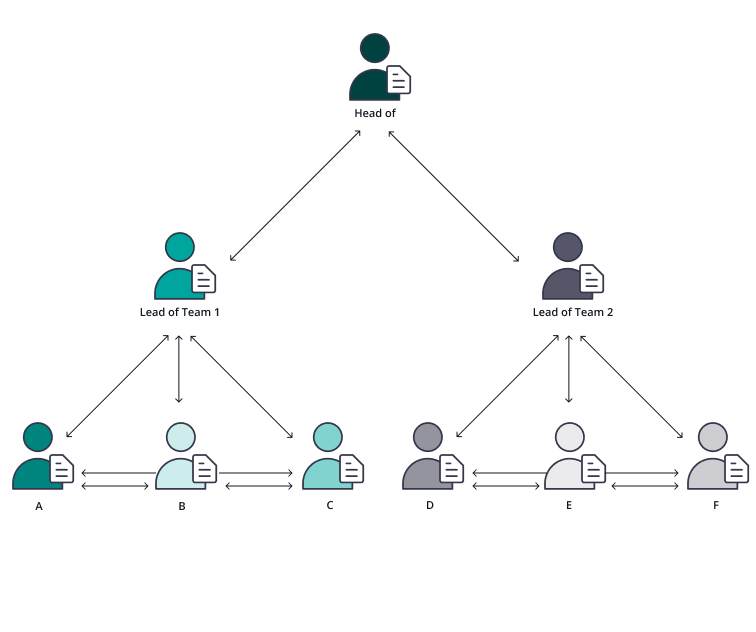
In this scenario you can see that everyone in Team 1 has access to documents of the other team members A, B and C. Team 2 cannot see documents from Team 1 and also Team 2 members cannot see Team 2 members documents. Lead of Team 1 has only access to the documents from the members A, B and C. Lead of Team 2 has access to the documents of the members D, E and F. The “head of” has access to all documents.
More level within one team
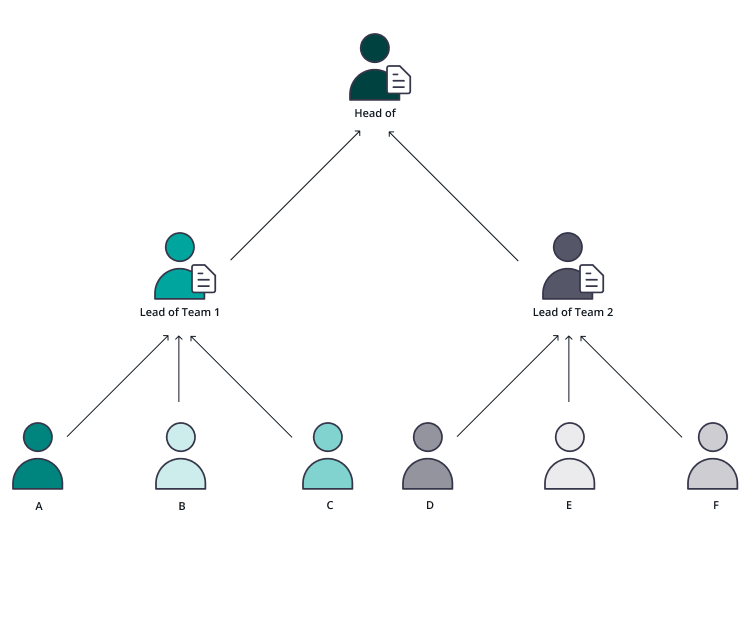
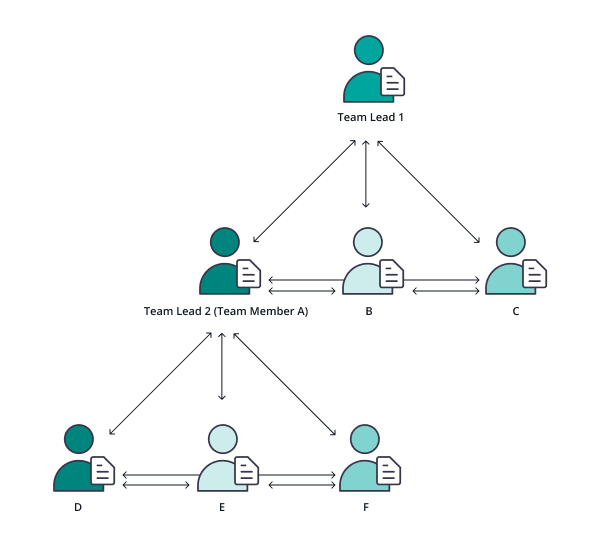
In this scenario only the leaders of the teams have access to the members. Therefore, lead of Team 1 has access to the documents of the members A, B and C. Lead of Team 2 has access to the documents D, E and F. The Team members do not have access to other Team members documents. The “head of” has access to all documents.
More level within one team and sharing
Everyone has access to all documents in Team 1 and everyone in Team 2 has access to documents of team members of Team 2. But, Team 2 has no access to the documents of Team 1. This applies also to the team leader.
More level with sharing between teams
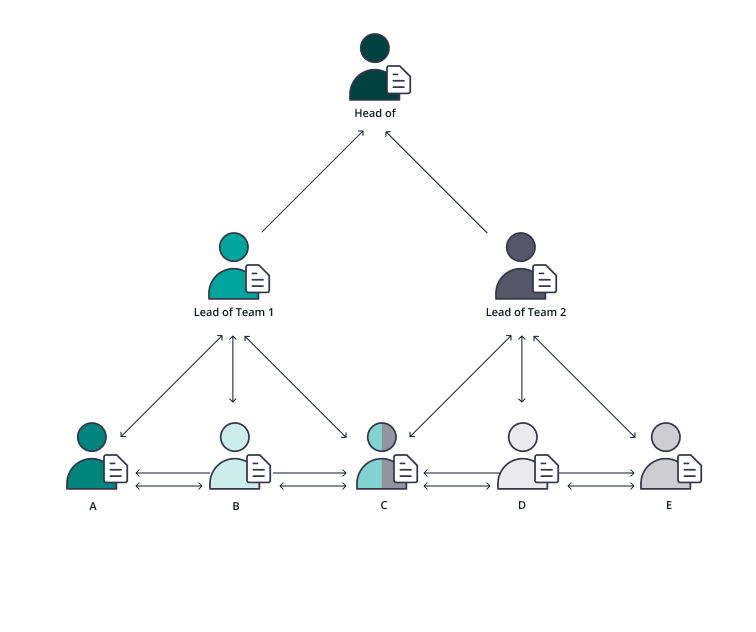
In this scenario person C is in both teams and therefore every team member can see the documents of other team members. For example: Person A can also see the documents of Person E although both are not in the same team. Lead of Team 1 can see the documents of his/her team members but cannot see the documents of the “head of”. Same configuration for the lead of Team 2.
More level team configuration in the UI
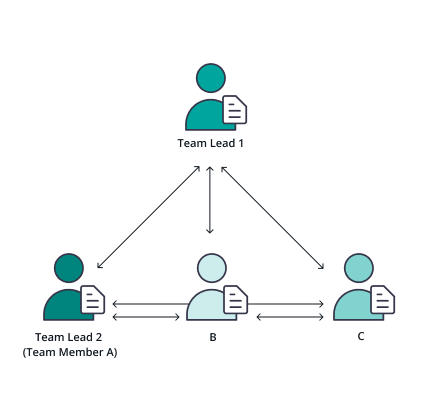
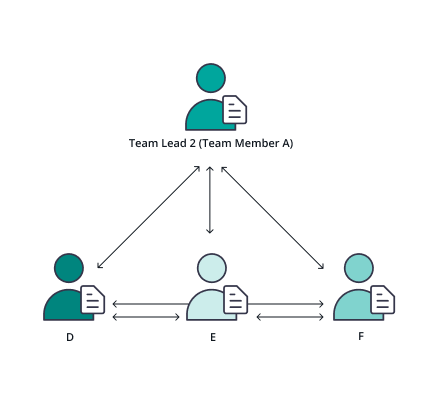
To create a more level team structure in the UI you have to create two teams. In the top team you only have to take into account that the desired team lead of the second team is also a team member of the first team. Therefore, choose a team member in the first team who is also the team leader of a team below. Please see also the figures below:
| 1st level team | 2nd level team |
|---|---|
Resulting team structure
