...
| Multimedia | ||||||
|---|---|---|---|---|---|---|
|
|
|
...
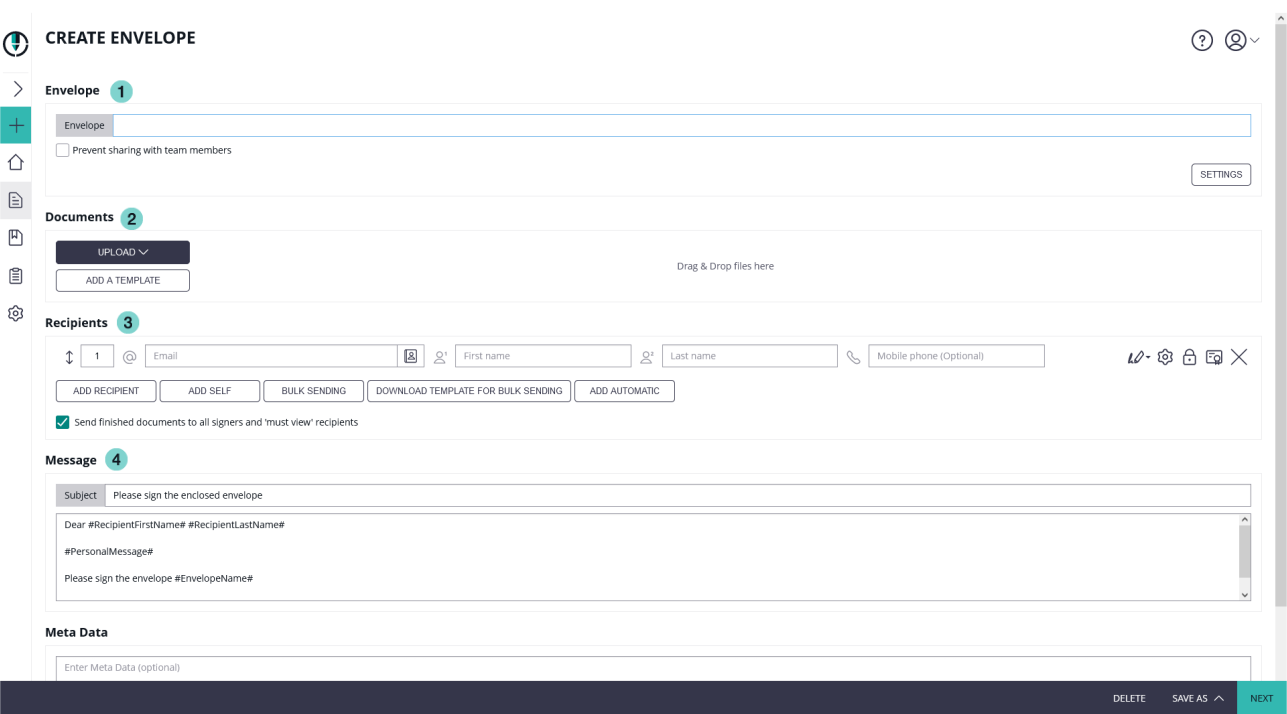
If you open a template or an envelope, where you have already set signature and form fields, but you need to replace the document without losing the configuration, just click after loading the template or envelope, on the replace icon of the document.
| Figure | Description |
|---|---|
|
|
| Info |
|---|
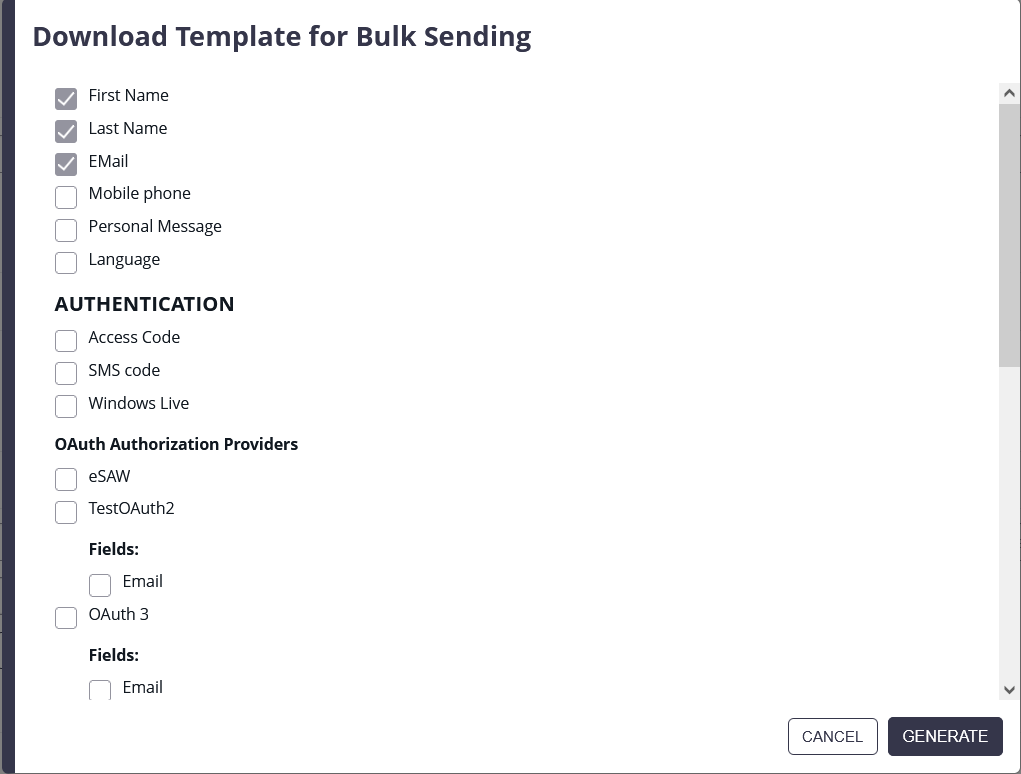
The buttons “add bulk” and “bulk CSV template” are features, which are not part of every eSignAnyWhere plan. So you may not see these buttons in your eSignAnyWhere. |
|
|
...
| Info |
|---|
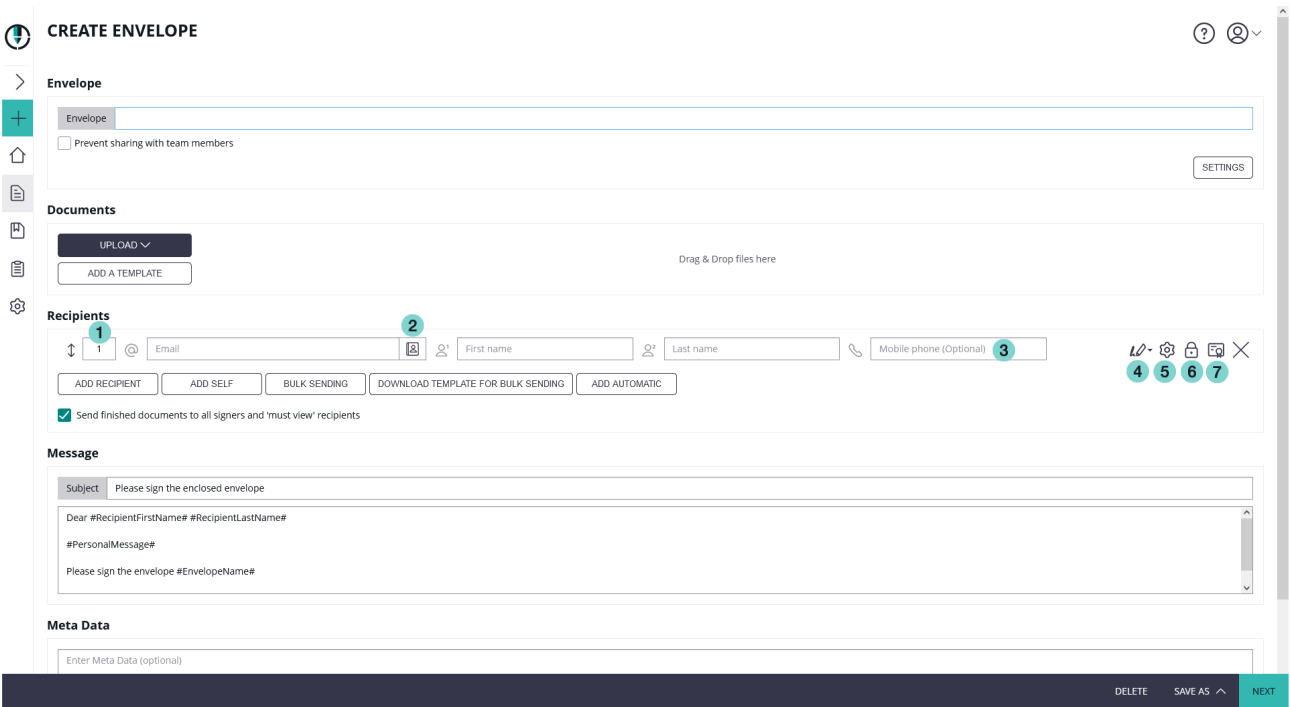
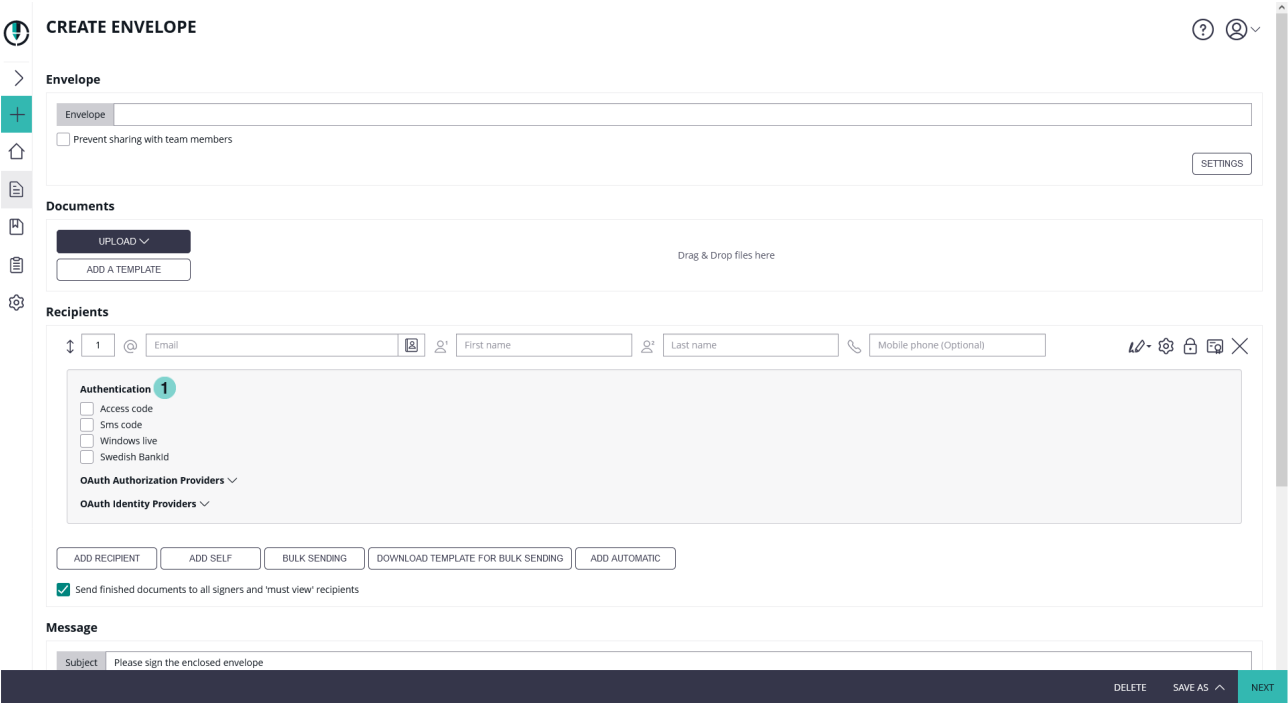
Additional information to the phone number of the recipient: The phone number of the recipient is connected with the following three phone number settings:
If you enter a phone number for the recipient, these three fields are also filled out. You can then either accept the phone number (default) or change the phone number for, for example, SMS-Authentication (custom). For more information please also see the video below. |
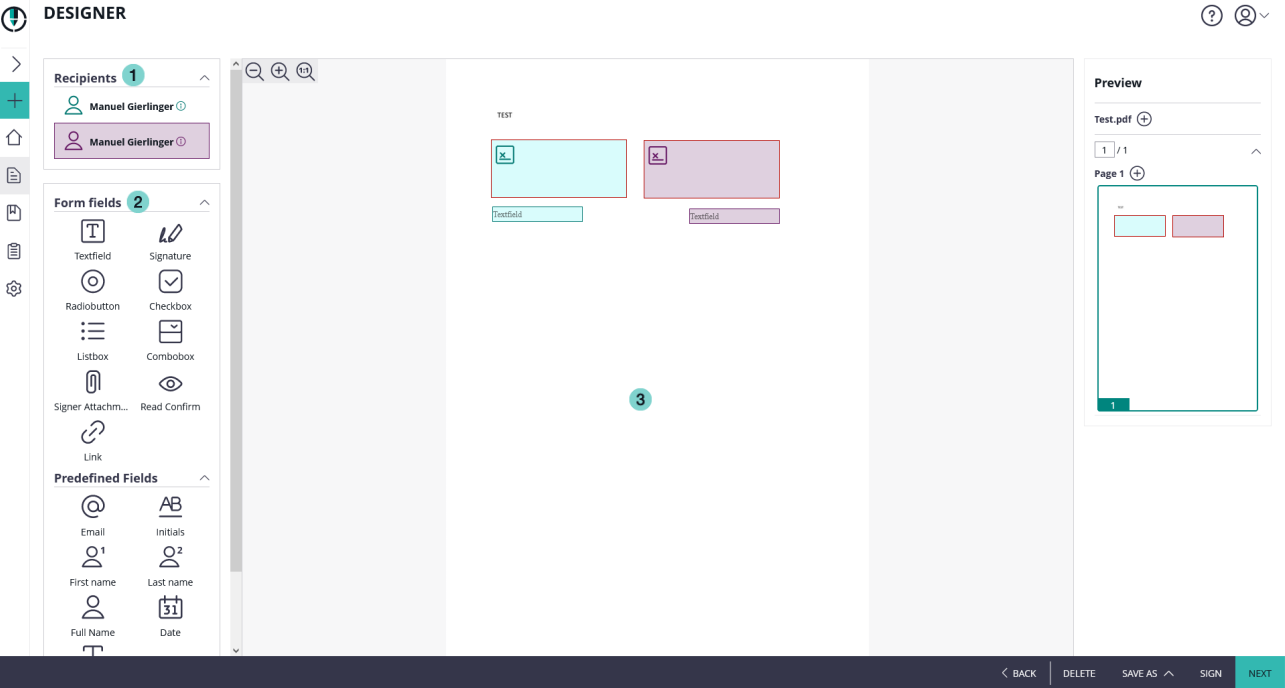
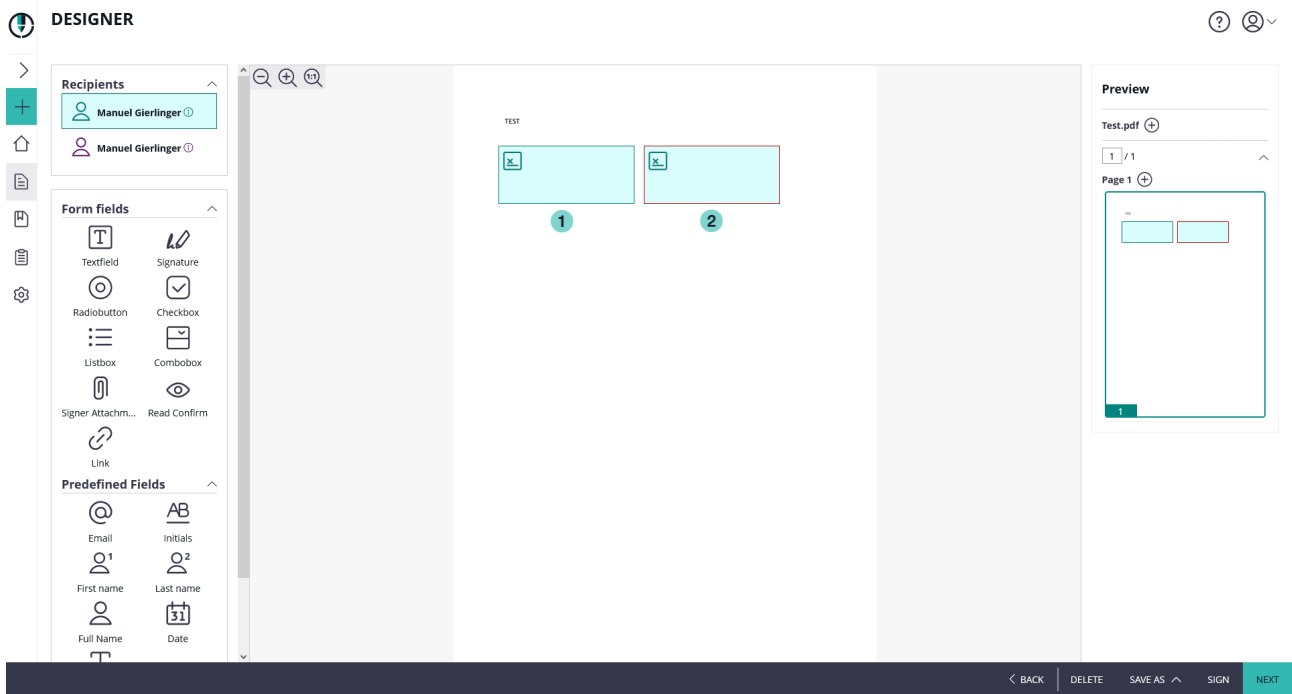
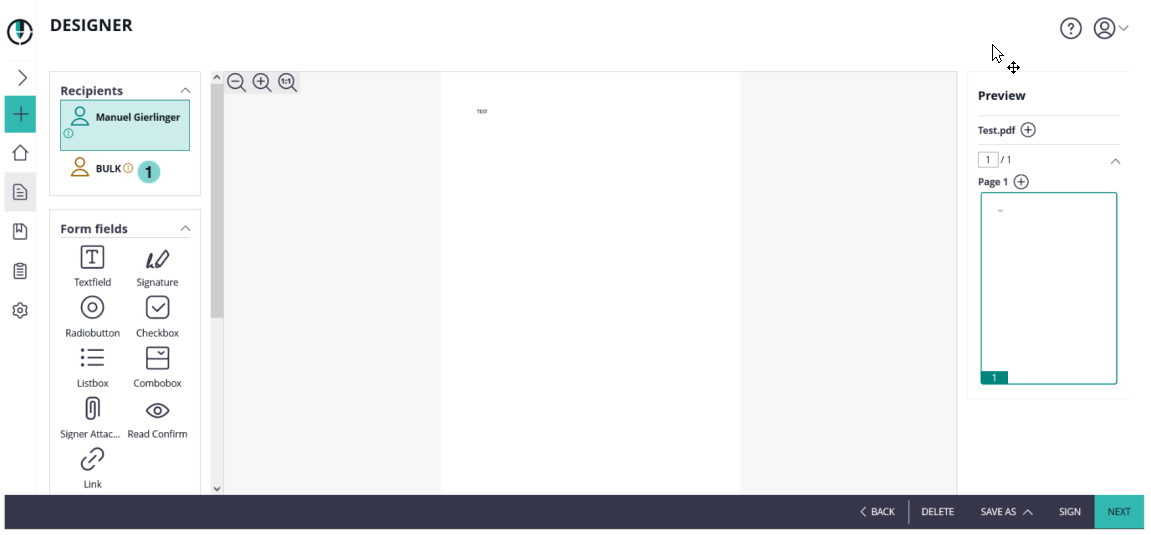
(2) DesignerThe Designer helps you to assign predefined signature fields of the document to the recipients and define additional signature fields and form fields.
|
|
|
...
- Recipient: which recipient has to sign the field
- Label: the label of the signature field
- Required: define if the recipient has to sign it or if the field is optional. If a signature field is required it is highlighted with a red border.
- Signature Type: you have to select at least one type. You can select more, if you want to give the recipient the option to choose a specific type. You can also define a preselect type (favorite, click on star-icon). Please note, that not all types are available for all customers.
- Click to Sign: the recipient has just to click on the signature field to sign it
- Draw to Sign: the recipient can draw his signature (e.g. with finger on touch screen)
- Type to Sign: the recipient can type his name for signing
- Biometric Signature: this stores the biometric data of his recorded signature (x,y coordinates; pressure [if available] and time). For that signature type the recipient has to use the SIGNificant SignOnPhone App on his Smartphone or Tablet for recording. The Signature is asymmetrically encrypted and highly secure.
- withinField: the recorded signature must within the signature field
- onPage: the recorded signature must be on the page (can be written outside of the signature field)
- intersectsWithField: the recorded signature must be partly within the signature field (default)
- Local Certificate: the recipient can use a locally on his device installed certificate for signing.
- Digital Remote Signature: the recipient uses a remote certificate for signing
- Disposable Certificate: The recipient will receive an email as usual and when the recipient wants to sign a disposable certificate signature field he/she will get a one-time-password via SMS. The counter on the disposable certificate starts by signing the first signature. (For more Information please have a look into the Beginner Guide)
- SMS-OTP Signature: The recipient receives a SMS with the one-time-password (OTP)
|
|
|
|

...
The following screenshot show you how to configure batch signing:
|
|
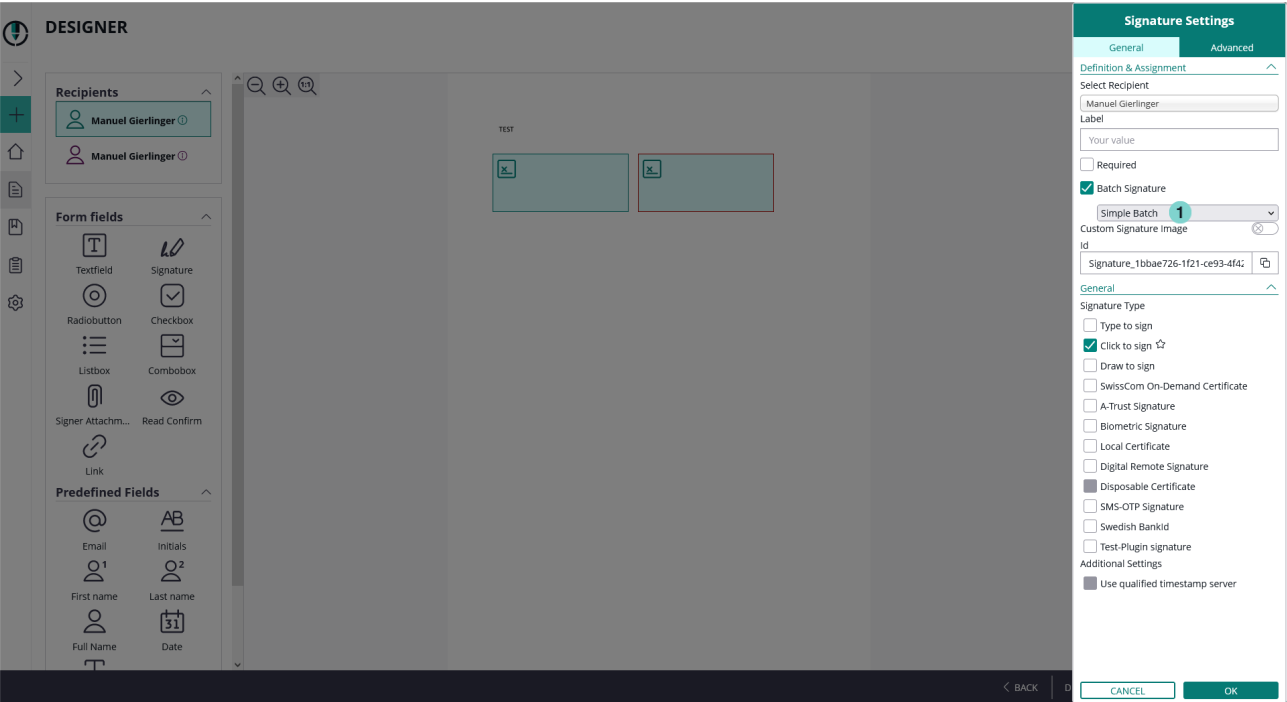
In the drop down for the batch signature (highlighted with the arrow) you have the following options:
...
You can add form fields simply by drag and drop and place it on the document or via the advanced tags as predefined fields.
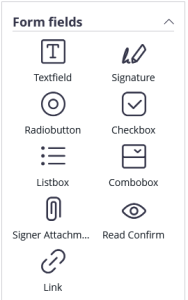
The following form fields are available:
...
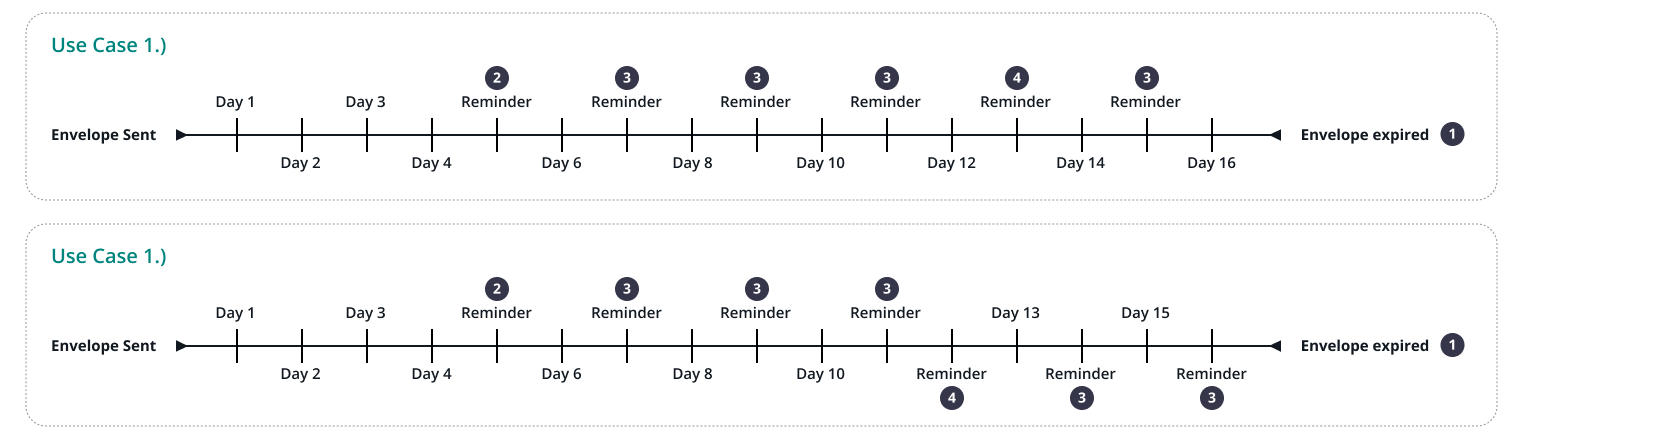
On the last page (envelope summary) of creating and sending an envelope you can find the settings for the absolute, relative date and also the configuration for the reminders. Please see the next figure for detail information:
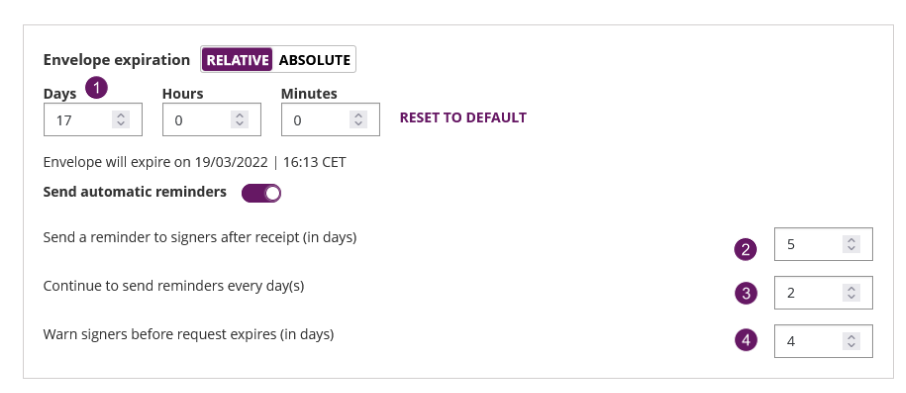
Please see the following figure which shows the configured reminders in a timeline. Note that the use case one shows the exact configuration which is configured above in the envelope expiration settings. The difference in the second use is that the "warn signers before request expires (in days)" is 5 days instead of 4 which is shown in the configuration above. Summing up the configuration: The point ![]() is the first reminder after the envelope was sent. After this first reminder the continuing reminders
is the first reminder after the envelope was sent. After this first reminder the continuing reminders ![]() start. Therefore, as it is configured in the settings above, every second day after the first reminder the recipient will get a reminder for signing the document. If also a reminder is configured before expiration
start. Therefore, as it is configured in the settings above, every second day after the first reminder the recipient will get a reminder for signing the document. If also a reminder is configured before expiration ![]() the continuing reminders will orient themselves on this reminder. This is shown in the second use case. If such a reminder is used, the continuous reminder can be postponed by one day (referring to the last continuous reminder). Overall, the recipient will receive a reminder again two days after the additional reminder
the continuing reminders will orient themselves on this reminder. This is shown in the second use case. If such a reminder is used, the continuous reminder can be postponed by one day (referring to the last continuous reminder). Overall, the recipient will receive a reminder again two days after the additional reminder ![]() .
.
For more information about the api configuration please also see the beginner guide.
|
|
...
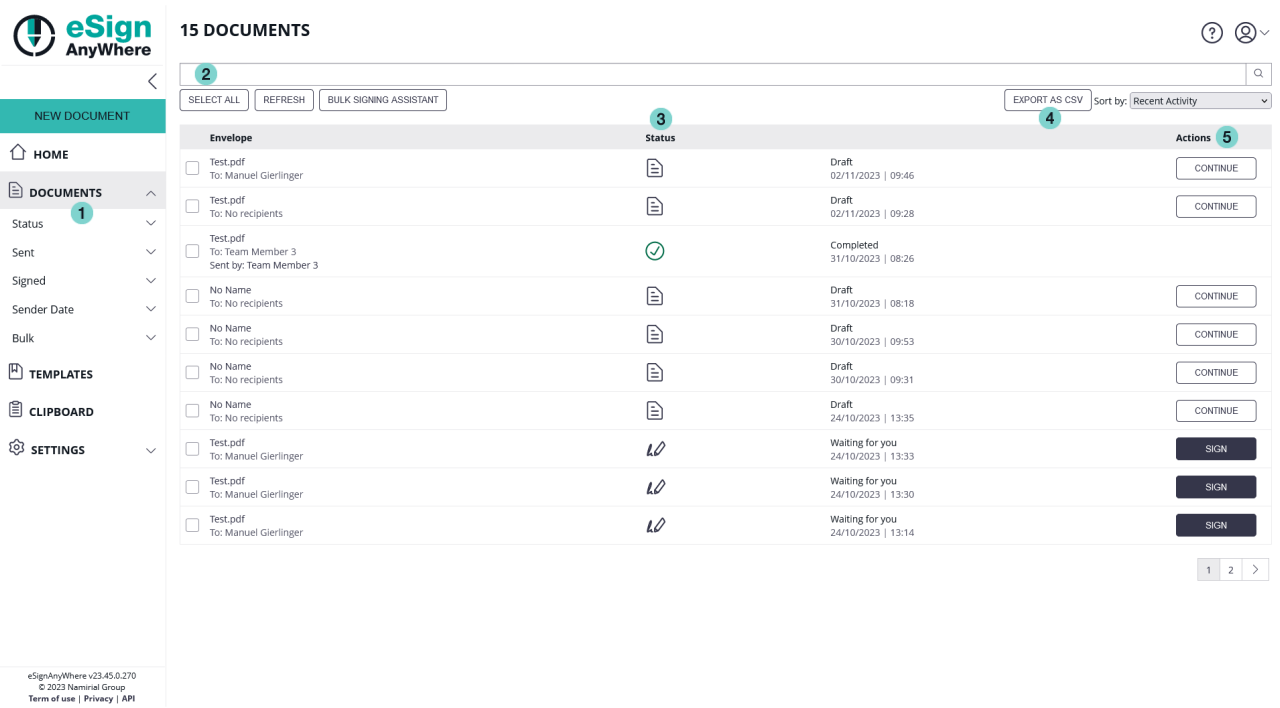
- Search: enter a text to search the envelopes
- Status: an icon shows the status of the envelope
- Actions: direct on-click to sign or continue
- Export as CSV: export current list of envelopes (e.g. for a reporting)
- Sort by: recent activity or envelope name
- Filter: click on a filter from the menu to apply it to the current list. You can easily apply more filters to the selection or remove them one-by-one.
Figure | Description |
|---|---|
|
|
...
| Info |
|---|
This list shows you the available document status icons, a textual representation is next to the icon in eSignAnyWhere. |
| Envelope is finished |
| Envelope is canceled by one of the recipients | |
| Envelope is rejected by one of the recipients |
| Envelope is a Draft |
| Waiting for signing |
| Waiting for acknowledge |
| Caution (e.g. email bouncing) |
| Envelope is expired |
...
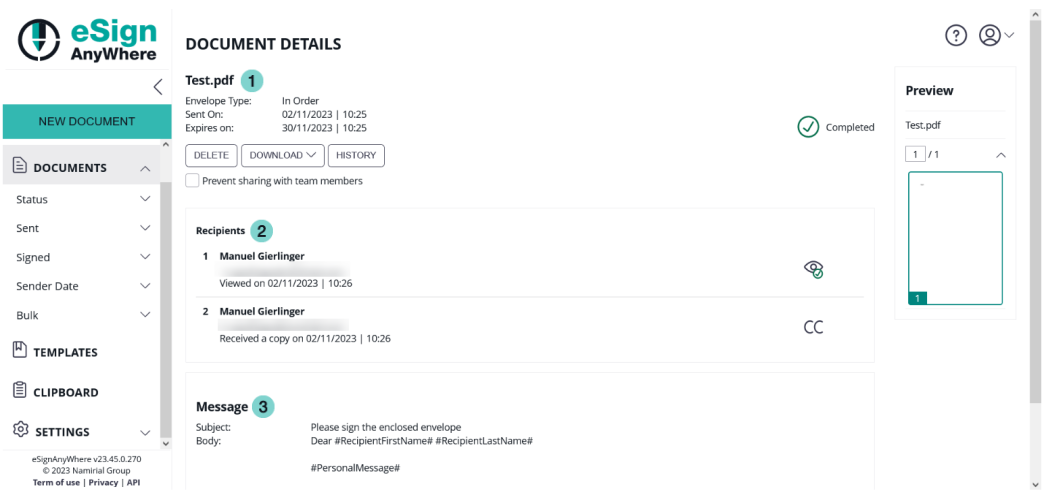
Document Detail Page with highlighted envelope and recipients area.
Figure | Description |
|---|---|
|
|
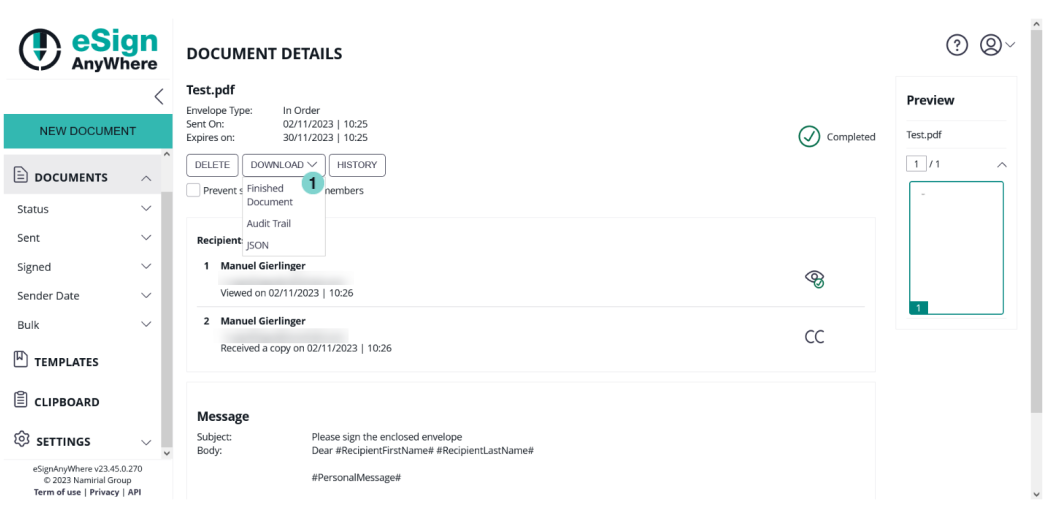
Finished envelopes will allow you to download the finished documents and audit trail (log document). If you have the developer mode enabled, you can download the envelope configuration as XML and JSON. The next screenshot shows where you can download the finished document and the audit trail:
Figure | Description |
|---|---|
|
|
...
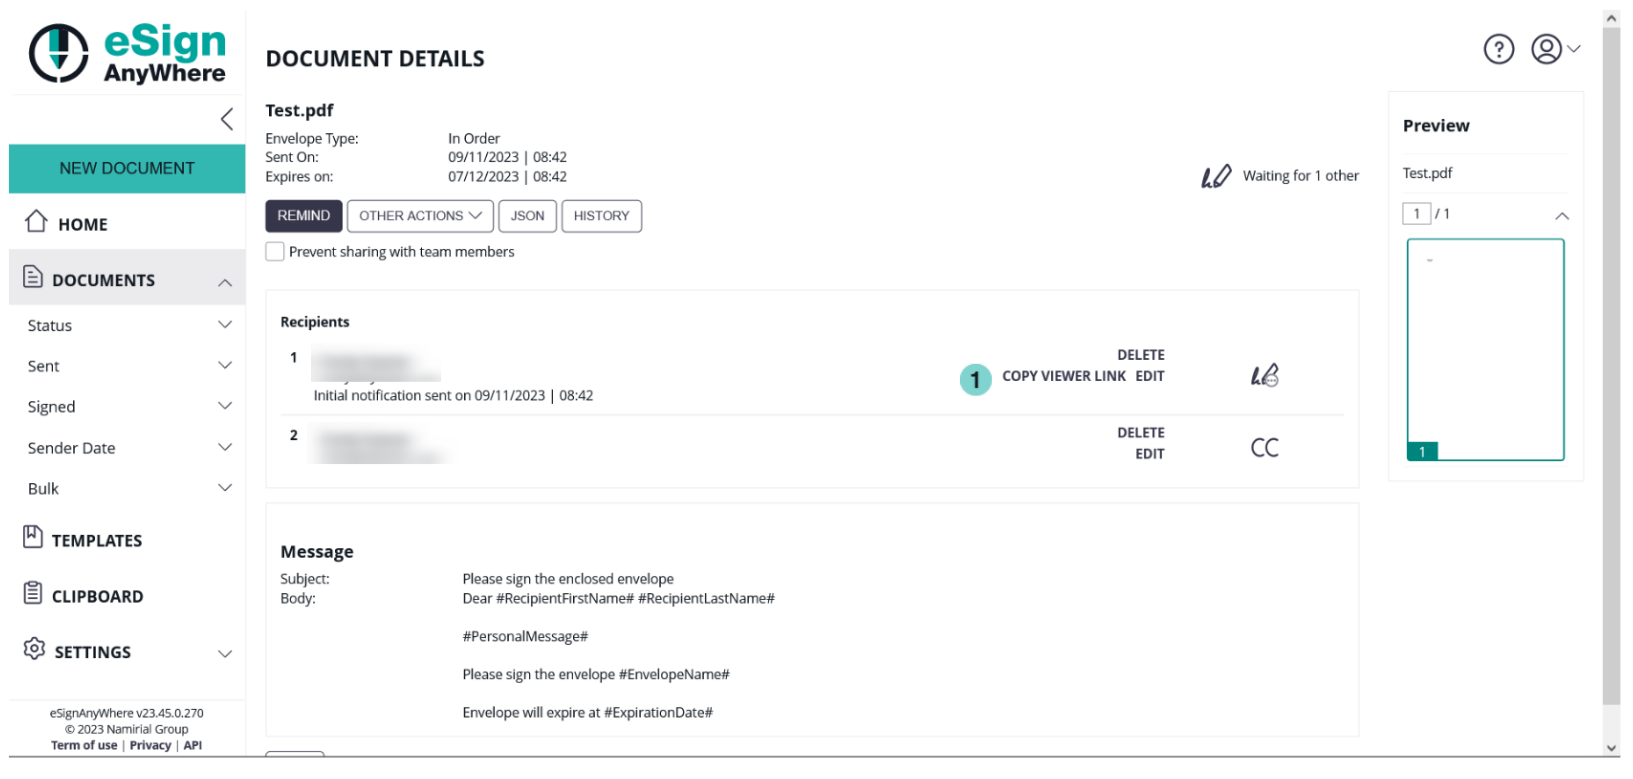
It is possible to edit or delete a recipient after the envelope was sent. Therefore, you just click on “edit” to change user details (First Name, Last Name, Email), set the personal message, change authentication method, set digital remote signature or set SMS-OTP signature. You can just change details of recipients, who did not yet fulfill their assigned task. Finished recipients are shown via icon in the Document detail view. “Delete” will delete the recipient’s envelope, as long his signing task was not yet finished.

Viewer Link
...
The “Copy Viewer Link” link will show you a window with a link (to copy) to the recipients envelope for signing. In case the signer has a problem with receiving the email, you can send the link to the recipient via other channel (e.g. instant messenger).
| Figure | Description |
|---|---|
|
|
...
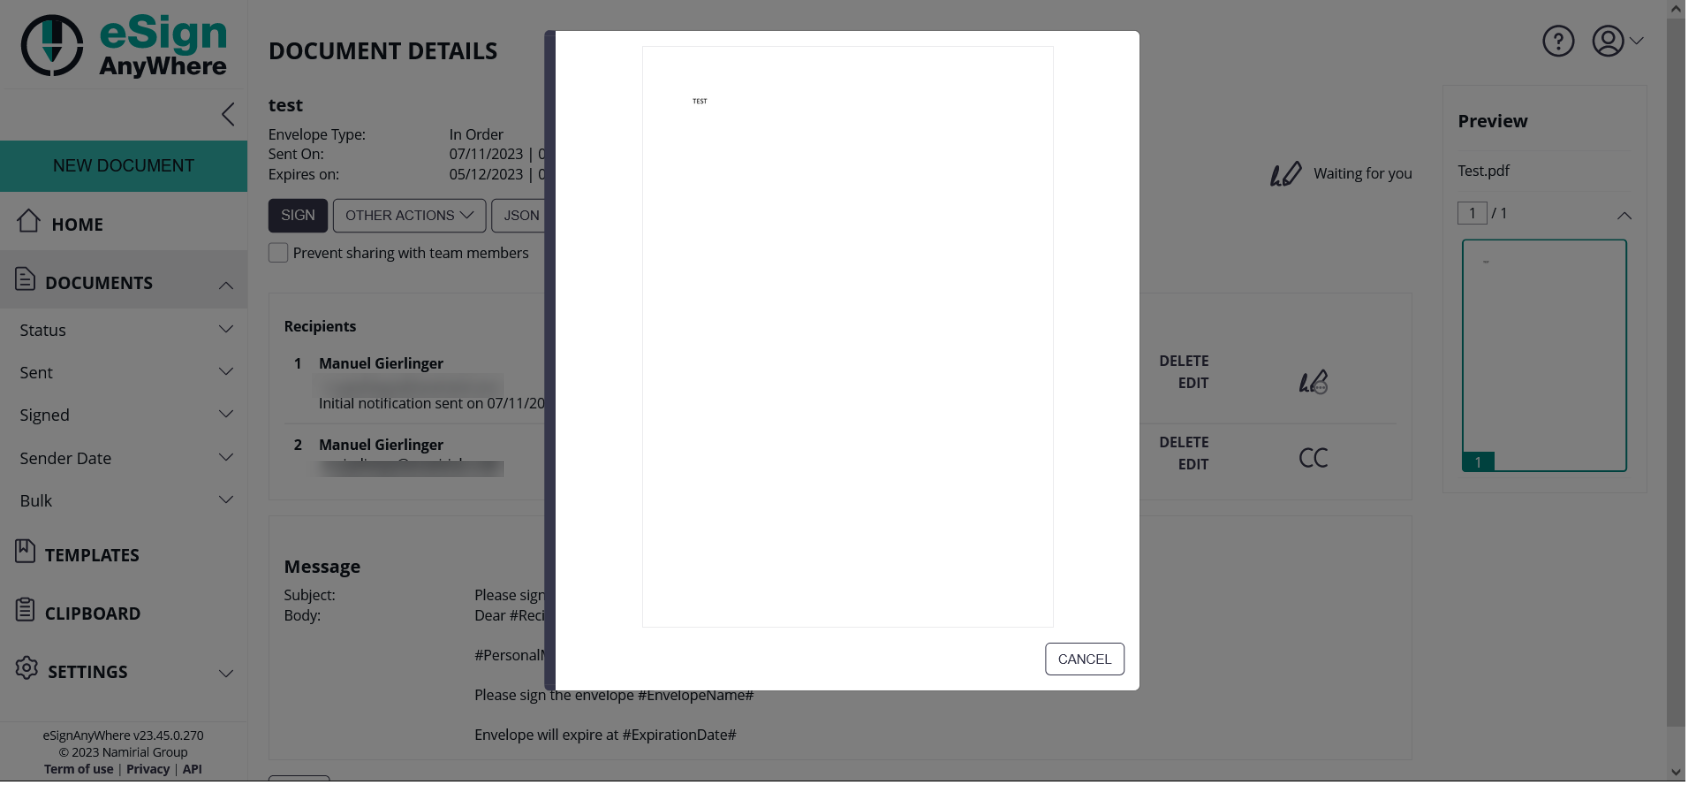
The document preview will show you a small and, by clicking on it, a large preview of the document.
Filter Document
...
The applied filters are listed at the top and you can remove specific filters by clicking on the “x” or reset all filters.

Download as CSV
...
You can also download CSV (comma-separated values) files. So you can open them in e.g. Microsoft Excel for analysis or reporting.
| Figure | Description |
|---|---|
|
|
...
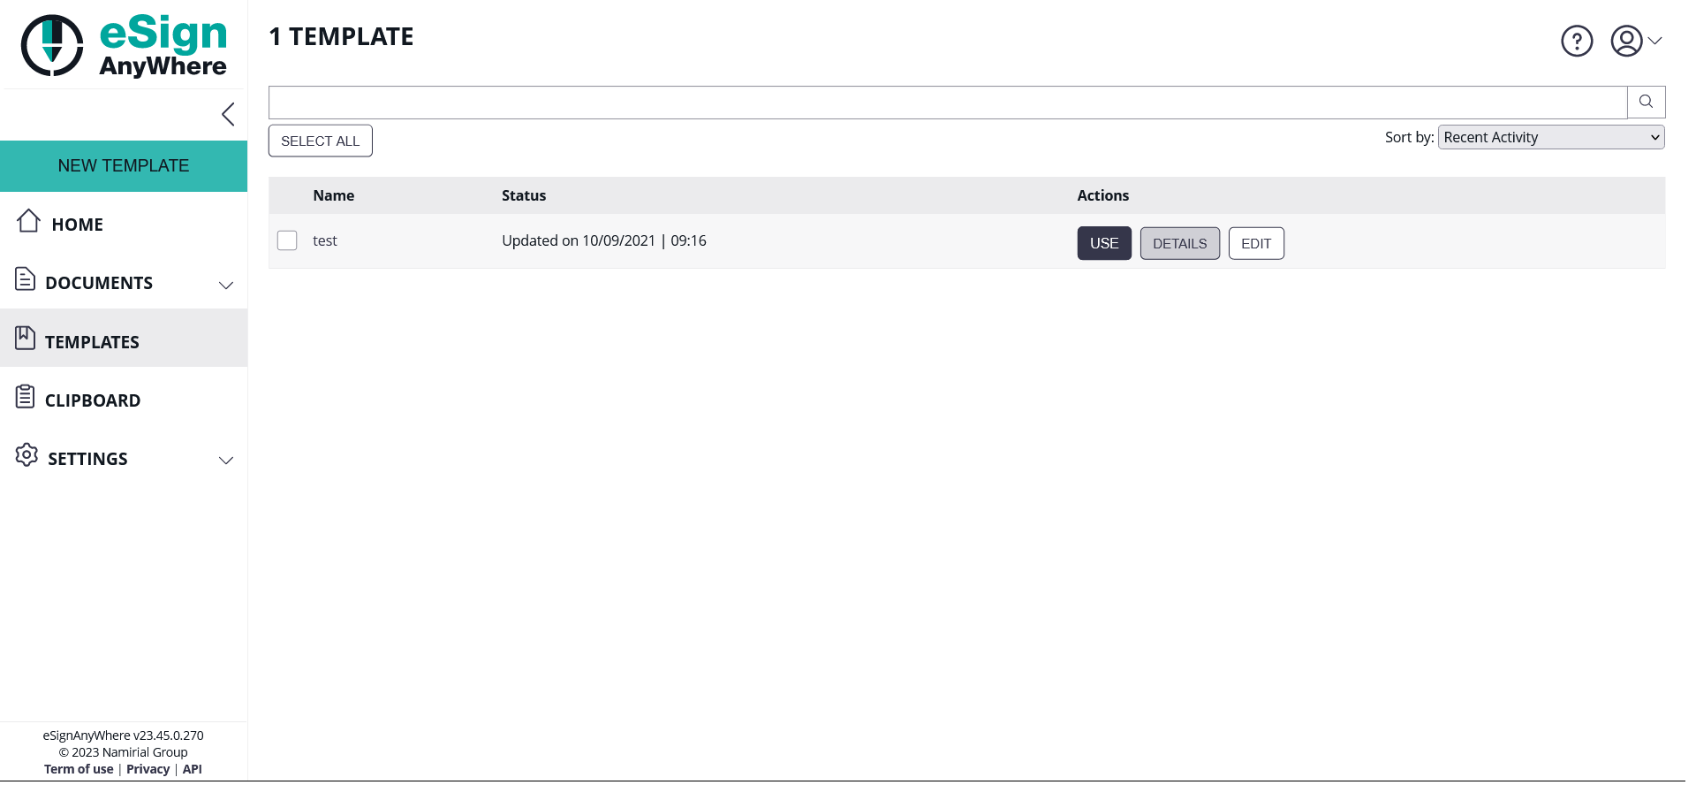
- Use: directly use the template as a new envelope (same function also available in creation of an envelope in the document section as "add a template"
- Details: show details about template
- Edit: modify template
- recipients
- settings
Document Tags and Placeholders
...
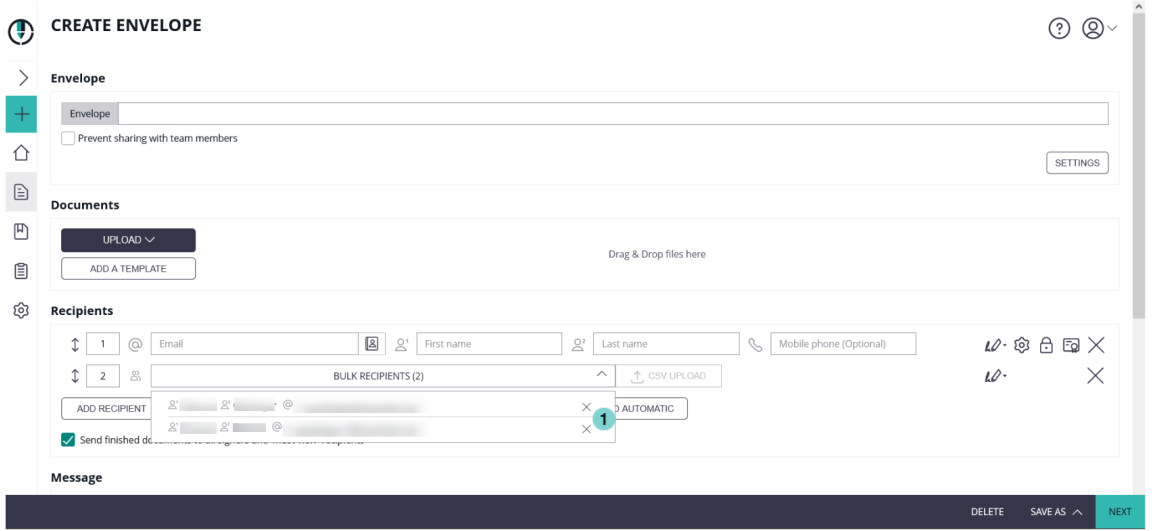
This feature allows you to send an envelope to multiple signers. The workflow will be split at this order into unique envelopes for each bulk recipient. This allows you to create a workflow, where the first signer (e.g. head of a department) signs the document and then each of the bulk recipients (e.g. employees of the department) receives a unique document for signing.
Design the Workflow
 |
|
...
Create a Bulk CSV with a template
|
|
...
If the Authentication>>Pin is enabled (true) the authentication is activated. The last number is an example value for a parameter for the authentication.
 |
|
...
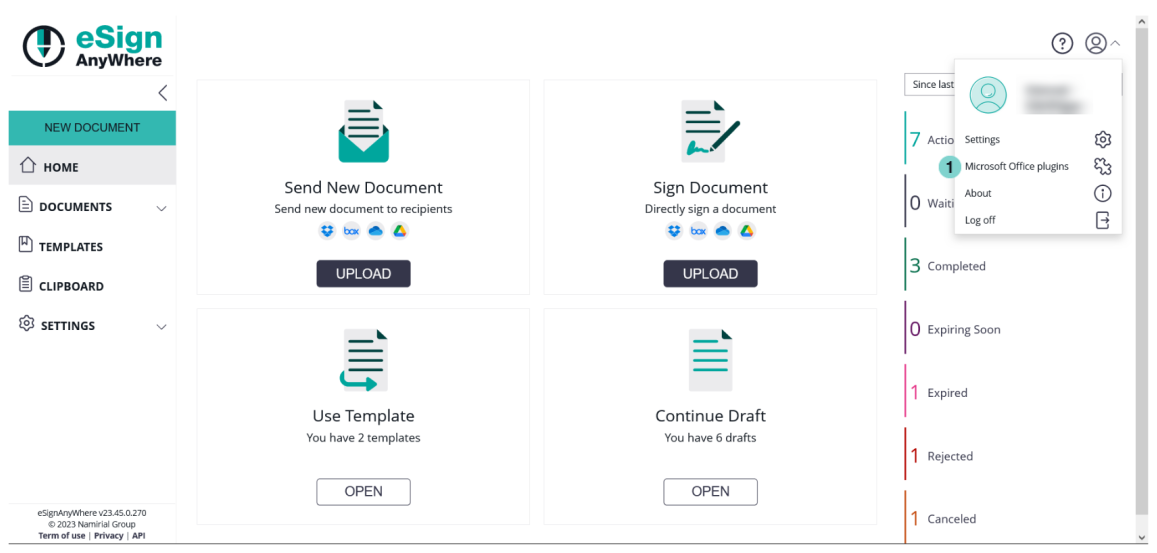
You find the Microsoft Office Plugin for download in the top right account menu:
 |
|
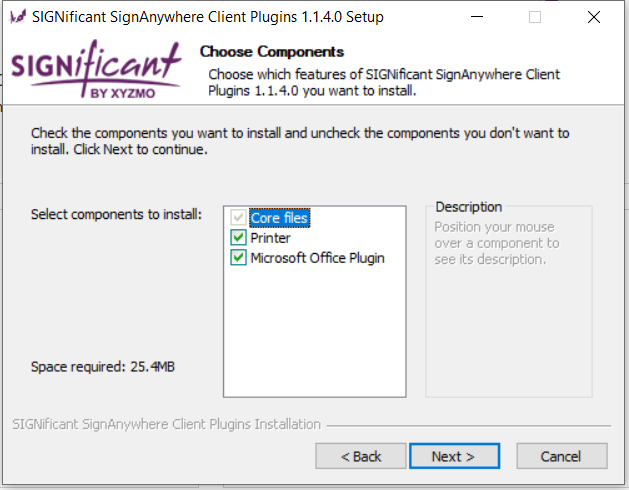
Download the plugin and install it:
The plugin directly uploads the document in the clipboard of your eSignAnyWhere account. After the installation, you can use in Microsoft Office the eSignAnywhere Plugin, but first you have to configure it with your user token. The user token can be found in your Settings/Account page.
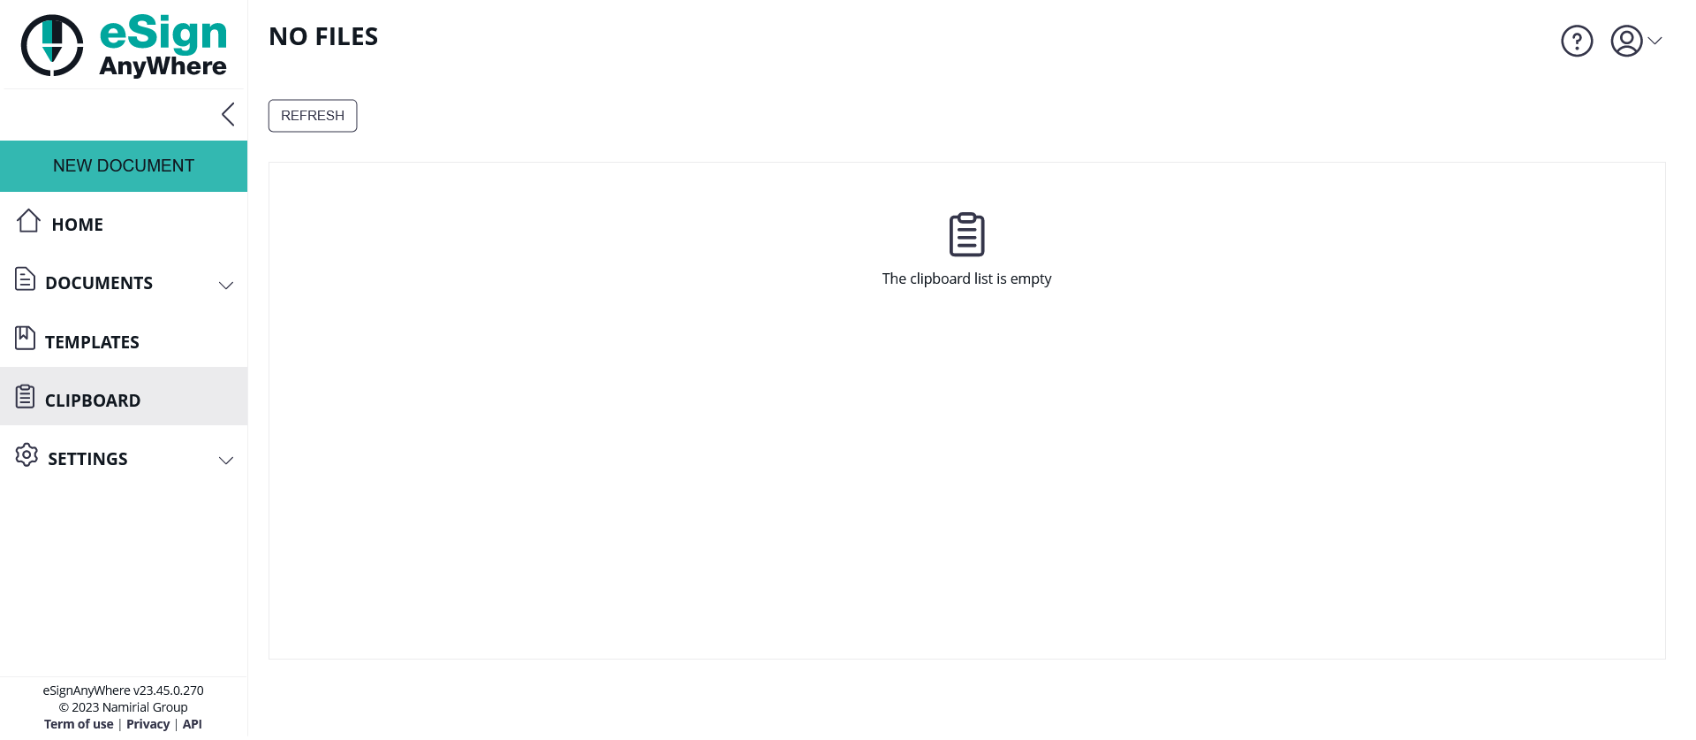
If you upload a file, it appears in your clipboard. A uploaded clipboard file can be used for one envelope. Therefore, if you click on the button “start envelope” the file will be deleted from the register clipboard. If the retention period is enabled, the clipboard files are deleted automatically after 24 hours.
|
|

You can find the plugin in “Add-Ins”
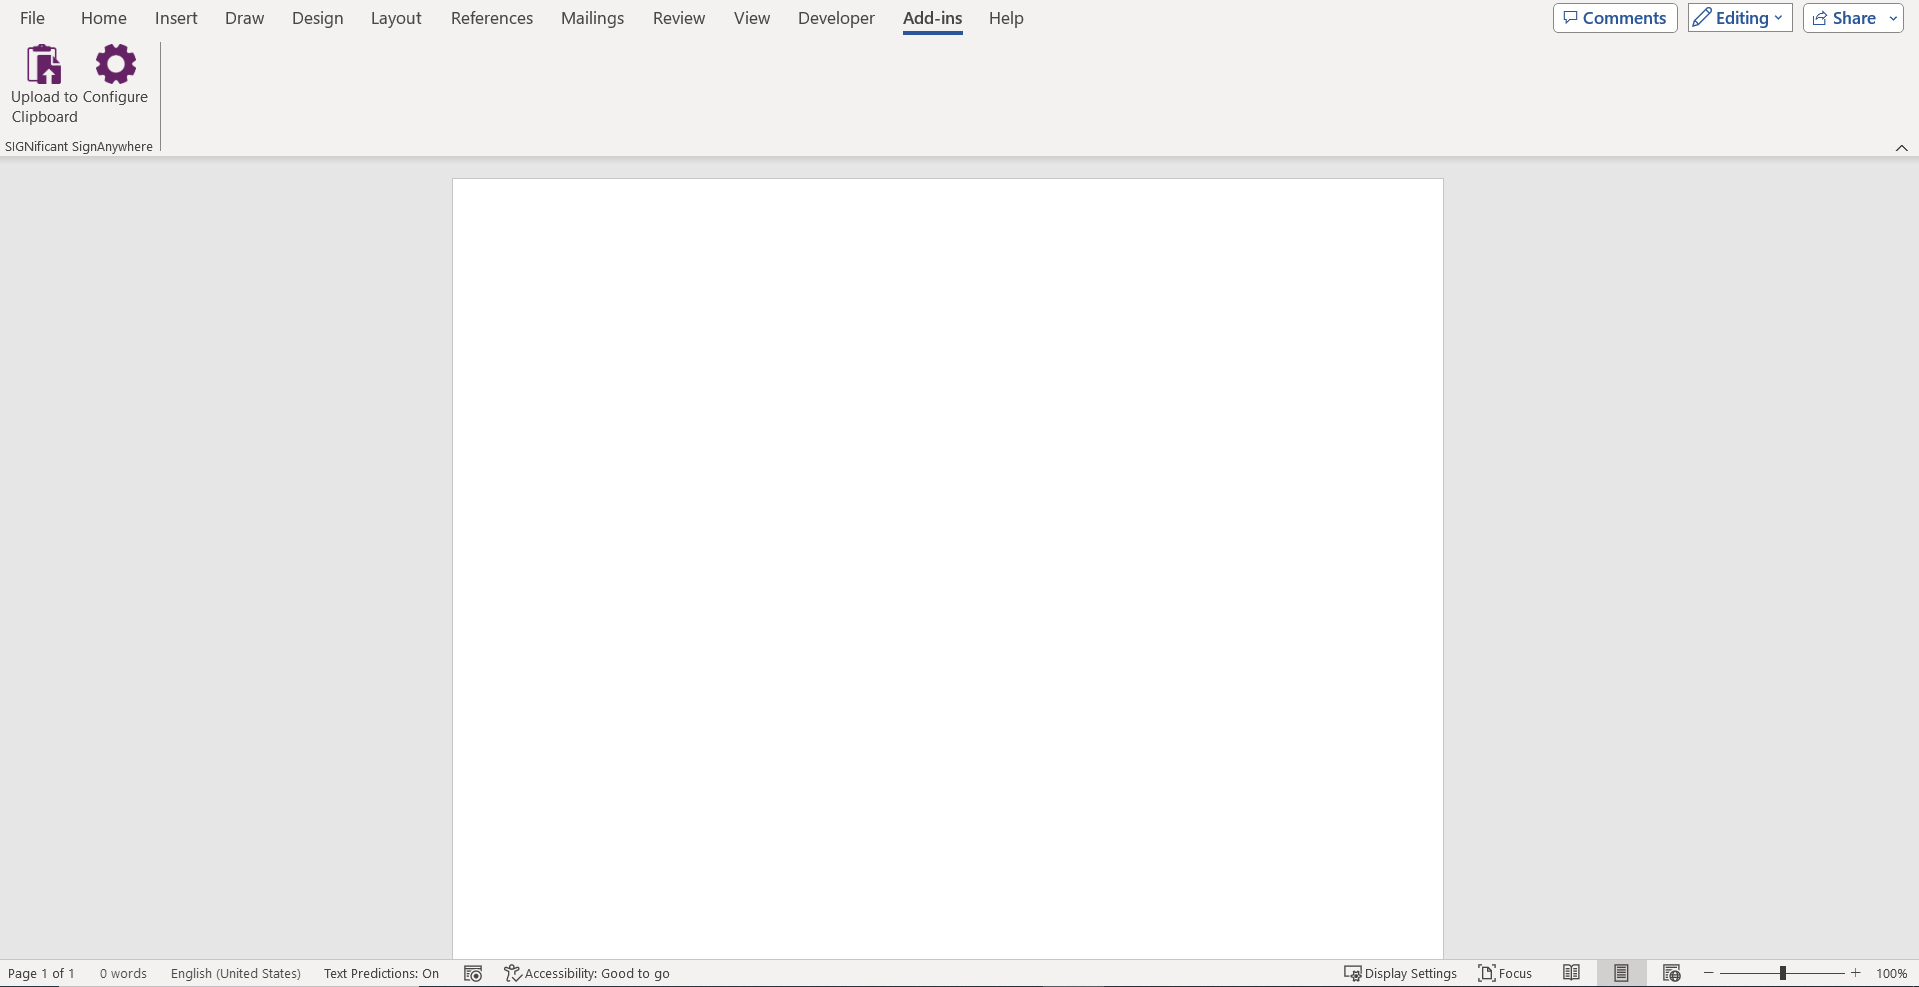
Configure the user token:

If you use eSignAnywhere on premise you also can configure the endpoint (URL).
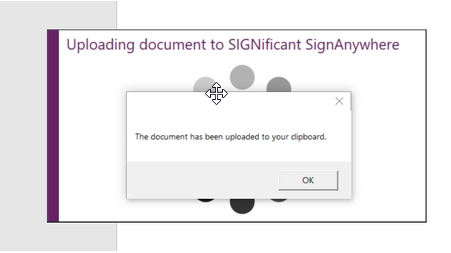
By clicking “Upload to Clipboard” the document will be uploaded to the clipboard. To use the uploaded file, just go to your clipboard and click on “Start Envelope”. A clipboard file can only be used for one envelope.
If you want to create your own “upload-to-clipboard” application, you can easily do it via API (UploadUserFile_v1 [SOAP]). Only the user token and a file XML, similar to the upload data structure (UploadTemporarySspFile_v1) and an optional source of the file.
...